

Introduction:
If you’re a yoga enthusiast, you know how important it is to have a good quality yoga mat. But what about a convenient way to carry it around? A yoga mat bag is the perfect solution! Not only does it make it easier to transport your mat to and from class, but it also adds a touch of style to your yoga gear.
This yoga mat bag features a contrasting base, exterior pocket, drawstring closure and adjustable strap. Photo sample features a bottom weight and vinyl, but any two heavier fabrics would work – canvas, linen, or whatever home décor weight you happen to have on hand.
Whether you’re a beginner or an experienced sewist, this project is sure to enhance your yoga practice and make your life a little easier. So grab your sewing machine and let’s get started on this practical and fun project!
Based on the project originally posted by Devon Lott on Pfaff.com
Requirements:
To create your very own Yoga Mat Bag you will need:
- PFAFF® passport™ 3.0 sewing machine
- 0A Foot
- Buttonhole Foot
- INSPIRA® Microtex Needles Size 90 [620104396]
- Small scrap of tearaway stabilizer or interfacing
- Main Fabric: 0.6meter (¾ yard) home décor weight fabric (black and white in photos)
- Contrast Fabric: 31cm (⅓ yard) home décor weight fabric (brown in photos)
- Three 1” metal D-rings
- 1.82 meter (2 yards) 2.5cm (1”) cotton webbing
- 9 meter (1 yard) 0.6 (¼”) cotton cording
- 2 large beads (optional)
- Sewing thread
- Water soluble marking tool
- Masking tape or painter’s tape (if you use vinyl or leather for either fabric)
- Binding clips or paperclips (if you use vinyl or leather for either fabric)
- Basic sewing tools
The PFAFF® passport 3.0’s patented IDT™ system makes sewing over all kinds of fabrics easy and stress-free.
Cutting:
From Main Fabric:
- 1 piece 52cmWx50.8cmL (20⅜”Wx20”L) (upper bag)
From Fabric B:
- 1 piece 52cmWx25cm (20⅜”Wx9¾”L) (lower bag – notch center of bottom edge
- 1 piece 18cmW (7”W circle) (base – template provided)
- 1 piece 16.5cmWx19.05cmL) (6½”Wx7½”L) (pocket)
From Webbing:
- 1 piece 122cmL (48”L) (strap)
- 1 piece 25.4cmL (10”L) (top loop)
- 1 piece 20.5cmL (8”L) (bottom loop)
- 1 piece 7.6cmL (3”L) (drawstring stop)
Construction:
All seam allowances are 1cm (⅜”) unless otherwise noted.
If using vinyl or leather, do not use pins. Use quilt binding clips or paper clips instead.
1 – Thread machine with sewing thread and bobbin. Snap-on the 0A foot and engage the IDT™ system. Select stitch 06 (three-step zigzag)
2 – Stitch along the sides and bottom of the upper bag at 0.3cm (⅛”) seam allowance to finish raw edges.
3 – Select stitch 01 (straight stitch). Align the bottom edge of the upper bag with the top edge of the lower bag, right sides together. Stitch together and press the seam allowance towards the upper bag (if using vinyl, use low heat and a press cloth). Increase stitch length to 3.0. From the right side, topstitch 0.3cm (⅛”) to the upper side of the seam.
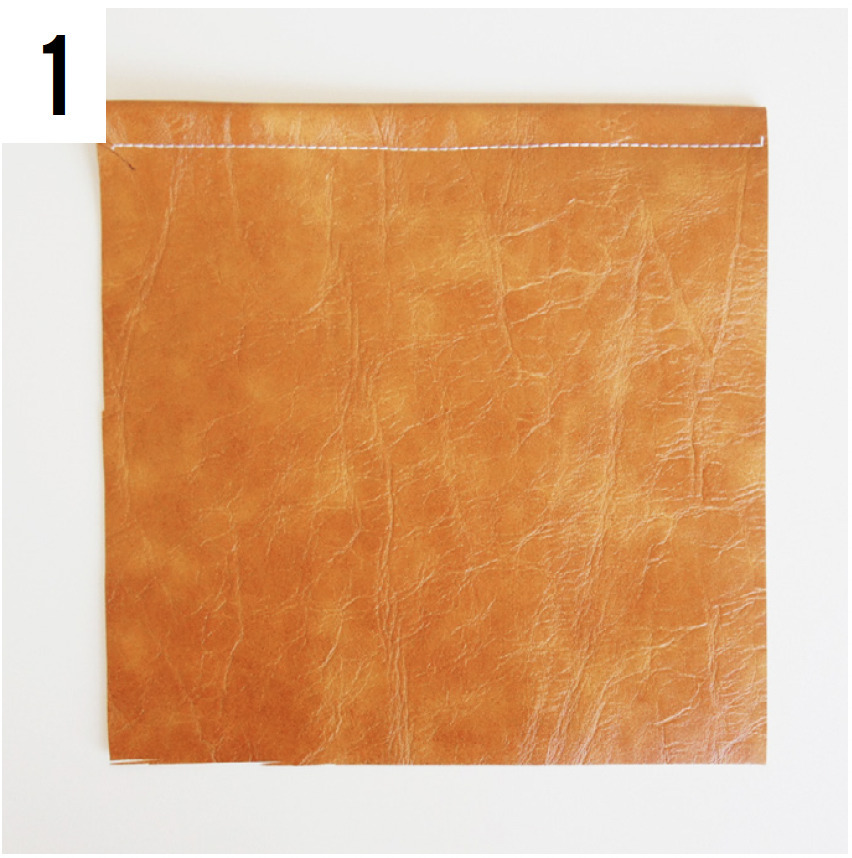
4 – Fold the top edge of the pocket 1.3cm (½”) towards the wrong side twice and press. (If using leather or vinyl, fold only once 2.5cm (1”). Stitch along the lower folded edge to secure.
5 – Fold the remaining three edges ½” to the wrong side and press. Topstitch at ⅛” seam allowance around three edges.
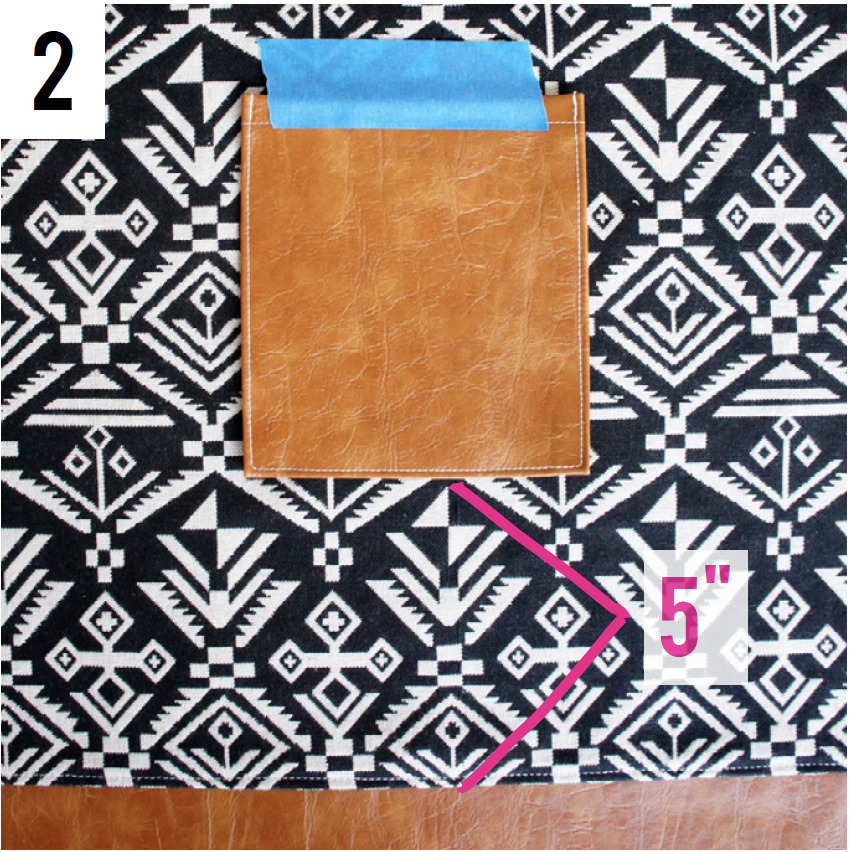
6 – Fold both the bag and the pocket in half vertically to find the centers; mark. Place the pocket on top of the bag, centers aligned, and the bottom edge 5” above the contrast seam. Pin in place (or use painter’s tape to secure).
7 – Topstitch around three sides of the pocket, following the previous stitching line, backstitching at the beginning and end. Stitch a triangle in each upper corner as shown for added strength.
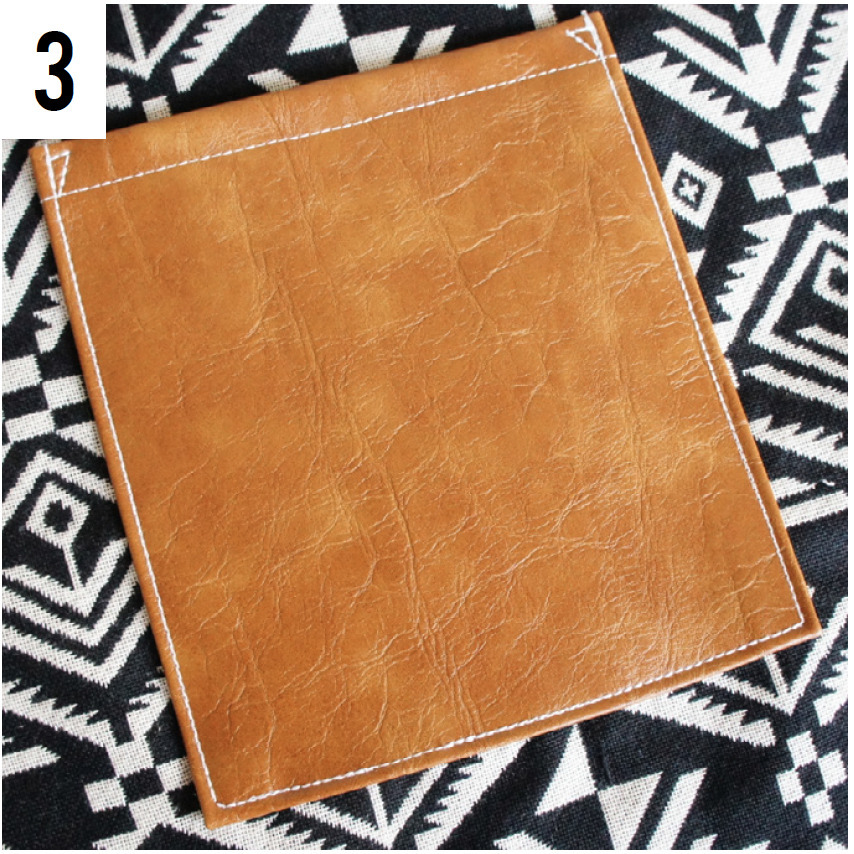
8 – Optional: leave a ½” gap in your stitching in the bottom corner of your pocket to make an opening for an earphones cord.
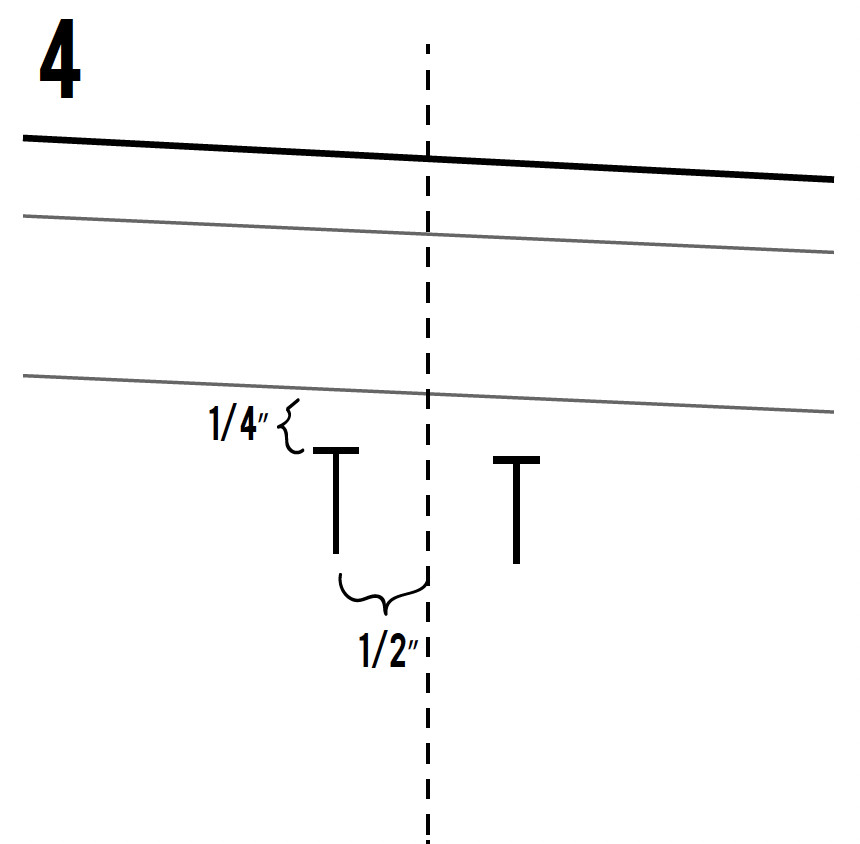
9 – Fold the top edge of the upper bag ½” towards the wrong side and press. Fold another 1” and press. Unfold. Mark a placement mark for two buttonholes, both ¼” below the lowest fold ½” to either side of the center.
10 – Adjust the Buttonhole Foot so that the space between the side prongs measures 1.9cm (¾”).
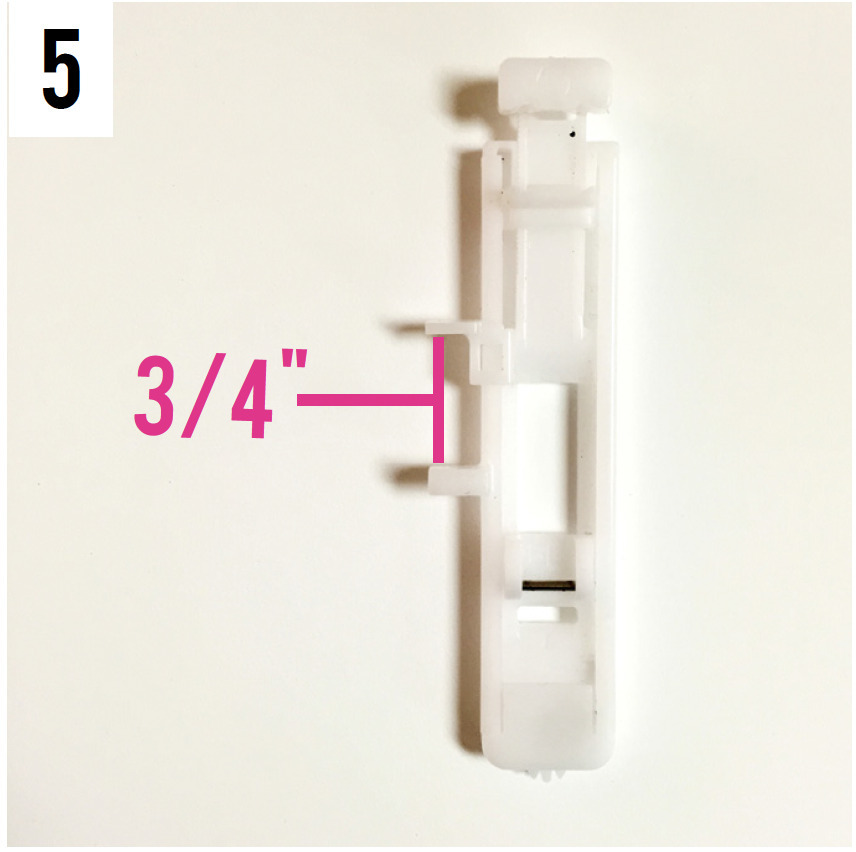
Snap-on Buttonhole Foot and select stitch 15 (buttonhole). Place interfacing or stabilizer behind buttonhole marks. Place most of the bag behind the machine so that you are starting at the top of the buttonhole (the machine will stitch backwards first). Stitch both buttonholes. Carefully use a seam ripper to open buttonholes, starting at each end and cutting into center.
Tip: do at least one practice buttonhole first on a scrap of your main fabric.
11 – Snap on 0A Foot and select stitch 01 (straight stitch). Thread lower loop webbing (20.32cm (8”) long) through one D-ring and align ends. Stitch a square and X just below D-ring. Cut ends at a 45° angle. Align the raw edge of the strap with the right side / raw edge of the bottom bag, 4” below contrast seam and with strap angled towards the top of the bag.
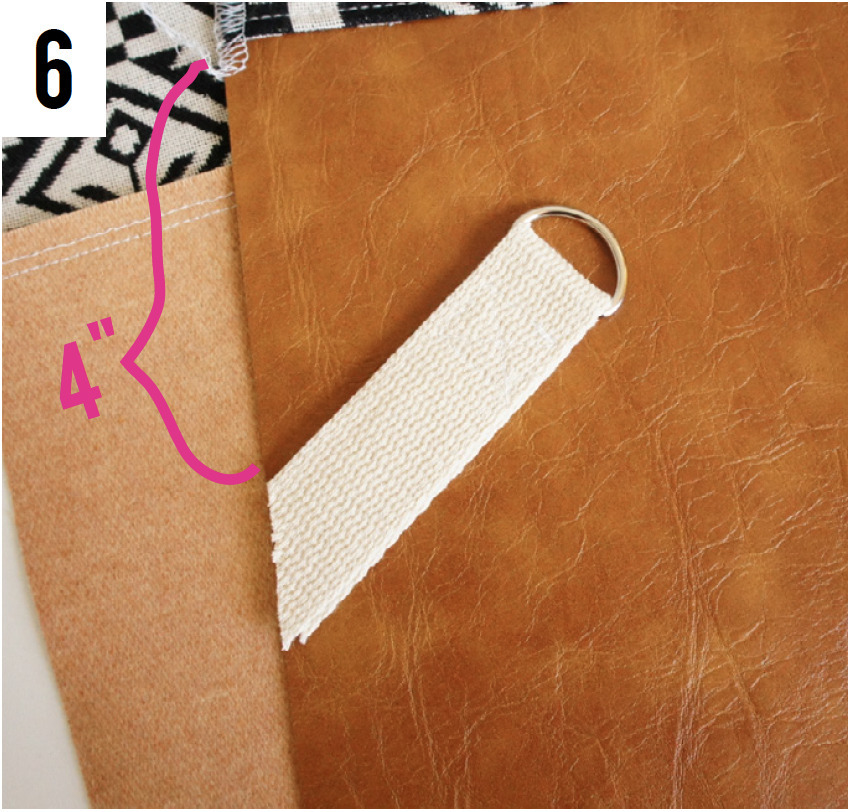
Stitch in place with ¼” seam allowance.
12- Fold the bag in half lengthwise, right sides together, and align the side edges. Make sure all the pressed creases are unfolded at the top. Stitch together and finger press open.
13 – Pin/clip base to the bottom opening of the lower bag, right sides together. Start by aligning and pinning notches of the circle to the notch and side seam of the bag, then ease the rest of the edges together.
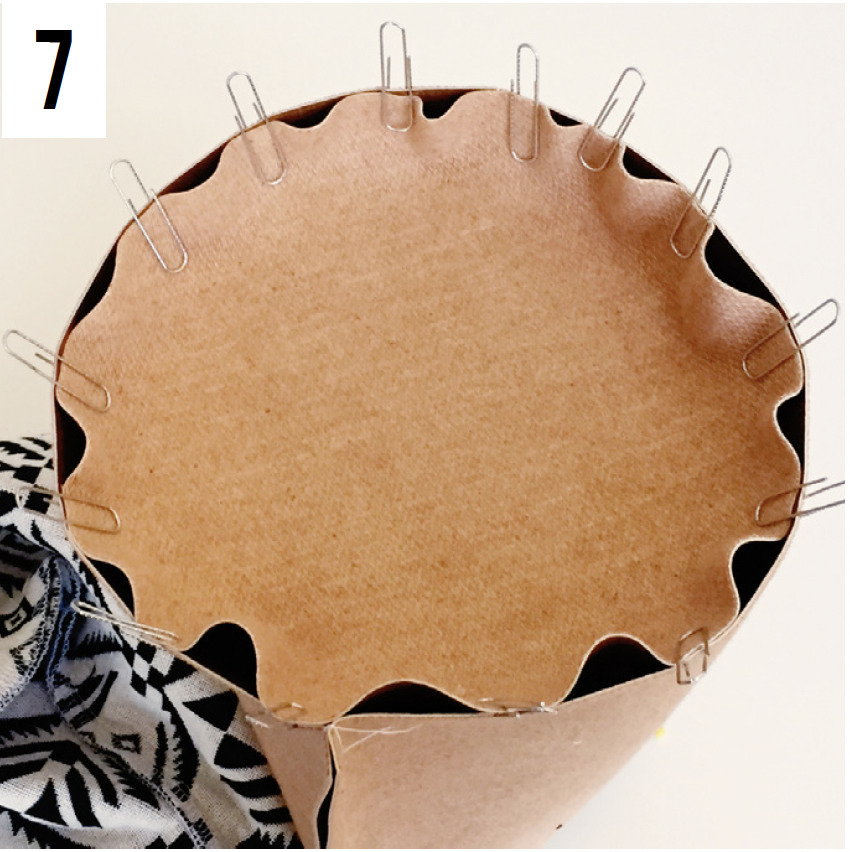
Stitch together all the way around, going slowly and ensuring that the edges stay aligned. It will be easier to sew with the base side down. Clip notches in the base seam allowance only to release extra fabric.
14 – Refold the top edge along pressed creases and pins. Stitch along the lower fold all the way around.
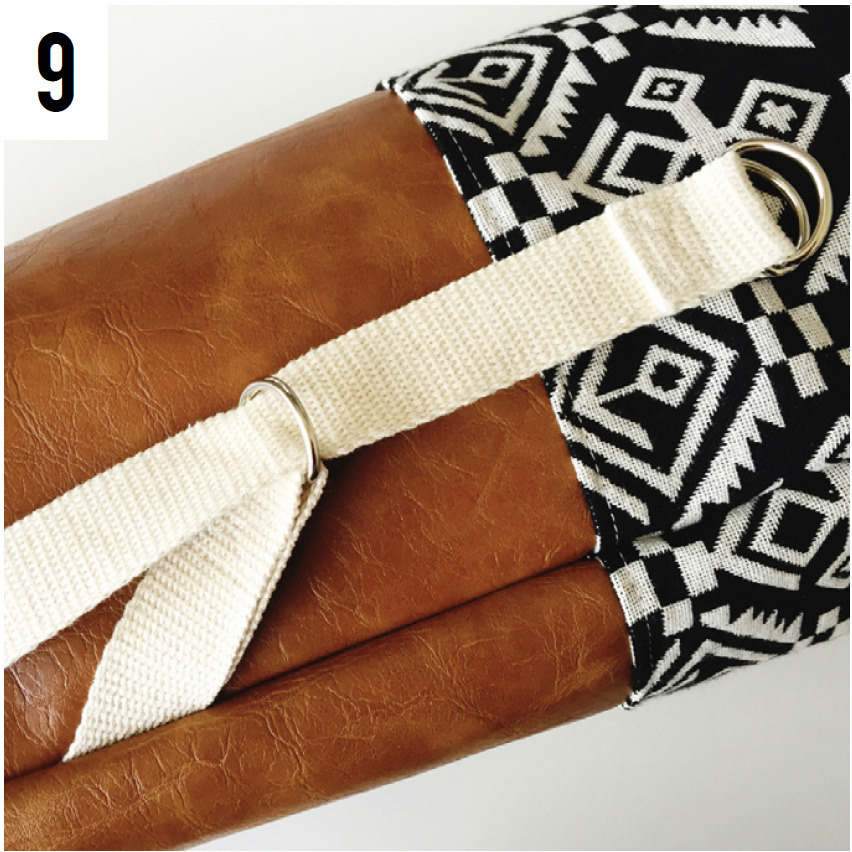
15 – Thread one end of the strap (122cm (48”) long) through both remaining D-rings. Fold the end over 3.8cm (1½”) and tuck the raw edge under. Stitch a square and an X to secure.
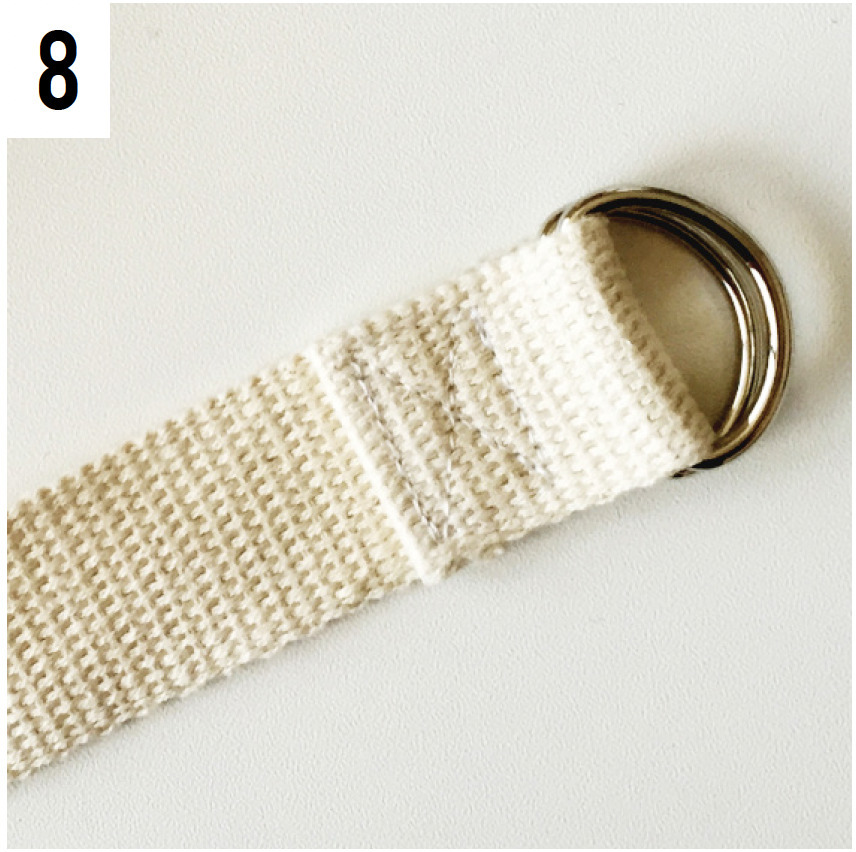
Thread the raw end of the strap through the D-ring on the lower loop.
16 – To create an adjustable portion, thread the raw end of the strap through both main strap D-rings.
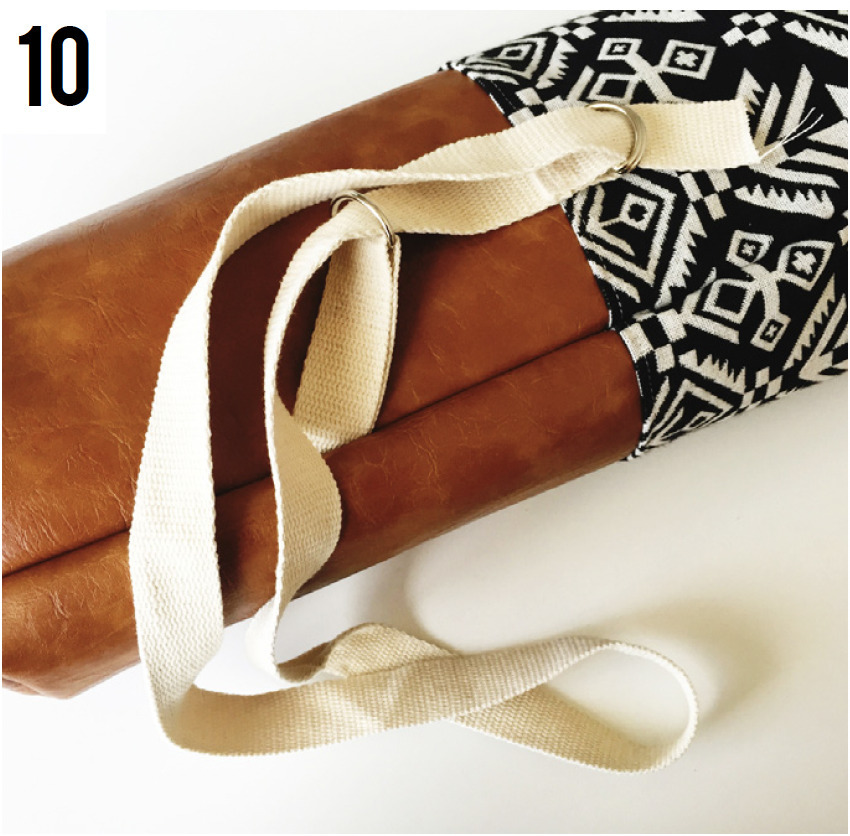
Then back through only one D-ring.
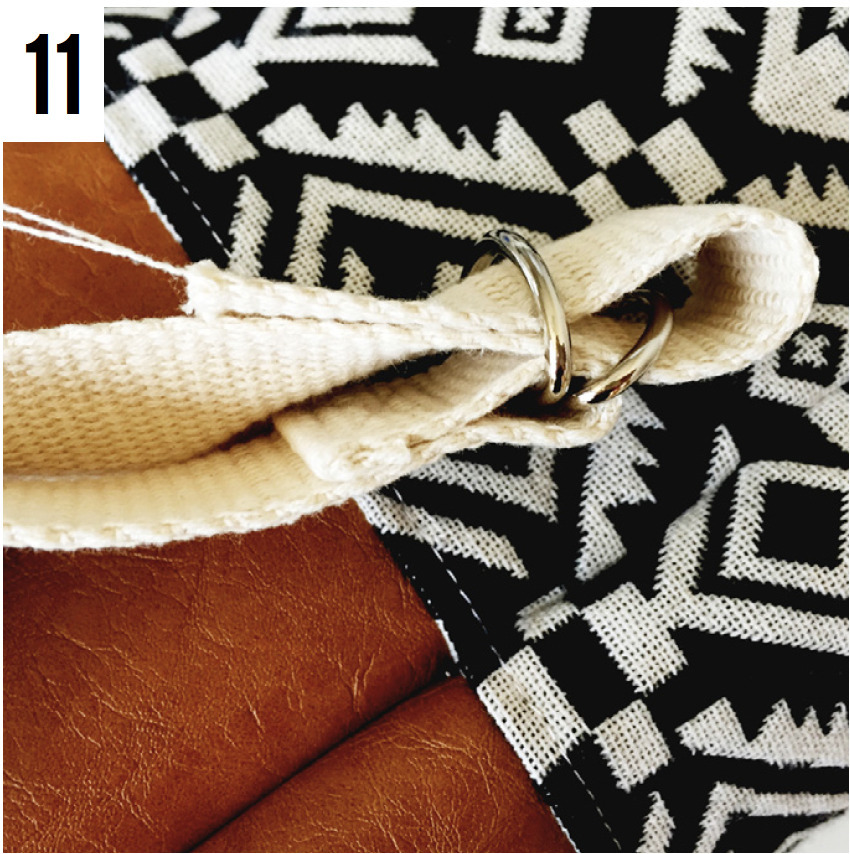
Adjust until the strap is about 36” long.
17 – Fold the upper loop in half with a twist. Stitch ¼” from the raw edge to secure. Fold the raw end of the main strap around the bottom end of the upper loop to enclose raw edges. Pin to bag centered on the side seam and with the bottom edge 3” below the top of the bag. Make sure that strap isn’t twisted. Remove the accessories box on the machine. Stitch a square and an X to secure.

18 – Fold the drawstring stop in half and stitch ends together with 0.6cm (¼”) seam allowance. Trim close to the stitching and turn right side out. Squeeze flat with a seam in the middle. Stitch two lines 0.6cm (¼”) apart and centered.
19 – Thread cord through bag casing with a safety pin. Thread one end of the cord through each slot in the drawstring stop. Place a bead on both ends (optional). Tie a knot at the desired length and trim excess. Unravel the cord below the knot to create a tassel.
20 – Toss your mat in your new bag and head to class!
Conclusion:
Sewing your own yoga mat bag is a practical and fun project that allows you to customize your yoga gear and make your life a little easier.
By following the steps outlined in this blog post, you can create a unique and stylish bag that is perfect for carrying your mat and accessories to and from class.
So, what are you waiting for? Grab your sewing machine and start creating your own one-of-a-kind yoga mat bag today!
Don’t forget to share your completed project with us! Follow us on our Facebook page, Pfaff Australia or Instagram, tagging @pfaff_sewing_australia and using the hashtag #pfaffingaround