

Matching a button placket requires some careful thought and consideration but is well worth the effort for the seamless look that it creates.
Understanding the construction of your button-up shirt (or dress) makes this whole process much simpler. So, before starting, read through your pattern instructions, look at your pattern, and keep a button-up garment nearby for reference.
Note that you will start by cutting the side of your placket that will have buttonholes. For a men’s shirt this is the left side and for a women’s shirt/dress this is the right side.
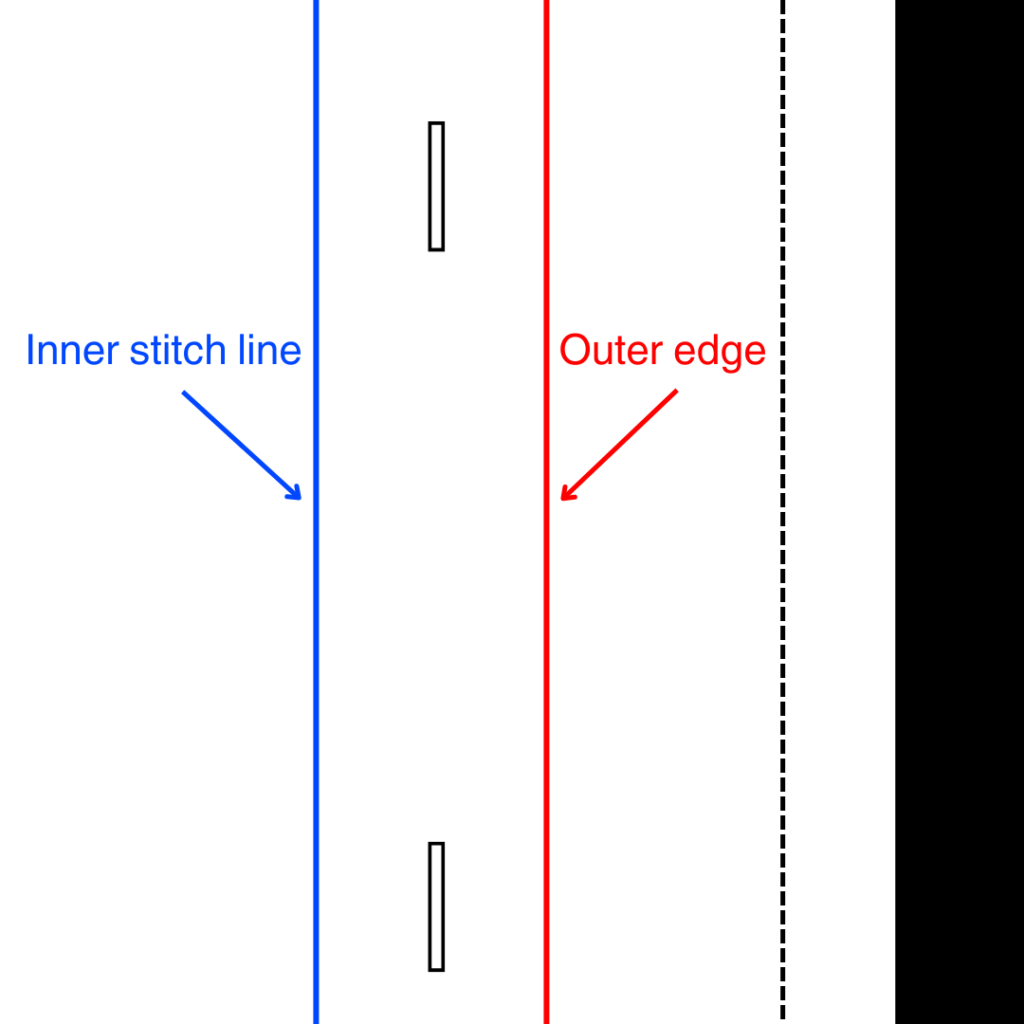
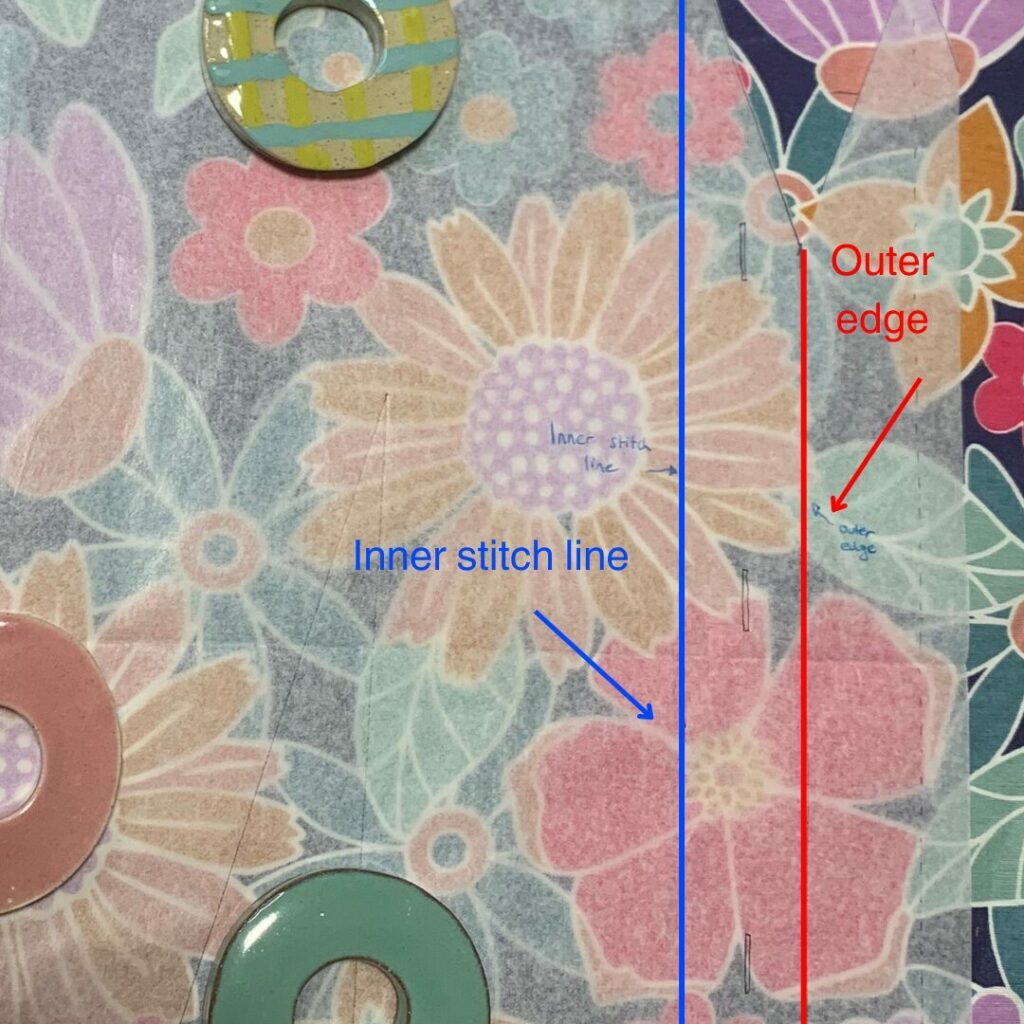
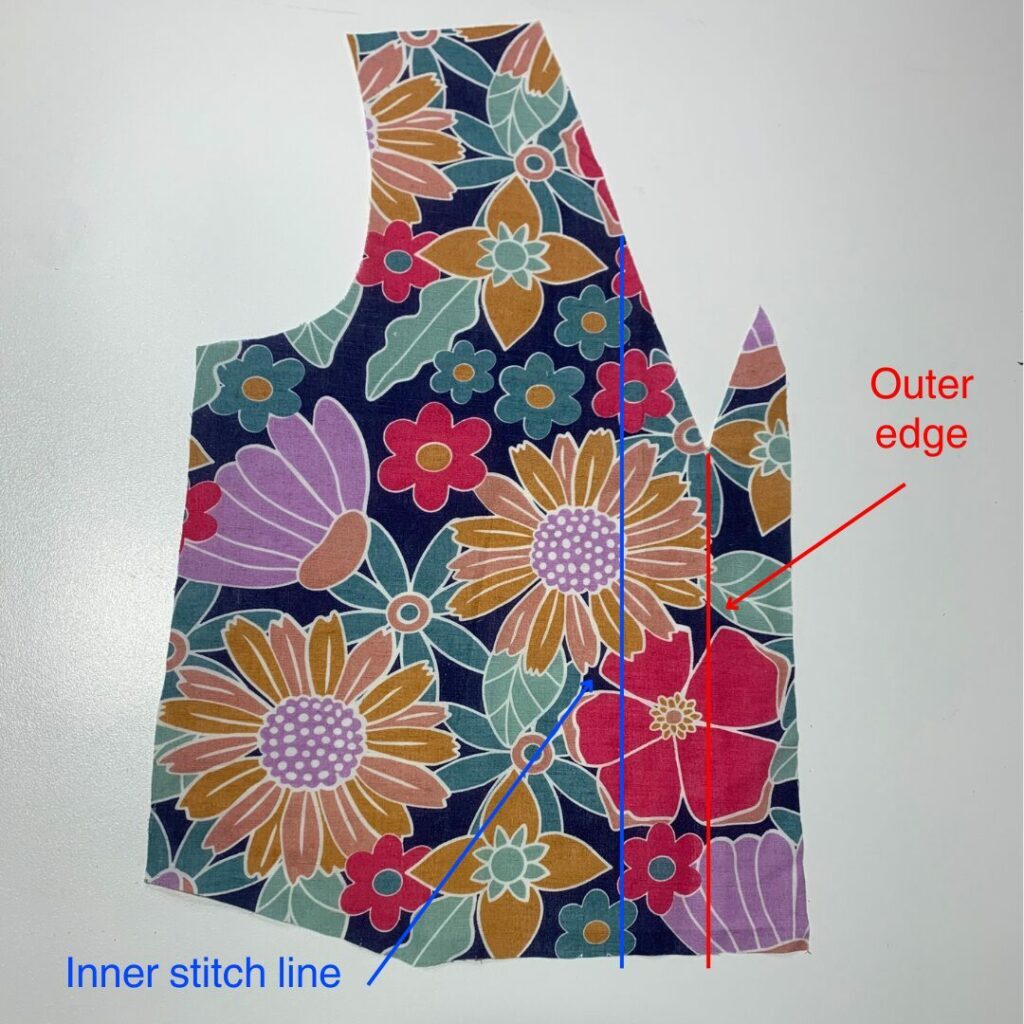
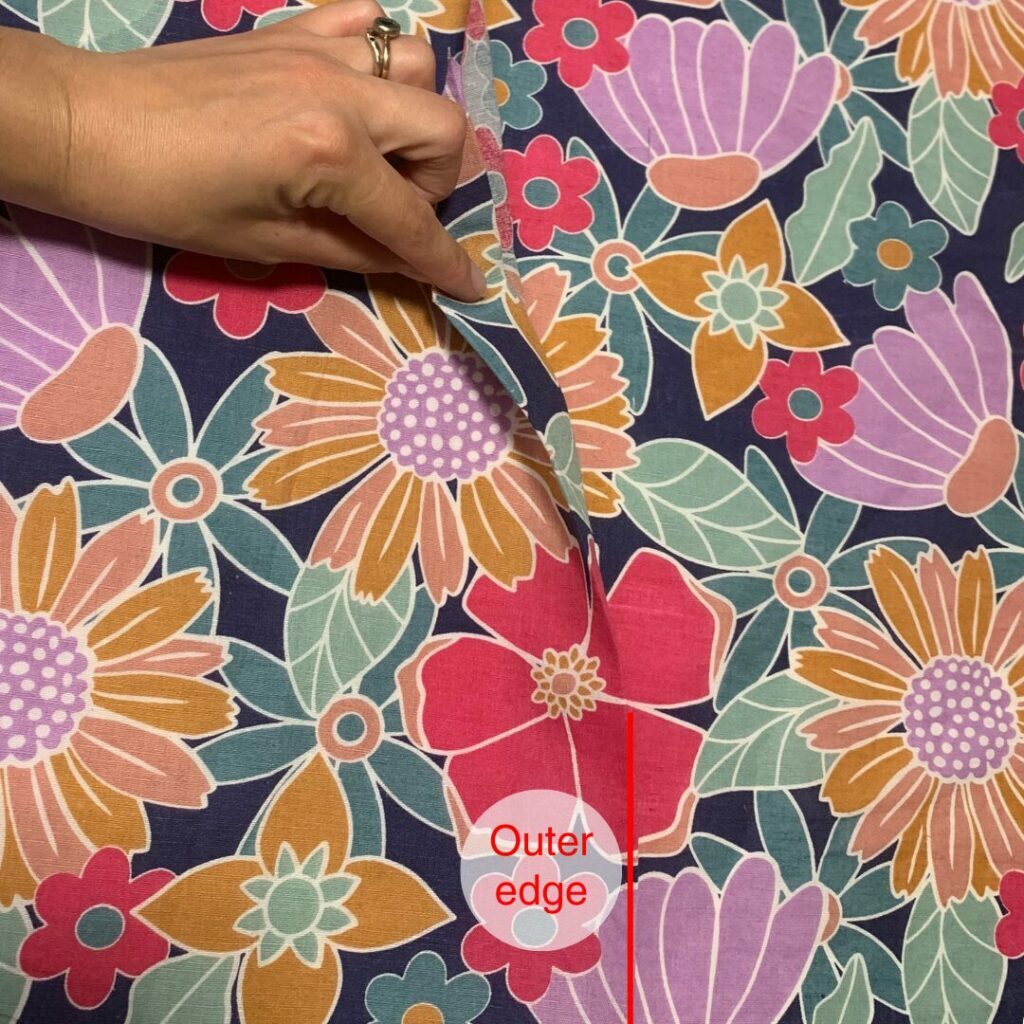
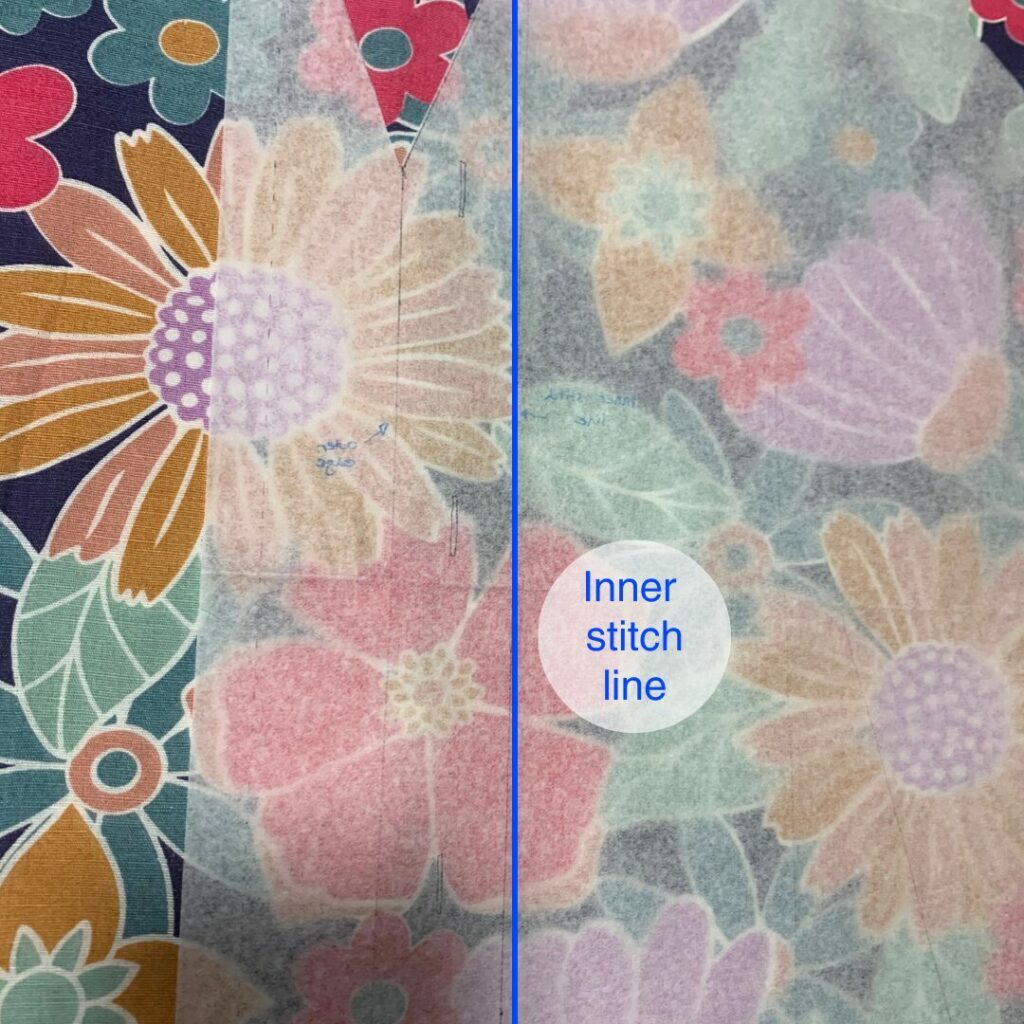
- On your pattern piece, mark and label the outer edge of your button placket (where your folded placket will end) and the inner stitch line of your placket (where the stitching line will be).
2.Lay out your fabric and decide on what printed design elements you want to be front and Centre on your shirt. Place your buttonhole side of your shirt pattern down (left men’s / right women’s), making sure any design elements you want on the Centre of the shirt are in-between the inner stitch line and the outer edge line (where your buttonholes will be).
Note: The pattern elements under the outer edge line will be separated by the two sides of the shirt – in the example the pink flower will be separated, with the Centre of the flower on the right side of the shirt and some of the petals on the left side.
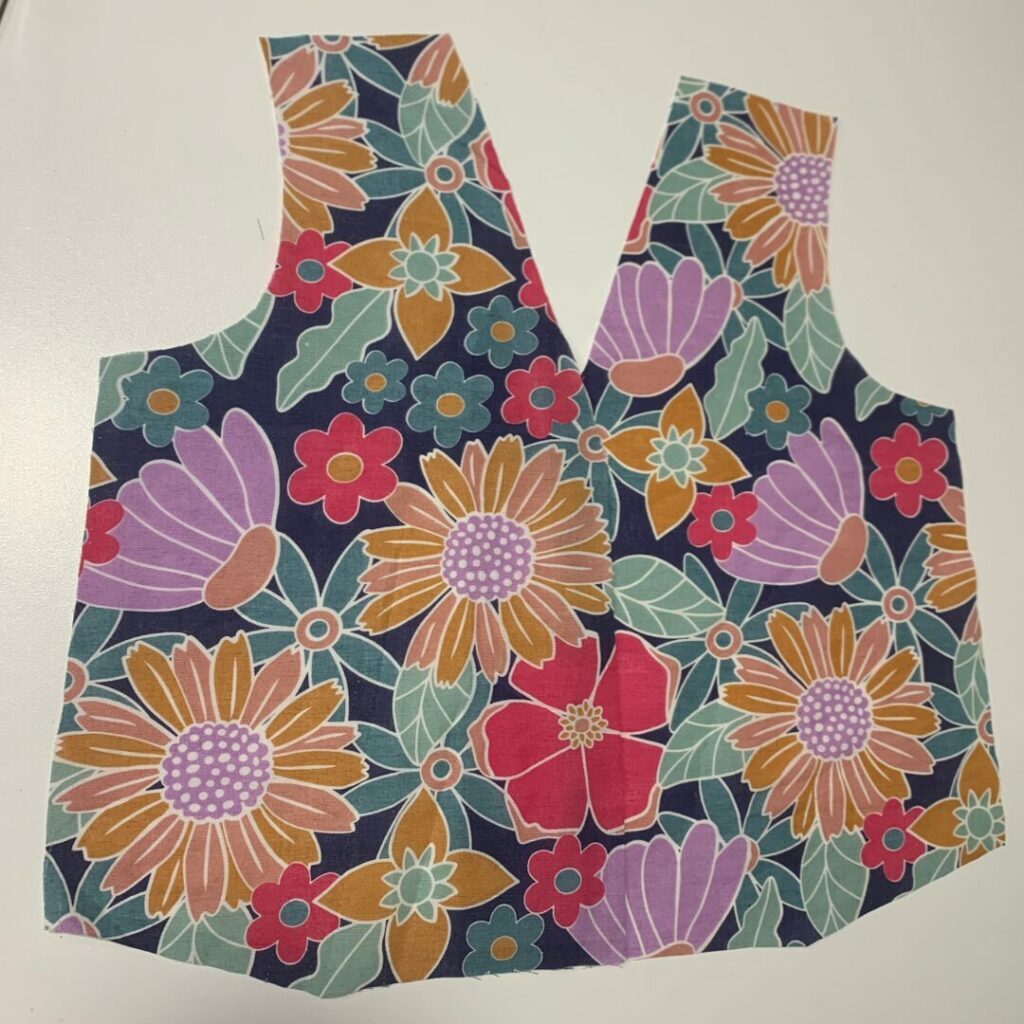
3. Cut out the buttonhole side of your shirt.
Note: Here I am making a women’s shirtdress, so I have cut the right side
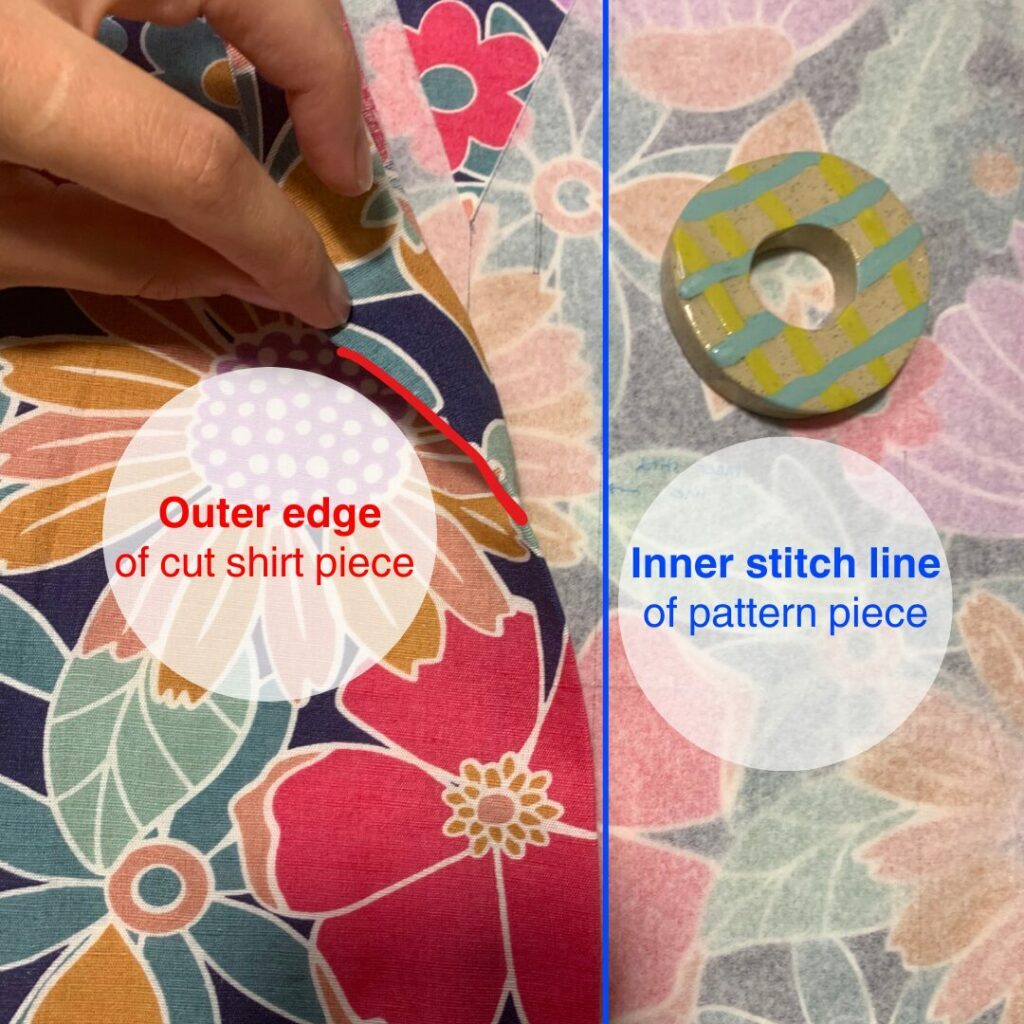
4. Fold your cut shirt piece at the outer edge line and press.
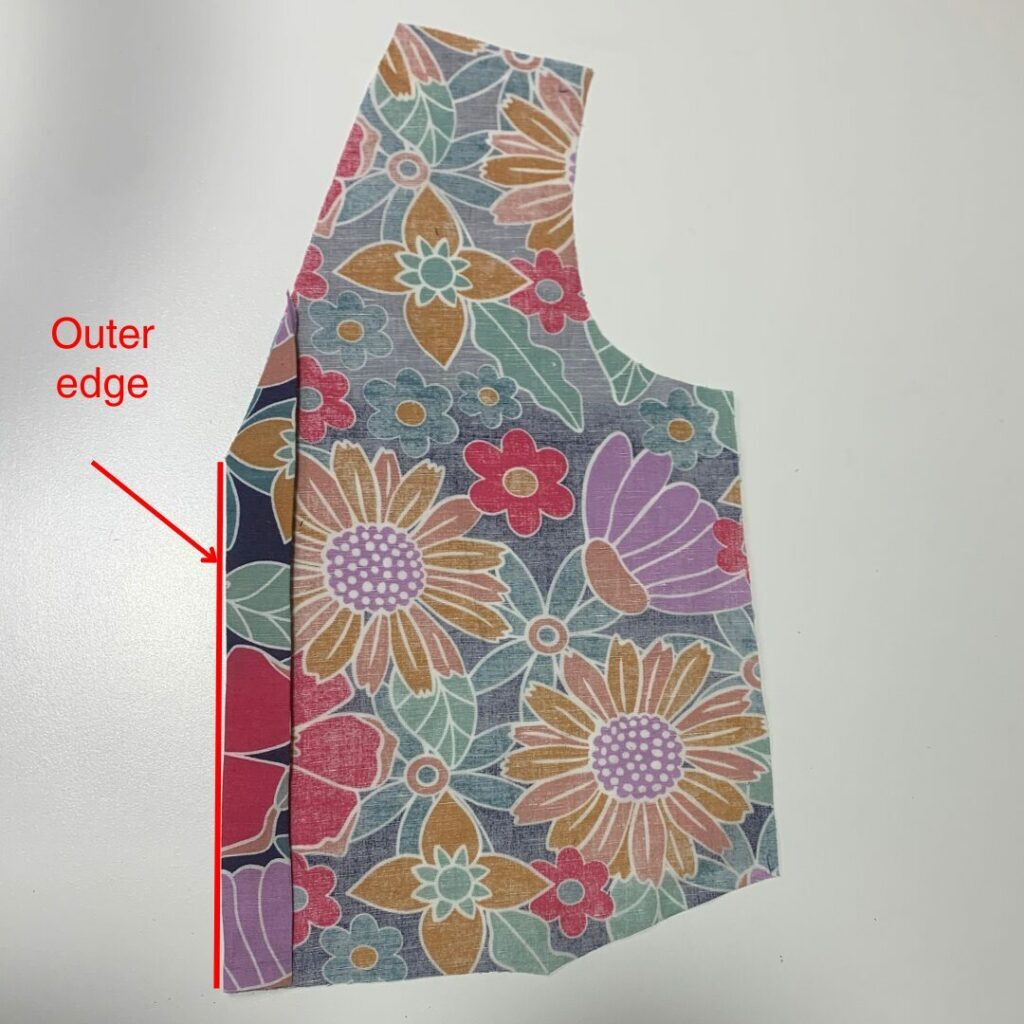
5. Place your cut shirt piece onto your fabric and align the outer edge with the design on the fabric. Your shirt piece should ‘disappear’ into the design of the fabric.
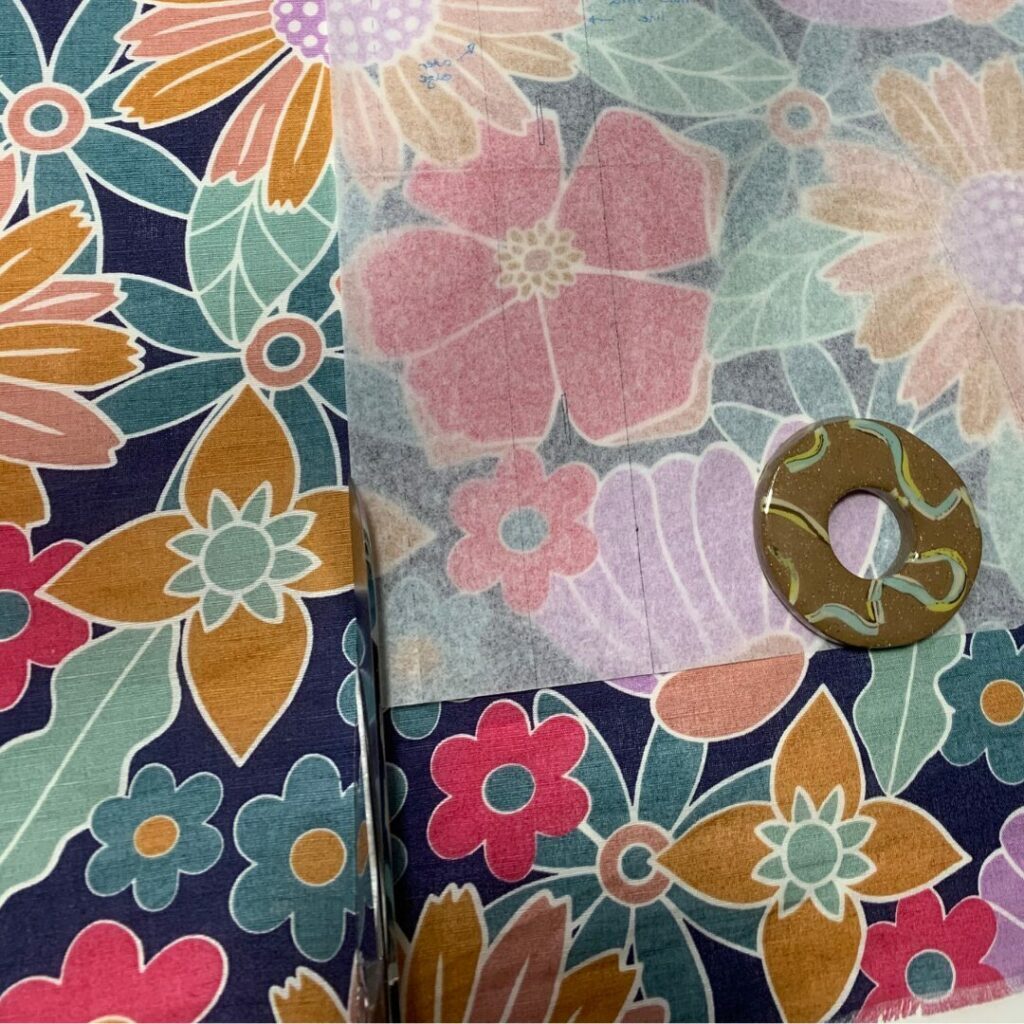
6. Put your shirt pattern piece, other side down, onto the fabric and align the inner stitch line of your pattern piece with the outer edge of your cut shirt piece.
7. Pin or weight this side of the shirt pattern, and double check your pattern matching by laying your cut shirt piece on top of your pattern piece (without moving the positioning of your pieces).
8. Remove your cut shirt piece and cut out your remaining shirt piece.
9. Your pattern matched placket pieces are ready to sew! Continue making your shirt/dress following the pattern instructions. If you’re making a dress, you can repeat the instructions above to match the skirt placket.
Final note: Remember that the outer edge of the buttonhole side will match up to the inner stitch line of the button side – see final diagram below. 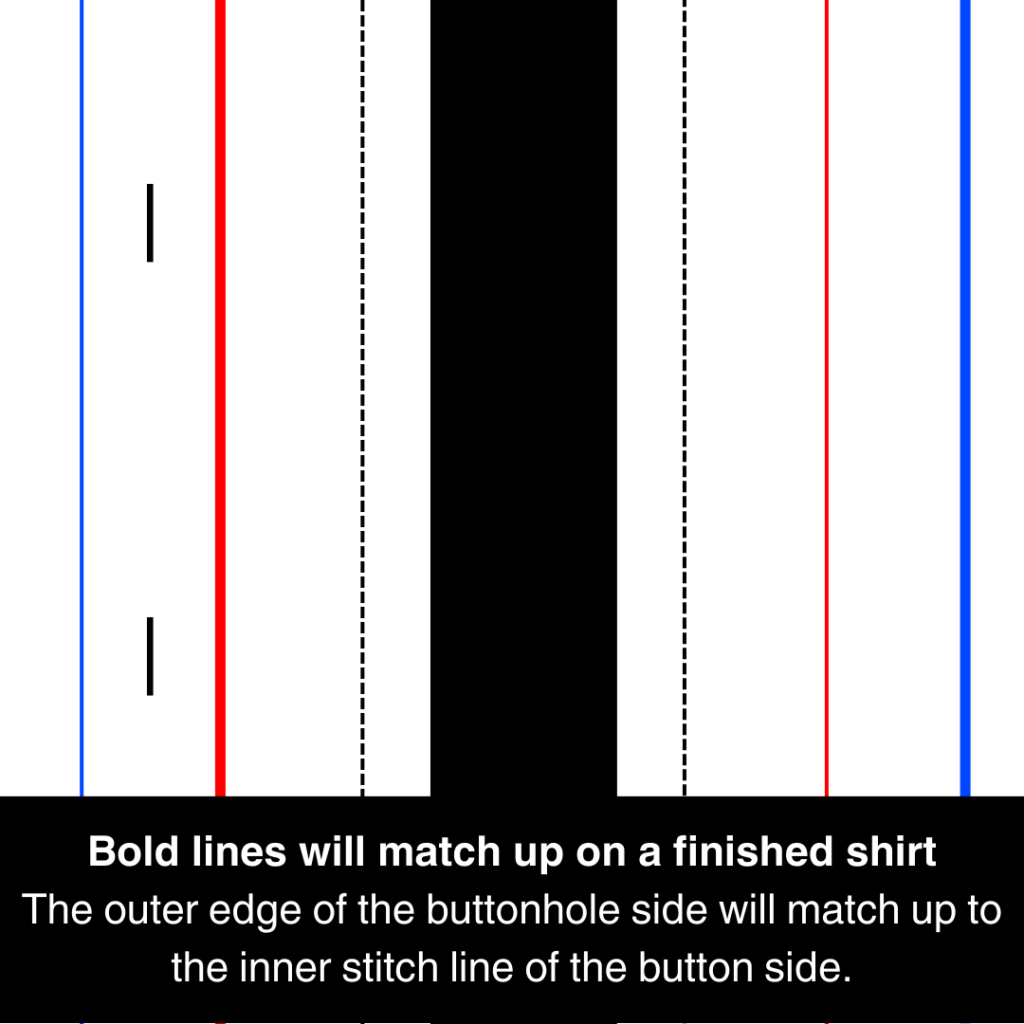
We can’t wait to see what you create! Don’t forget to share them with us on Instagram, tagging @pfaffsewingaus and using the hashtags #pfaffsewingaustralia #pfaffsewing #perfectionstartshere or our Facebook page Pfaff Australia