

Let’s talk about bias binding. A handy notion for both quilters and garment markers!
Bias binding refers to a strip of fabric that has been cut on the bias (a 45-degree angle to the fabric’s grain) and then folded and pressed in such a way that it can be used to encase raw edges or add decorative finishes. Binding cut on the bias is more flexible than binding cut along the straight grain, allowing it to curve smoothly around curved edges without puckering or bunching.
watch video below for your guide before you start.
Bias binding can be purchased pre-made or made from fabric scraps. It’s commonly used to finish the edges of garments, such as necklines, armholes, and hems, as well as for quilting projects to bind the edges of quilts. It can also be used decoratively, such as adding a contrasting binding to the edge of a garment for visual interest.
Making bias binding from fabric scraps is a fast and cost-effective way to utilise your scraps and ensures you have some in the stash ready to go when the project calls!
Machine Requirements:
- All PFAFF sewing machines.
Other Tools:
- Light-medium weight woven fabric
- Ruler
- Scissors/rotary cutter and mat
- Erasable fabric marker (always make sure to test on your fabric first!)
- Iron/ironing board
- Sewing machine + matching thread/needle
- Pins
- Bias tape pressing tool (these come in a variety of sizes)
Sewing Instructions:
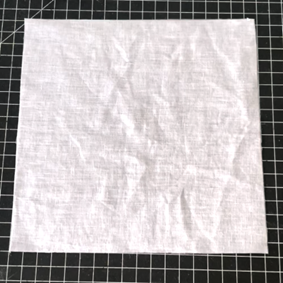
1.Cut a square from your fabric scrap – the larger the square, the less seams and longer length of continual bias you’ll make!
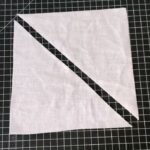
2.Cut diagonally from one corner to the other.
3.Flip the one triangle over, so that it is right sides together with the other and sew together at 6mm (1/4in) seam allowance (SA). You can use the one of the many different styles of ¼” seam feet which you can find here. There is one for all your needs.
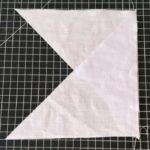
4.Press the seam open then trim the corners/threads.
You will now have a parallelogram.
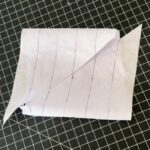
5.Draw lines 3cm (1 3/16in) wide along the length of the parallelogram (these should be on the bias grain). If there is excess at the end, trim it off.

6.Fold the diagonal edges in to meet each other, off-setting the ends by 1 row each. The markings should overlap each other at 6mm (1/4in) SA. Sew this edge together then press the seam open. If using a heat erasable fabric marker, finger press so that you don’t erase your lines! Otherwise press with an iron.
Handy Hint: Engage your PFAFF IDT. This time-tested system guarantees the optimal feed you expect on all types of fabric with absolutely even fabric feed from both the top and bottom. Your lines will match up perfectly!
7.Cut carefully along your lines creating a long strip of bias tape.

8.Press the bias strip along its length paying particular attention to the second lot of seams (press them over to the left).
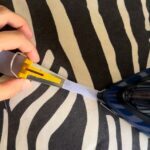
9.Take your bias tape device (12mm (1/2in)) and feed your strip through while pressing your strips so that the raw edges fold in towards the wrong side together.
Store your strips by wrapping them carefully around a piece of foam or cardboard then keep your eyes peeled for part two of this series where we attach the bias neatly!
Congratulations on finishing your project!
We can’t wait to see what you create! Don’t forget to share them with us on Instagram by tagging @pfaffsewingaus and using the hashtags #pfaffsewingaustralia #pfaffsewing #perfectionstartshere or our Facebook page Pfaff Australia