

I love a project! As I’m sure many of you do, and frocktails is the perfect excuse to make something special.
I knew for this event I wanted to wear our newly released bespoke dress pattern in a plain base colour with embroidered detail. I’ve been sewing on the Pfaff creative 3.0 for a while now, but hadn’t tackled a big, embroidery project…. so here goes!
The inspiration…..GUCCI!
Gucci are well known for their heavily embroidered garments with quirky details and this suits my style perfectly.
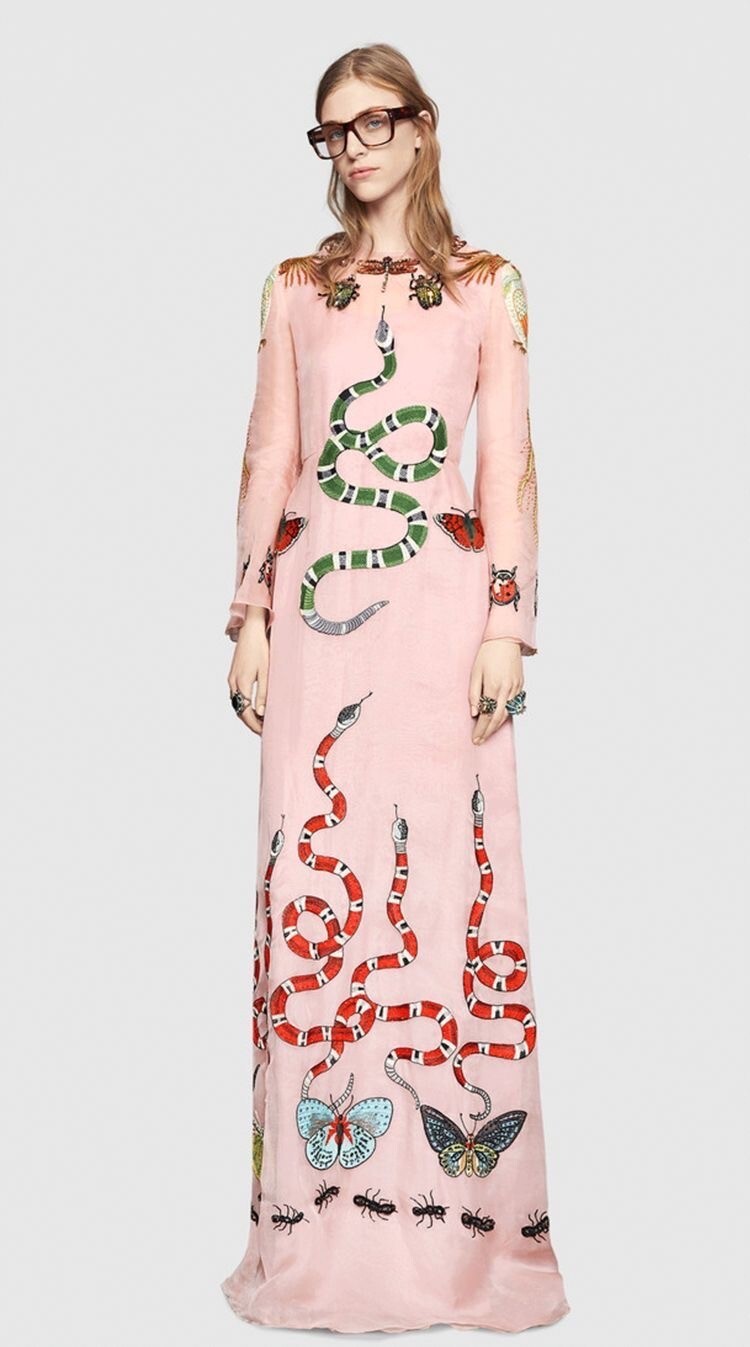
Although the style of dress I wanted to make was quite different, I loved the idea behind the embroidery and creating a border at the hem using one design on repetition
I started my hunt for suitable designs on Etsy and found just what I was after at Oopsi daisie embroidery.
I’ve found so many great designs from this store, Sam the owner is a creative genius.
I chose one design for the hem, a snake and moon that I used on repeat throughout the hem and a larger centre design for the bodice. I also used the small star that was part of the snake and moon design on it’s own to add more smaller elements to the hem. Don’t be afraid to use only part of a design when embroidering, it can create a whole new look to the design.
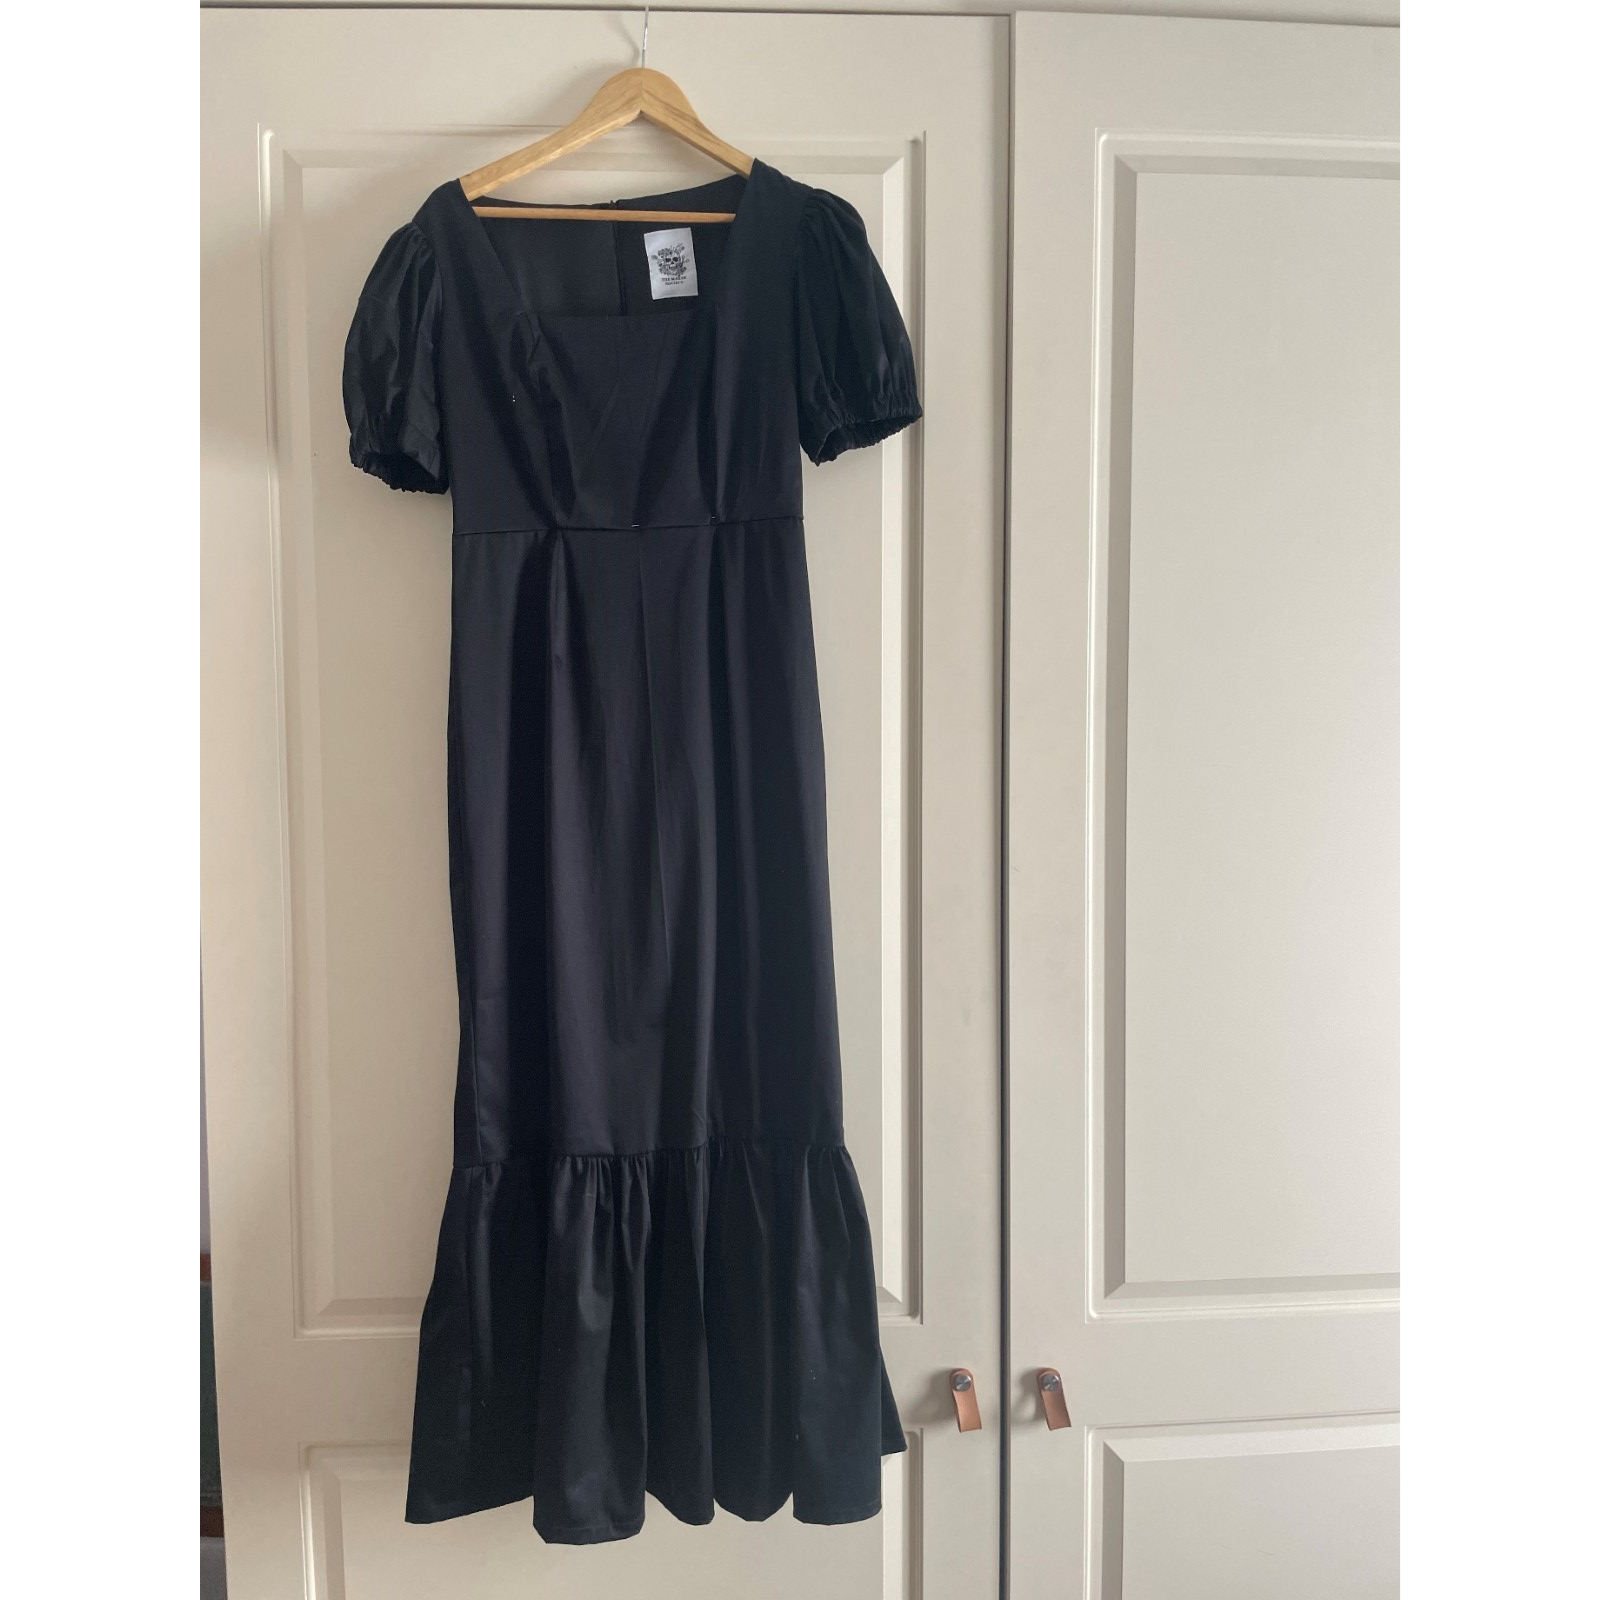
I started by sewing the bespoke dress in a plain black stretch cotton sateen. The weight of this fabric is perfect for the style and the heavily embroidered nature of the dress. I wanted something stable enough that it was going to sit well even with the heavy embroidery.
When embroidering a garment that I’m making I usually complete the embroidery before I construct the garment. This is for a few reasons.
- Stitching the design onto the uncut fabric allows you to position your pattern piece so the embroidery sits exactly where you want it to.
- Sometimes embroidery goes wrong. That’s life, things happen. Your bobbin thread could get caught, a needle could snap, a design could be not as you’d expected.
- It’s much easier to work with a flat piece of fabric than an already constructed garment that has curves and tight spaces.
This time however…. I sewed the dress first. I originally intended to make the embroidery as motifs and stitch them on, but I found the curvy snake design was difficult to cut out and I was adding more bulk where it wasn’t needed. I decided to stitch directly on to the finished garment….. what could go wrong?
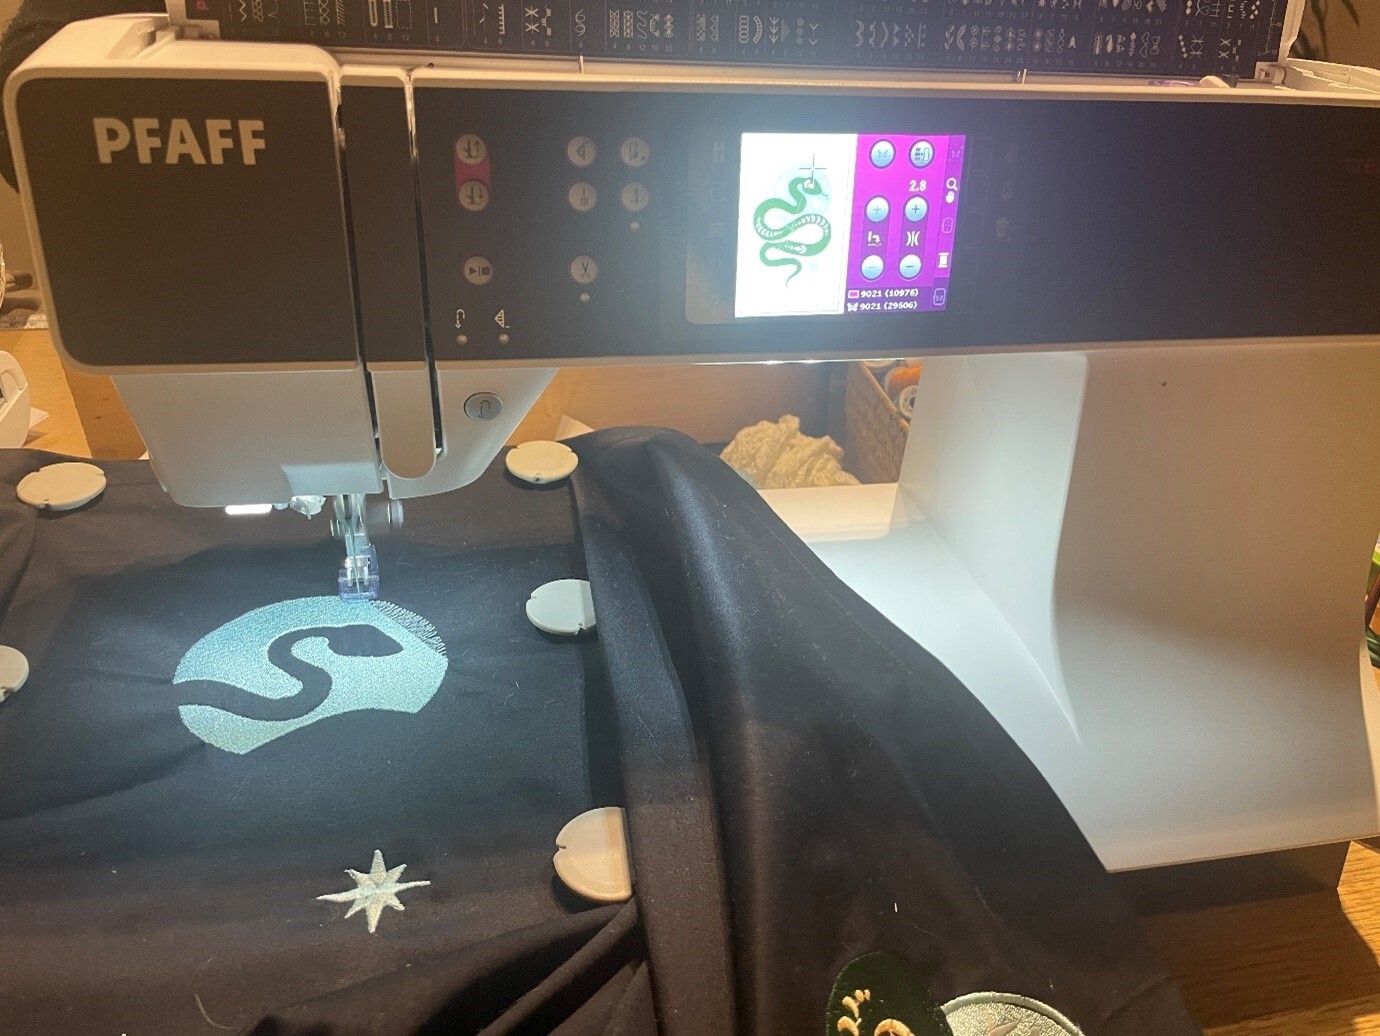
The deigns I used are the boho snake stars design and the Green snake and flowers design
I also used an embroidered butterfly motif from our store as it was the perfect colours, fit the theme AND saved me a lot of time!
As always, I stitched out the design on a sample piece to test the scale and colours I had chosen. I always find this a really helpful step and often tweak my colour choices one I see them all stitched together.
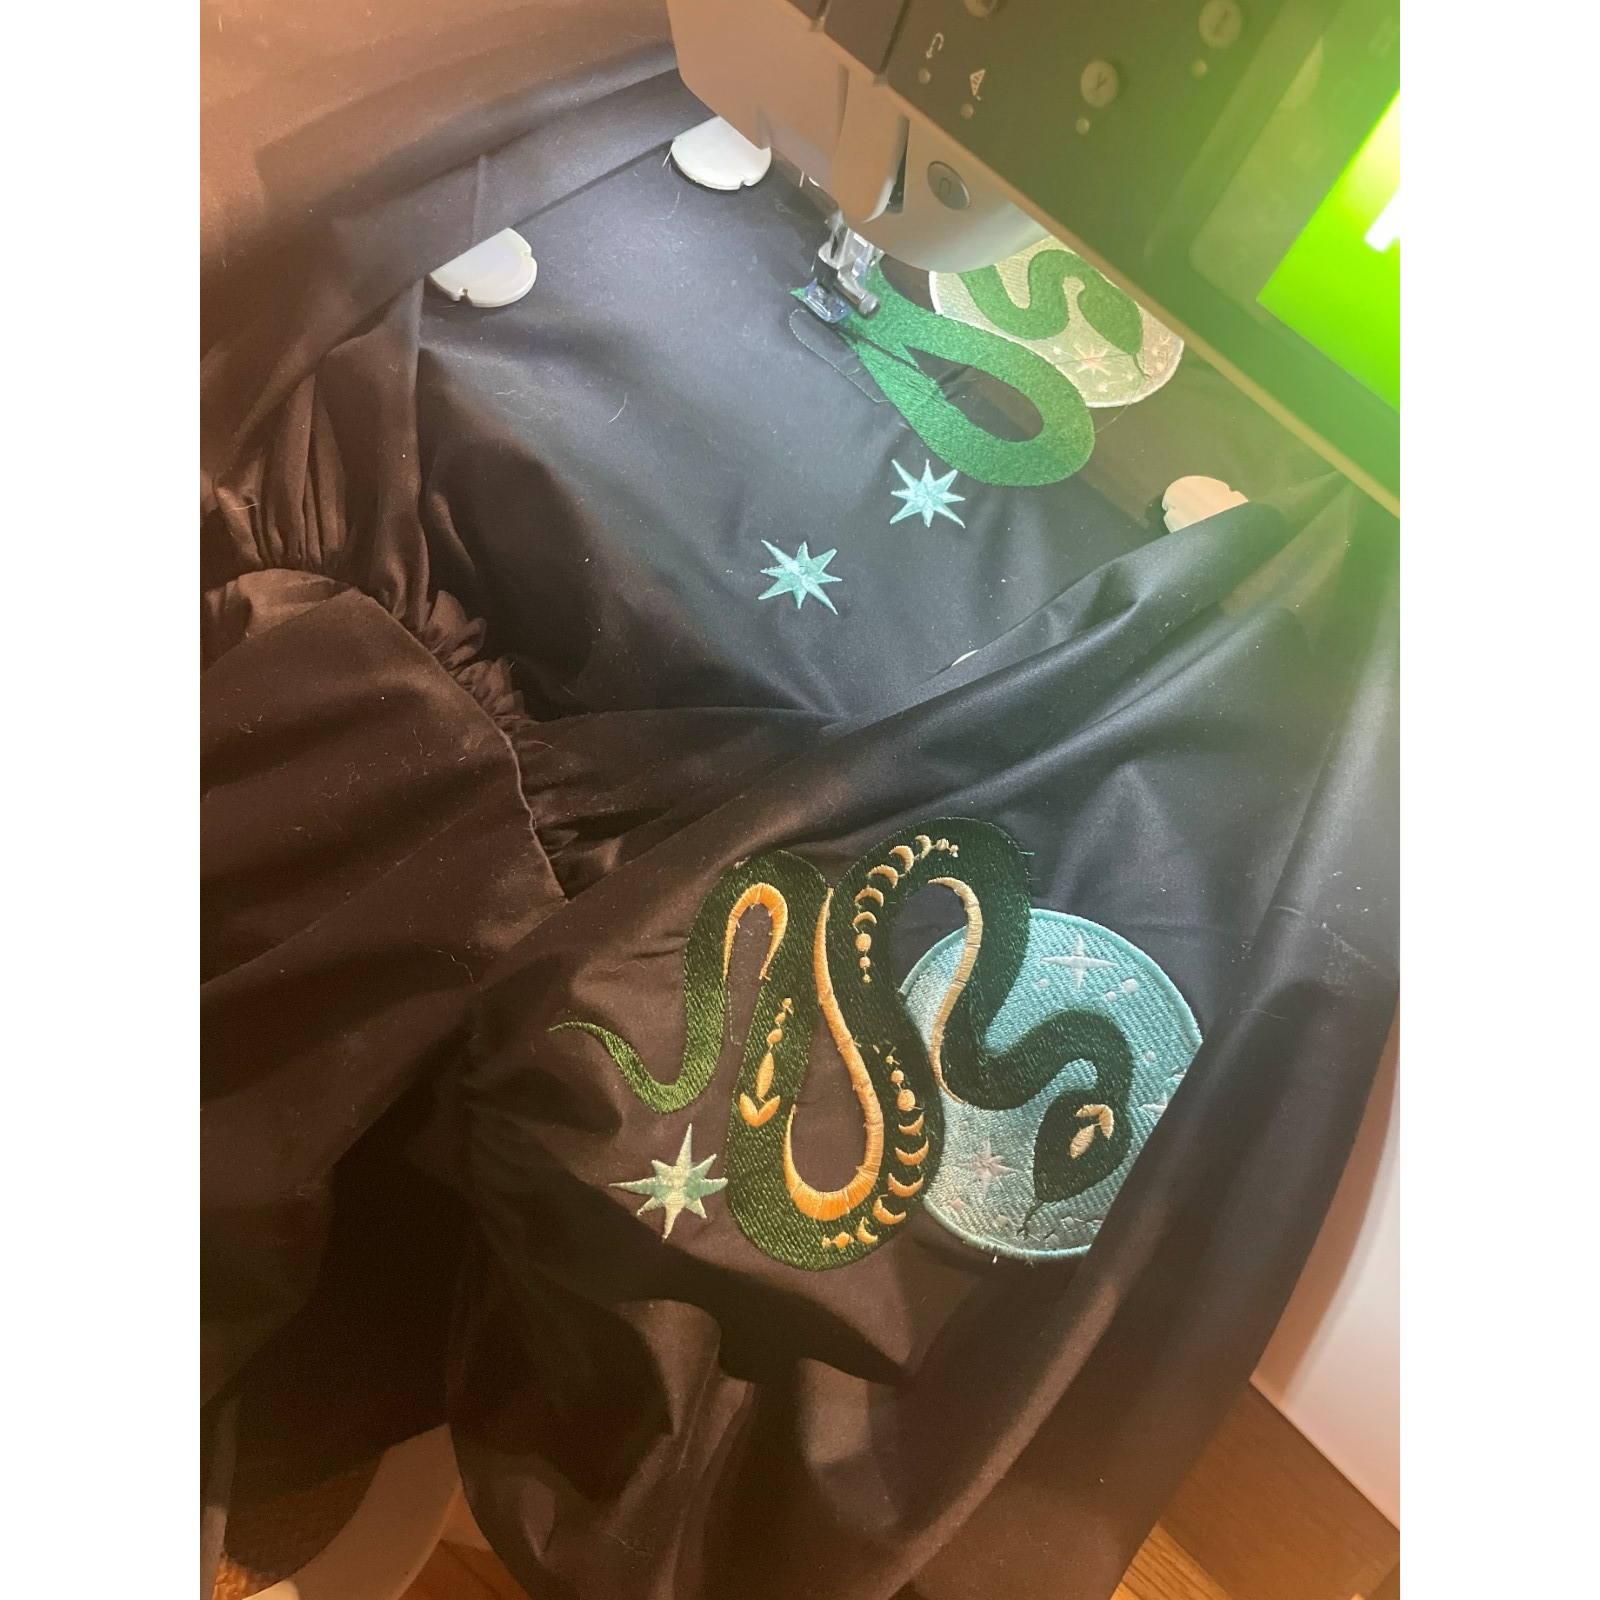
I started with the embroidery on the hem.
Using my sample as a template, I marked out where I wanted my embroidery to go. Deciding on 3 designs on the front, and 3 on the back, I marked the placement with tailor’s chalk.
I used the PFAFF Grand Metal Hoop for this project. With the garment already constructed it was much easier to put in place than a traditional hoop. This also made it quick and easy to move around when stitching multiple designs.
I used a single layer of Inspira tear away stabiliser at the back of all my embroidery. I simply floated the tear away behind the fabric, held in place by the magnets.
After completing the six snake designs, I filled in the gaps with my pre purchased butterfly motifs which I ironed in place, then stitched around the outside edge with a straight stitch.

With a project this big, I find it useful to complete the work in stages and take a step back after each stage and assess.
Once I’d added the butterflies, I felt there were some gaps that needed filling.
I used the star from the snake design for this.
To stitch only the star, I set up the hoop and started the embroidery, the star was the first element, and stopped it once the star was completed. If the element you are choosing is not the first element you can skip to it by selecting the thread colour it’s stitched out in from the list when you press the little thread icon on the screen.
With the hem ruffle embroidery complete I moved on to the central design. After a hiccup with my first attempt that meant I had to unpick the front bodice and front skirt section and re cut them Sam very generously re sized the design for me so that it was just right for the front section. I found the flat pieces much easier to work on.
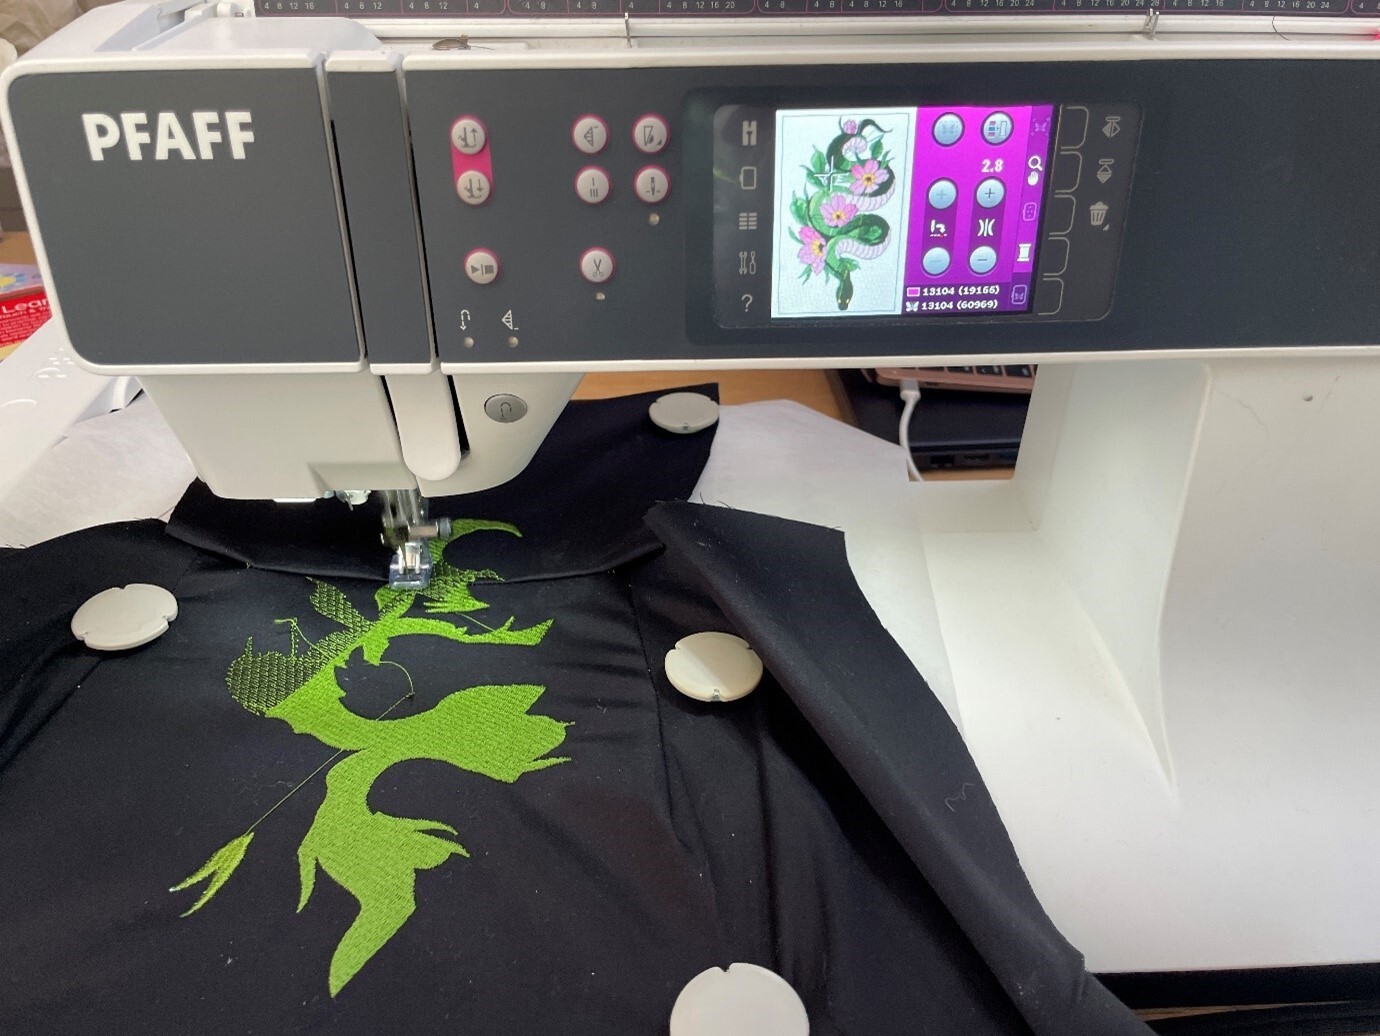
This was a complex design with many stitches, but it worked well on this fabric and stabiliser combination.

The dress was a big hit on the night. There is something quite wonderful about being in a room of sewers, admiring each other’s creations and asking questions on techniques used. I think there were quite a few sewists who are now on the machine embroidery band wagon. The possibilities really are endless with a Pfaff embroidery machine.
Until next time, happy sewing
Julia xx