

This week I spied some lovely gingham linens in 3 great colours. They’re perfect for spring and also a perfect fabric for the newly released Bespoke dress pattern
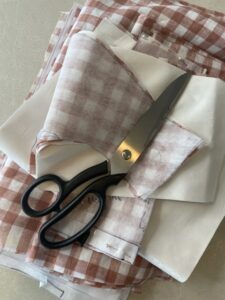
The Bespoke dress has a square neck, princess seam bodice, two skirt options, two sleeve options and the added option of a short or long ruffle.
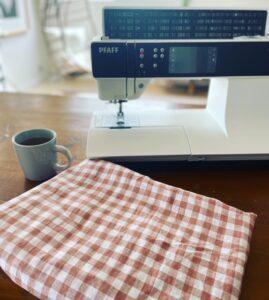
For this project I’ve gone with the gathered skirt, linen is a loose weave fabric, so best suited to looser fit garments. For added drama I’ve used the long ruffle and puff sleeve which work beautifully for this mid weight linen.
The Bespoke dress is a fairly easy make, aimed at intermediate sewers, with the two main points that may require some extra concentration being the square neckline and invisible zip insertion.
These steps are not difficult if you take the right approach… let’s walk through it.
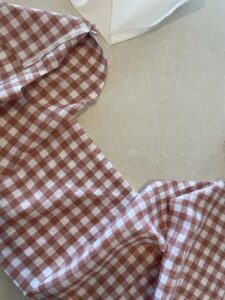
Starting with the square neckline.
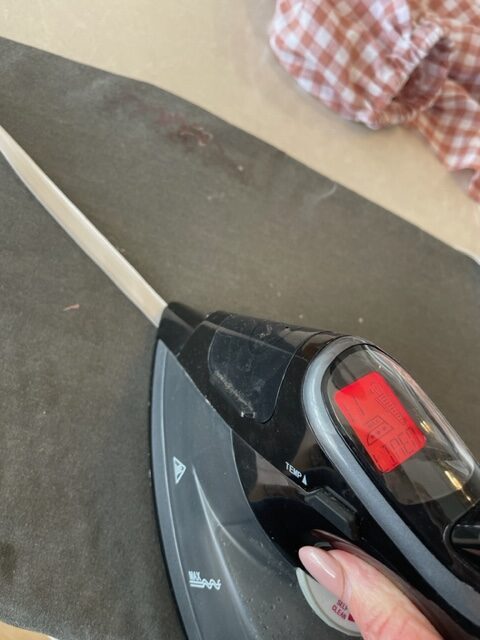
The neckline is stabilized with iron on stay tape to stop it warping out of shape and make sure you retain that lovely square neckline. The bodice assembly is pretty straight forward with back darts to be sewn and the front bodice joined to the side bodice at the princess seam. Repeat these steps for the lining.
Once your bodice is constructed it’s time to join the outer to the lining. This is where you will need to pay particular attention to that square neckline.

Ensure all your seams are pressed open and flat. Place the outer and the lining right sides together and pin matching seams and notches. Pay particular attention to the corners of your square neckline, you want to get the lining and the outer exactly matched so that when you pivot your needle at the corner point it creates a perfect corner on both the outer fabric and the lining. Sew the two layers together, with your needle down so that you can stop at the corner and pivot. It’s important to clip the seam, especially at those corners, just be sure not to snip your stitches. Turn right side out and press
Now that your bodice is complete you can attach the skirt and we move on to the zip!
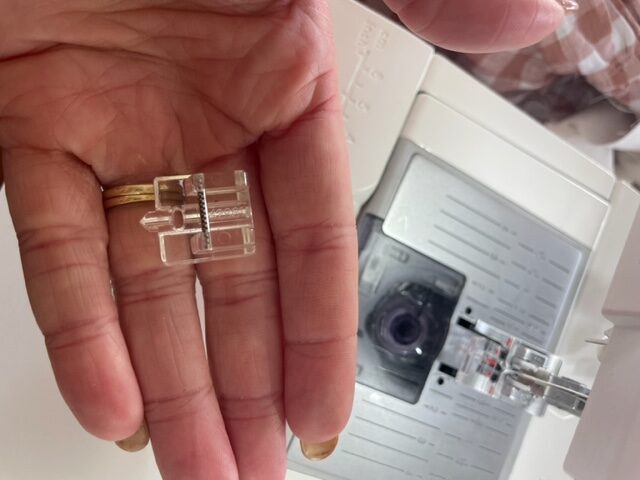
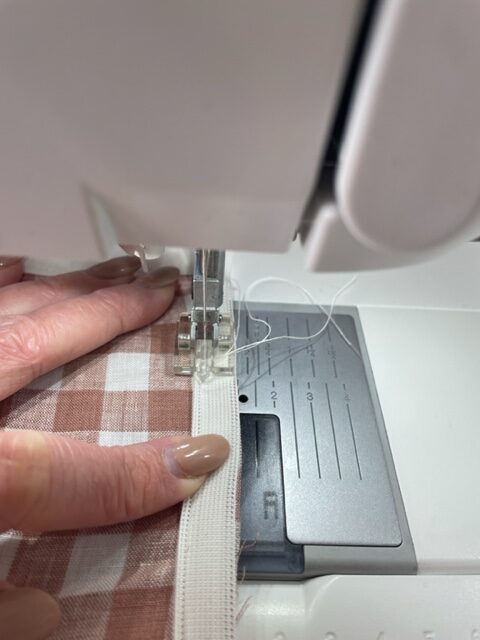
If you’ve never sewn an invisible zip it can be a daunting task. But I assure you, it’s really not that hard… if you have the right tools! An invisible zipper foot is a game changer when it comes to expertly inserting an invisible zip
This is the PFAFF Invisible Zip foot. The key feature of this foot is the little pointed part at the front, this pushes the teeth of the zip apart and allows you to stitch close to the edge.
The second tool you’ll need to insert an invisible zip is your iron!
Lightly press the zip flat, opening the tape up so the teeth are flat and you can stitch right up close to the edge.
Once you’ve pressed your zip and attached your foot it’s time to sew.
Position the zipper face down and align the zipper tape along the center back. Pin it in place, ensuring the zipper stop lines up with the neck seam where the main bodice piece meets the lining (or slightly below, leaving room for a hook & eye). Keep the zipper teeth 1 cm away from the edge.
Utilizing the invisible zipper foot, baste the zipper to the bodice, extending down at least 2 to 3 cm below the zipper end notch. You may need to temporarily remove the garment from the machine, raise the zipper tab beyond your stitching, and then resume sewing the remaining part of the zipper.
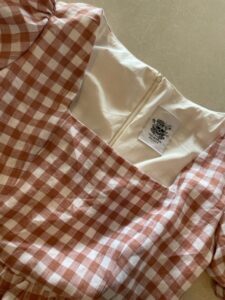
Fold the lining waistline edge out and press it by 1 cm. Fold the lining downward over the zipper, aligning the right sides of the lining and main bodice. Use the invisible zipper foot and stitch the lining down to secure the zipper between the bodice and lining. Stitch as closely as possible to the zipper teeth without stitching through them.
Turn the bodice right side out and check the zipper to make sure it zips up completely and is facing the right direction. Remove the basting stitch.
Repeat the process for the other side. Ensure that the zipper is correctly positioned and not twisted while sewing.
Sew the center back seam up until you meet the stitching for the zipper installation. Press open.
Your zip is in and your lining is neatly stitched down!
With those steps completed you’re not far off finishing your dress.
I hope this encourages you to give an invisible zip or a structured neckline a try.
Until next time, happy sewing
Julia x