

Pattern by Mikael Svensson originally posted on mysewnet.com
A Chatelaine is originally a belt clip with chains where various tools used daily could be attached.
This Chatelaine is meant to be worn around the neck and contains the things you need at hand when sewing, like small scissors, pliers, ripping tools, needles, and so on. The embroidery designs come from the embroidery library but with a new twist recycling an old pair of jeans!
What you need:
- PFAFF Sewing and Embroidery machine
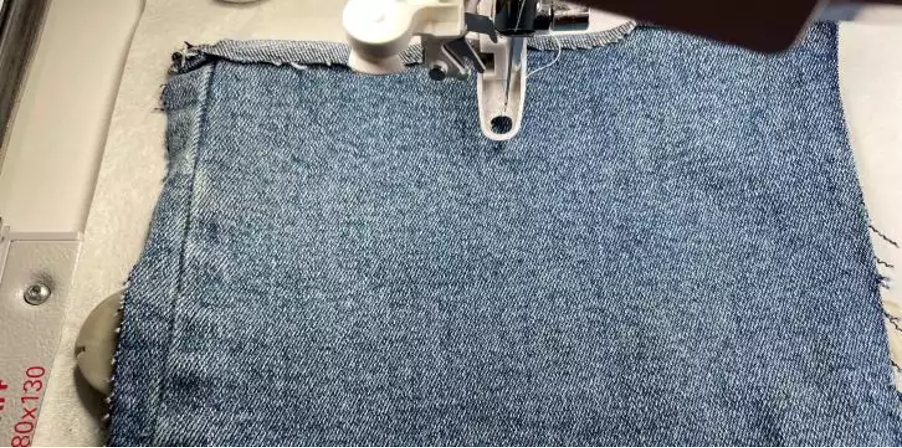
- One pair of old jeans, not stretch fabric.
- Water soluble stabilizer enough for the 360x200mm hoop
- Embroidery hoop 360×200 mm for the neckband embroidery design
- 180x130mm metal hoop (or other embroidery hoop, the small embroidery design are maximum 125x175mm
- Tear away stabilizer for the 180x130mm hoop (6 hooping’s)
- Embroidery thread
- Embroidery designs for the Chatelaine and other sewing accessories can be found in mySewnet embroidery Library, find them Here
Prepare and Stitch out the different parts
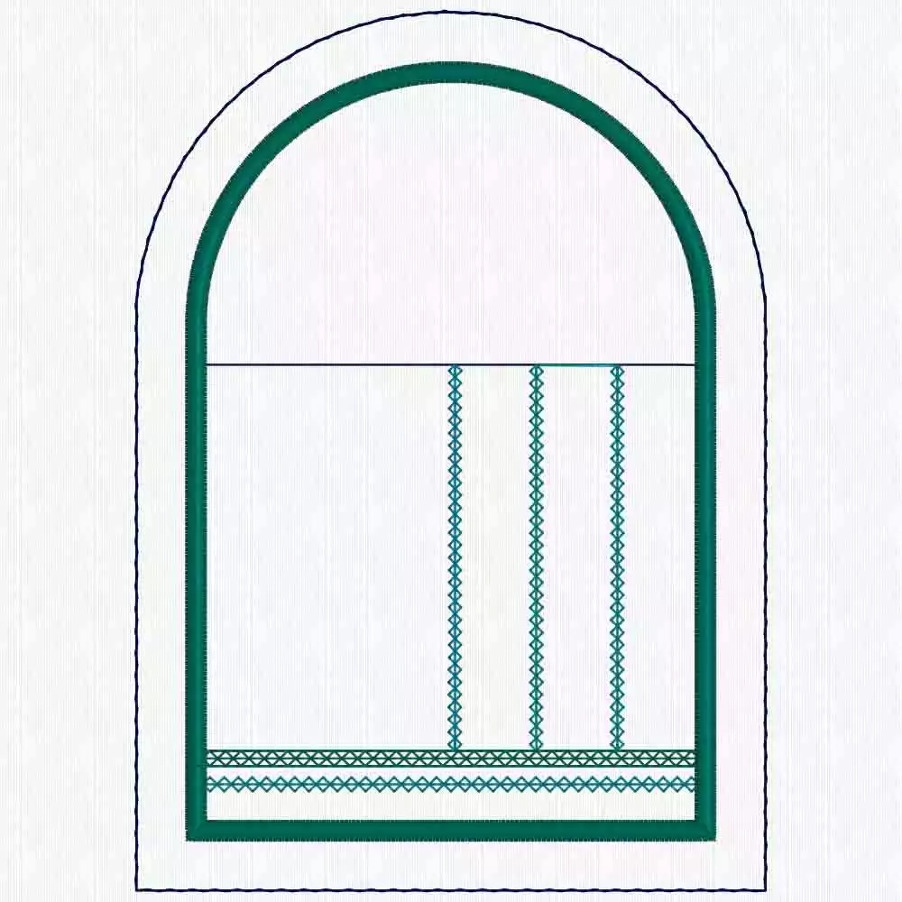
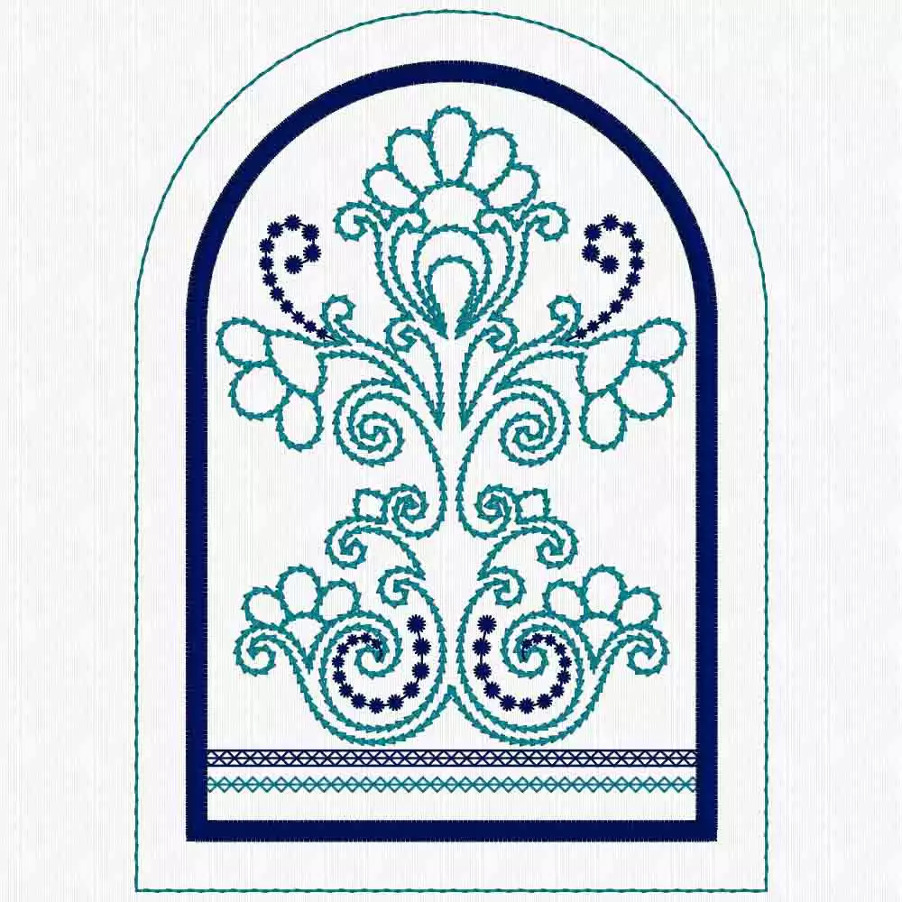
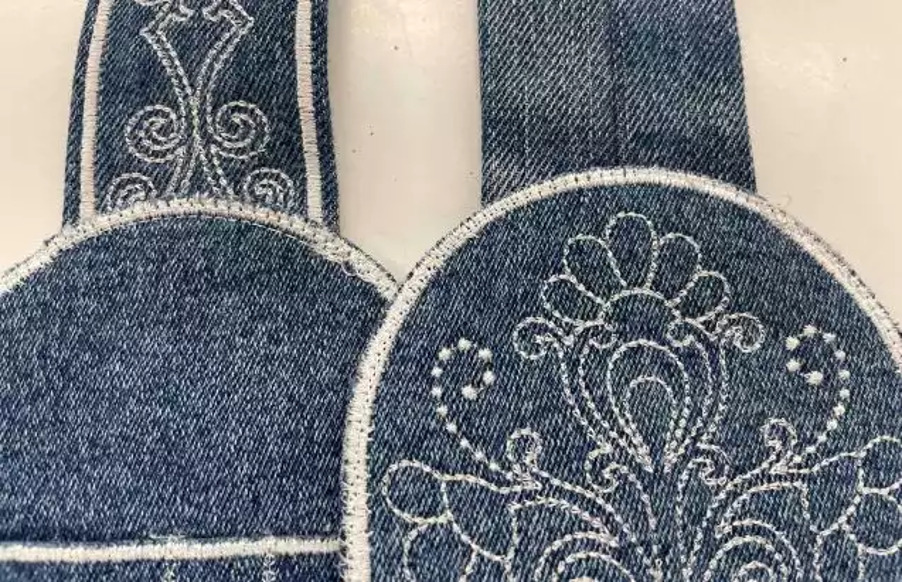
Make the Pocket Divider
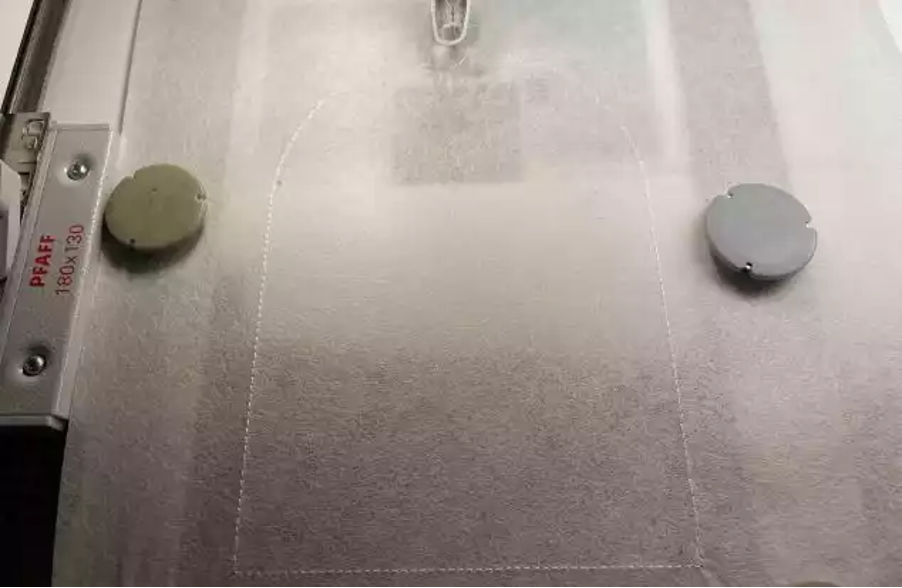
1 – Hoop tearaway stabilizer in the 180 x 130mm metal hoop. Stitch out colour 1, this makes a placement line for fabric.

2 – Attach the fabric right side up, stitch out colour 2. This secures the fabric in the hoop.
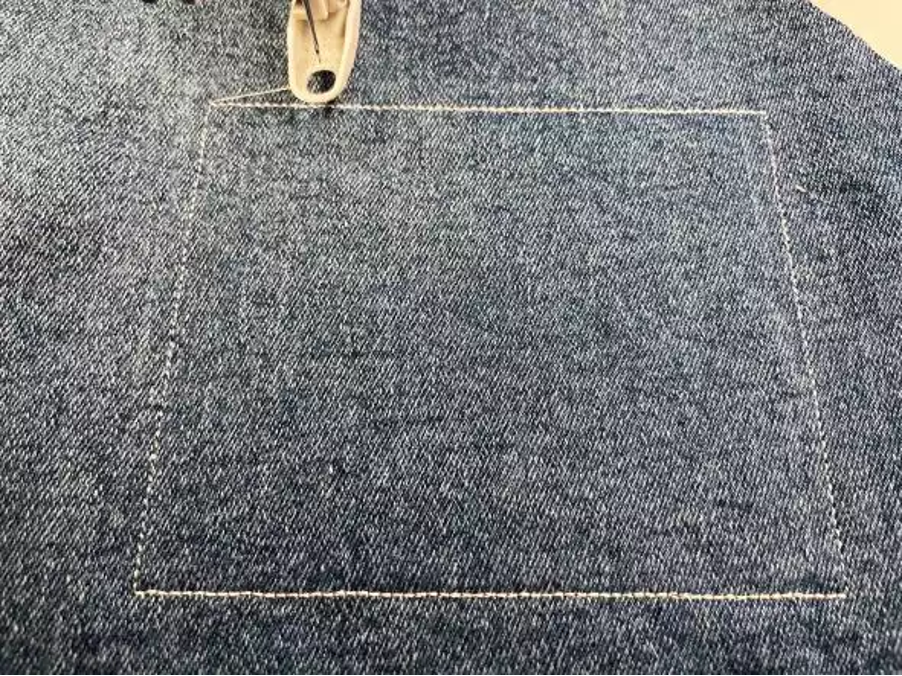
3 – Stitch out the rest of the embroidery design.
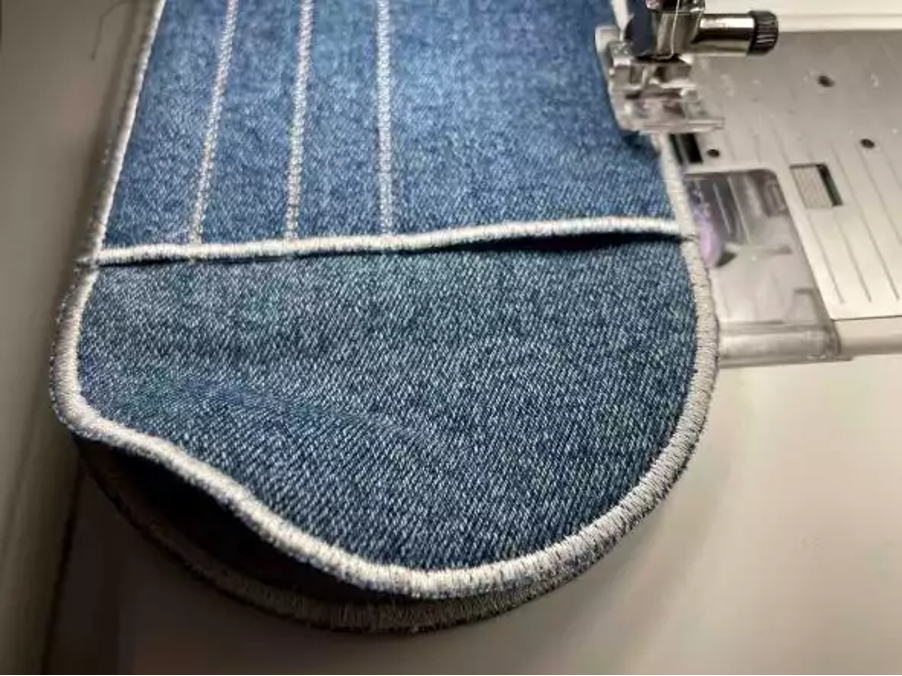
4 – Unhoop and cut out along the outer lines, take care not to cut into the satin stitch edge!
5 – Make one more pocket piece.
Make the Pocket Main Piece
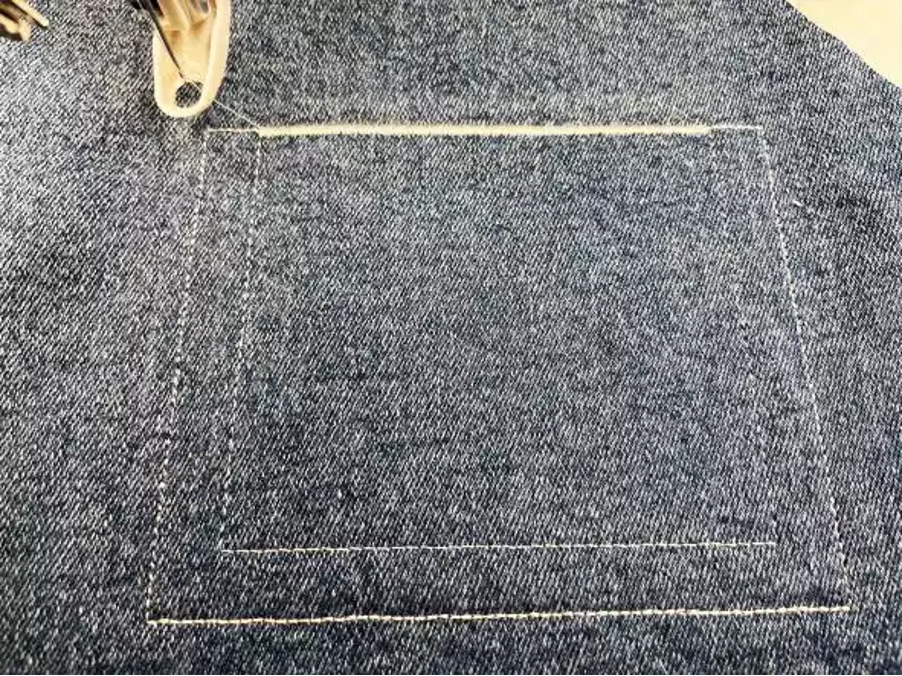
6 – Hoop tearaway stabilizer in the 180 x 130mm metal hoop and stitch out colour 1, this makes a placement line for the fabric.
7 – Attach the fabric, right side up and stitch out colour 2, which secures the fabric in the hoop.
8 – Stitch out colour 3, this is a placement basting stitch for the pocket pieces you made earlier. Place the pocket piece along the basting stitches and stitch out the rest of the embroidery design.

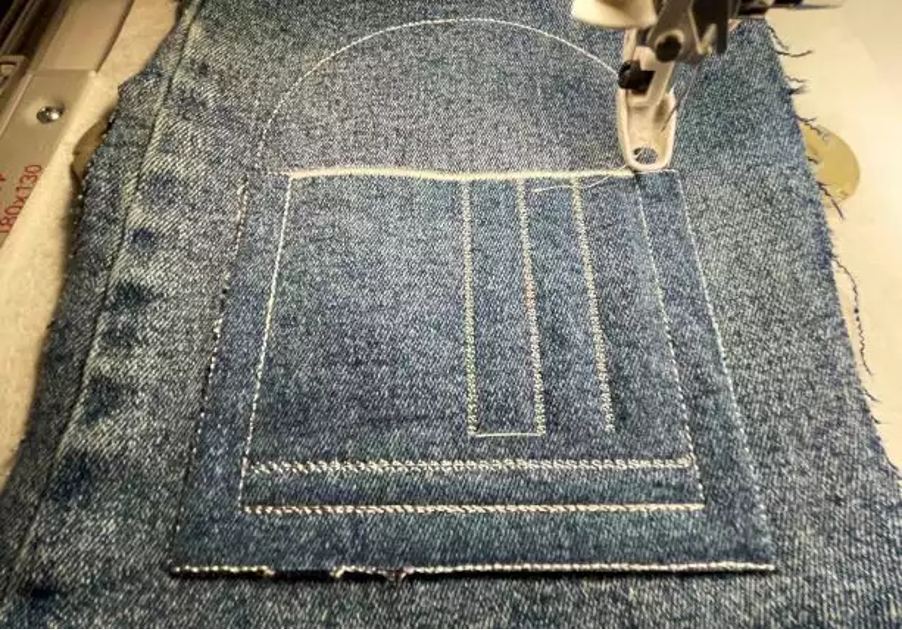
9 – Unhoop and cut close to the satin stitch edge. Normally you should cut after the outer edge, but since the fabric is much thicker than ordinary quilting fabric, we will assemble the chatelaine in a different way. Be careful not to cut into the satin edge.
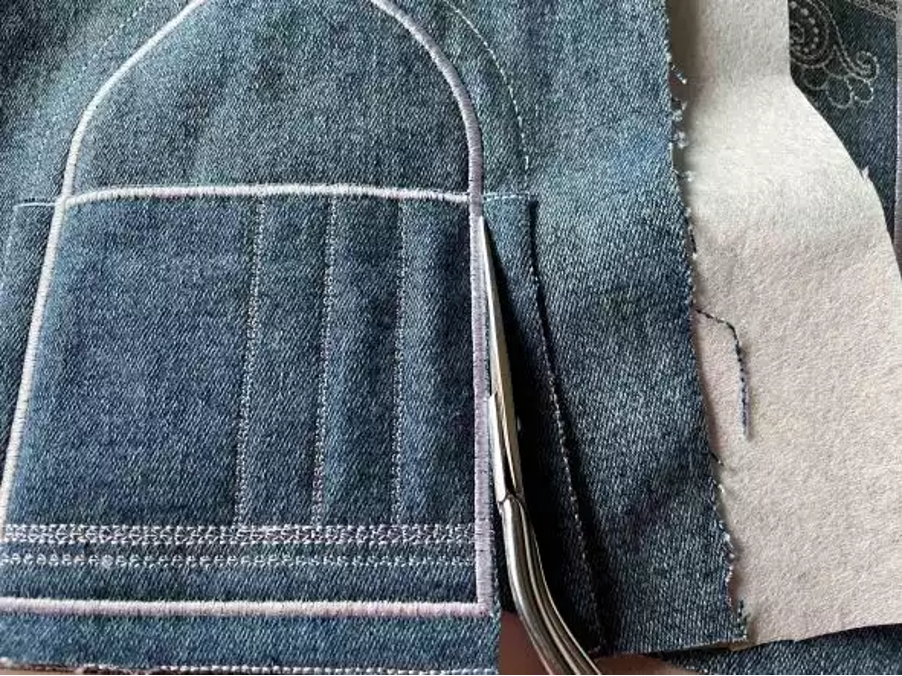
10 – Make one more and set them aside for now.
Make the Pocket Back
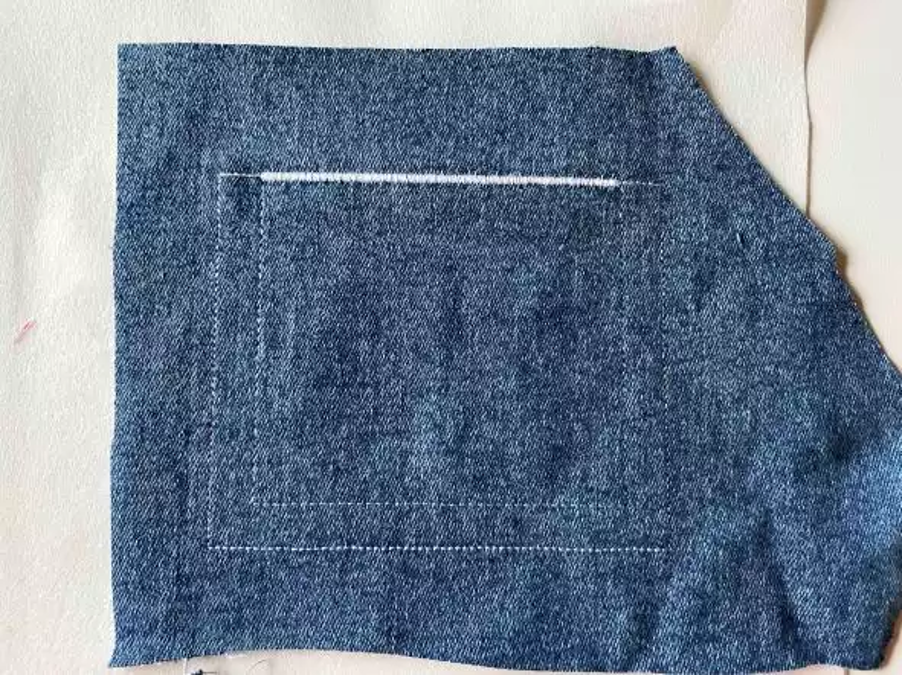
11 – Hoop tearaway stabilizer in the 180 x 130mm metal hoop and stitch out colour 1, this makes a placement line for the fabric.
12 – Place the fabric on top of the placement stitches, make sure it covers the stitching on all sides and stitch out colour 2, this secures the fabric in the hoop. Stitch out the remaining colours in the embroidery design, unhoop and cut close to the satin edge. Make one more.
Making the Neck Strap

Prepare and combine the embroidery design
In this project, the neck strap is made in a little different way than the original one. The neck strap will be in one piece, and it will also be lined. If you prefer the original way to make the neck strap the instructions can be found in the instructions provided with the collection. Find it Here
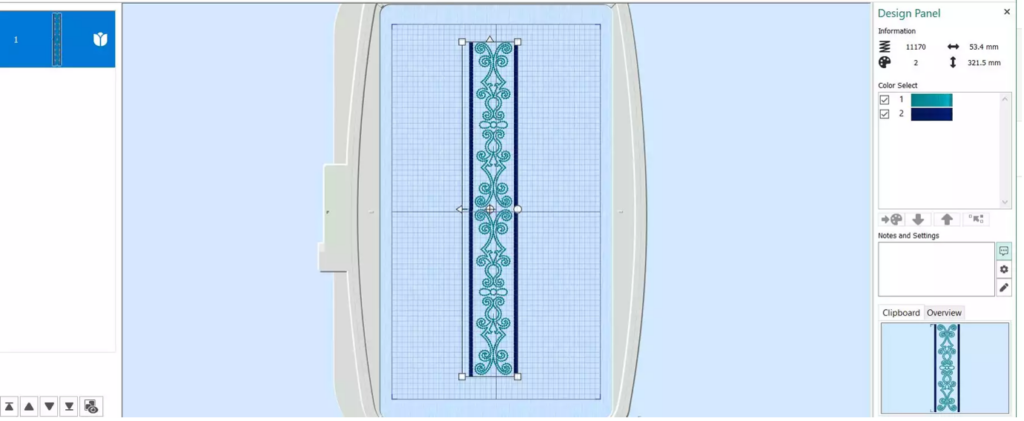
13 – Open mySewnet embroidery software, choose Blank Canvas and Change Hoop to 360 x 200 mm hoop
14 – Insert the neck strap embroidery extension design.
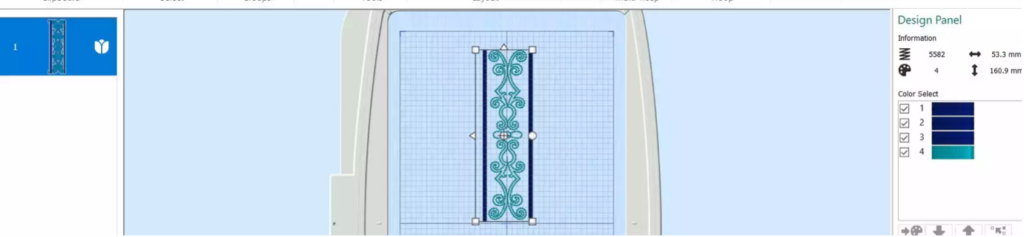
15 – Click on Duplicate, place the embroidery designs close together, zoom in to get a close fit.

16 – Click on Combine, Combine All and then Coloursort. Finally, click on Centre in Hoop
The finished result should look like this:
Stitching Out the Neck Strap
17 – Draw a straight line in the middle of the fabric lengthwise. This is to get the embroidery straight when stitching out the different parts of the neck strap.
18 – Stitch out the embroidery and continue to add sections with the help of Precise Positioning/ Design Positioning. The finished length is about (65-90 cm) depending on how many repeats you do. It is better to do it too long and shorten it later.
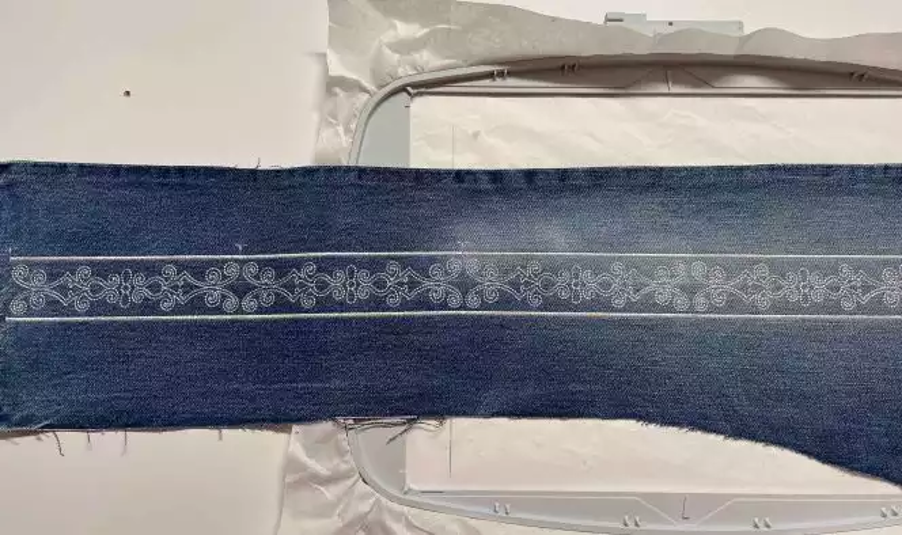
19 – Unhoop the embroidery, tear away excess stabilizer and cut out with a 3½ cm (1 ⅜”) seam allowance on the long sides.
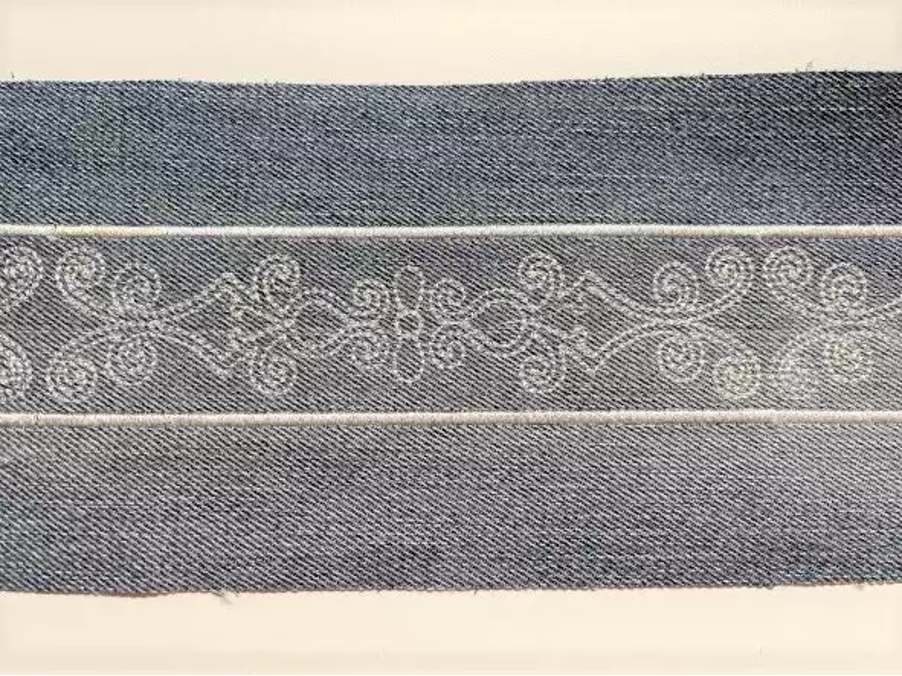
20 – Sew the long sides of the neck strap together with a 6mm (¼”) seam allowance. Turn right side out and press.

Putting It All Together
21 – Decide the length of the neck strap by pinning it to the pocket pieces and try what is most comfortable for you. Add 2½ cm (1”) seam allowance at the ends.
22 – Put the pocket front and back pieces on top of each other wrong sides together. Stitch around the edges with a zig-zag. When you come to the top of the rounded edge of the pocket piece, insert the neck strap between the layers. The embroidery on the neck strap should be visible from the pocket side. Catch the neck strap in the seam. Then topstitch with a straight stitch on top of the zigzag around the edge.
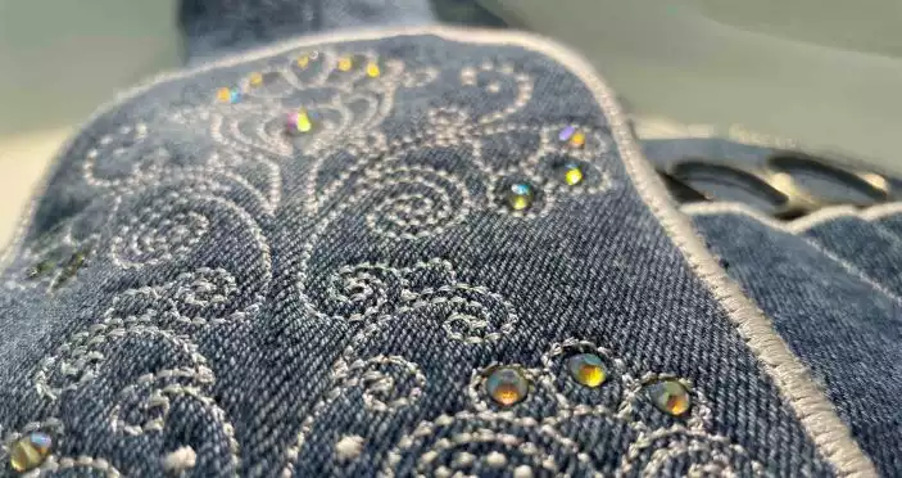
23 – Your chatelaine is now finished but can be further embellished with hotfix rhinestones or pearls!
Conclusion
Creating your own DIY embroidered chatelaine project is a fun and rewarding way to add a touch of vintage charm to your sewing arsenal. With your PFAFF sewing and embroidery machine and the embroidery designs from mySewnet, you can create a beautiful and functional accessory that will keep your most-used tools close at hand.
Don’t forget to share your completed project with us! Follow us on our Facebook page, Pfaff Australia or Instagram, tagging @pfaff_sewing_australia and using the hashtag #pfaffingaround