

Are you looking for a quick and easy sewing project that you can complete in just a few hours? Look no further than making a simple skirt with an elastic waistband!
Not only is this a great project for beginners, but it’s also a versatile piece that can be dressed up or down depending on the occasion.
In this blog post, Julia will walk you through the steps to create your own custom skirt that will fit perfectly and be a staple in your wardrobe for years to come.
This is a quick easy project and a great stash buster! Perfect for remnants!
Let’s start with drafting a pattern. This is a pretty simple process for such a basic garment.
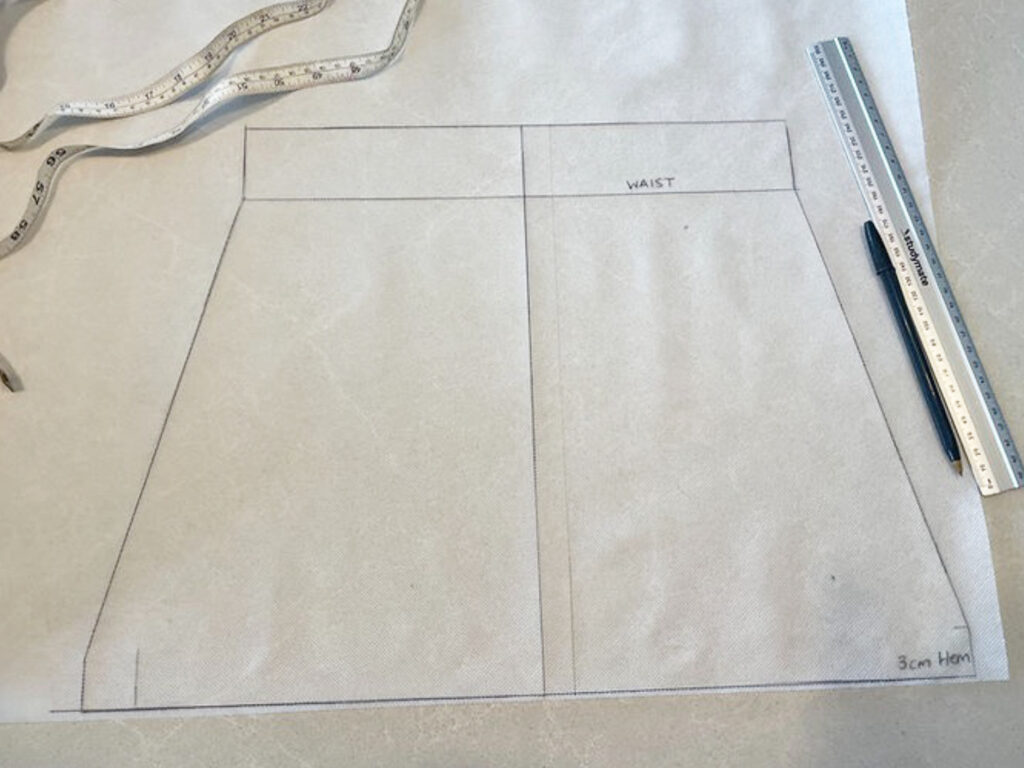
Drafting the pattern for your simple elastic waist skirt:
1 – Start by measuring the waist, in this case, I am making a size 5, and the waist measurement is 56cm. Add 25% to the waist measurement to get your waist circumference. You may like to add more than 25% if you want it fuller at the waist.
Divide this measurement by 2 to get a front and back waist measurement.
I am using a 35cm front/back waist
2 – Measure your desired length, I am using 28cm. Then add 3cm for a hem and 5cm at the waist to encase a 2cm wide elastic. You will need to add more if using a wider elastic.
3 – Draw a line down the centre front
4 – Draw a line across at the hemline.
5 – Draw straight down, 5cm at the waist side seam, and up 3cm at the hem side seam.
6 – Use a ruler to connect a line between these points, adding approximately 30% more volume to the hem than the waist. My hem measurement is 46cm front/back
You should end up with something like this:
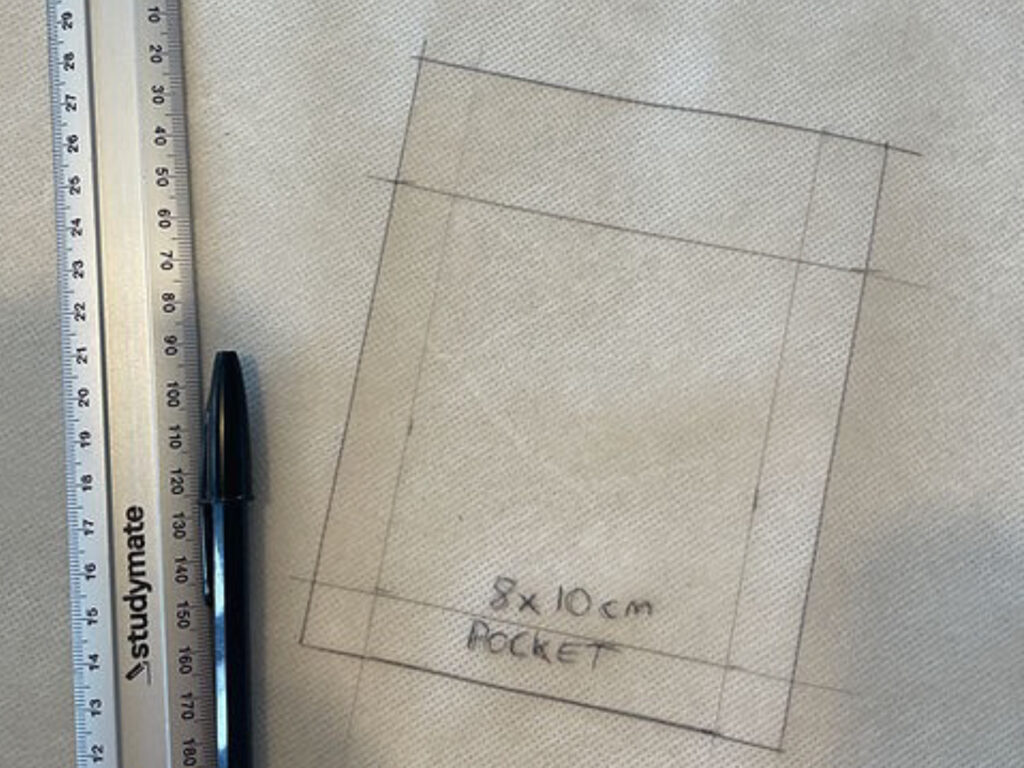
I also added a pocket piece
Simply draw your desired size pocket, I went with 8x10cm
Add 1.5cm seam allowance to the sides and bottom and add a 3cm seam allowance to the top.
Cutting and Construction:
1 – Time to cut out. Cut one pocket and one pair of your skirt piece.

2 – I have chosen to do some machine embroidery on the pocket. I used a built-in paisley design on my PFAFF creative 3.0
I enlarged the design by 10% and used two of the paisley designs, rotated to sit nicely together in the space I had.
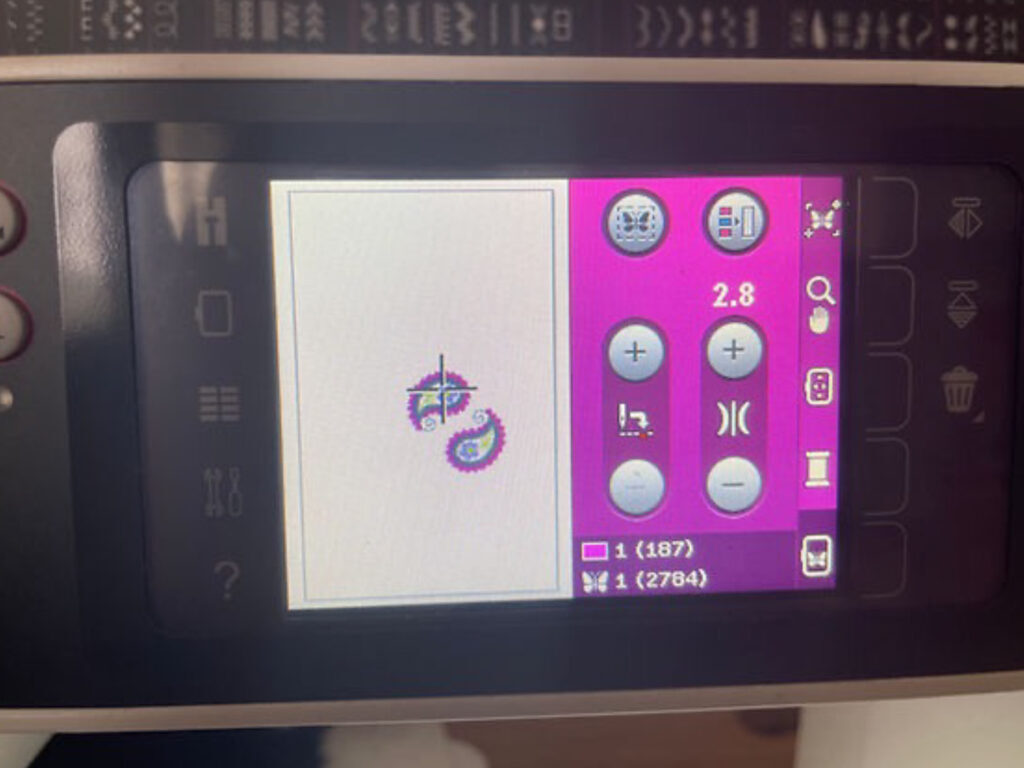
3 – I used the grand magnetic hoop for this project. I only had a small piece of fabric to use for my pocket, the magnetic hoop is perfect for this as you don’t need the extra fabric to feed into a standard hoop
I also used a layer of lightweight stabiliser
Simply lay the stabilizer, then your fabric onto the hoop, then attach your magnets. These hoops are a GAME CHANGER!
Once my embroidery was done I could lay my pattern piece on top for cutting, positioning the embroidery in my desired location.
With the cutting out sorted, we are ready to construct the skirt, starting with the pocket.
4 – Press under 1.5cm seam allowance on the sides and bottom of the pocket. Press down 3cm seam allowance at the top.
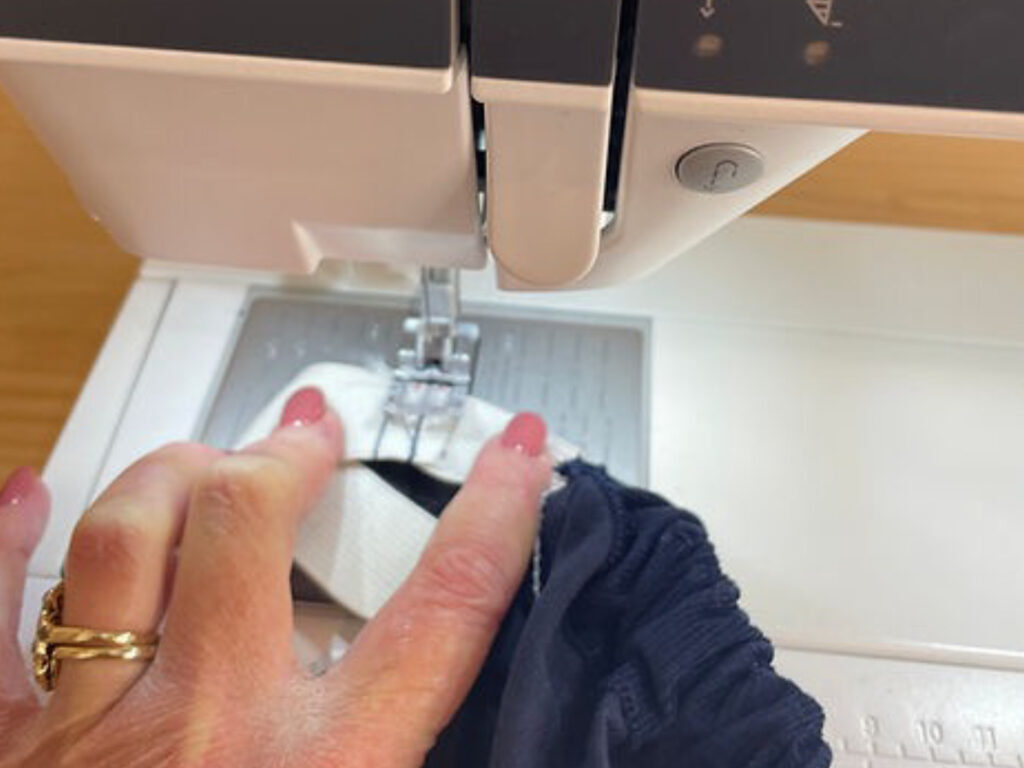
5 – Stitch down the top of the pocket. Pin pocket in place on the skirt (I went with front, bottom left, but you could choose any position you like)
6 – Stitch around the sides and bottom of the pocket. I used a triple straight stitch for this to get a topstitched effect whilst using standard thread.
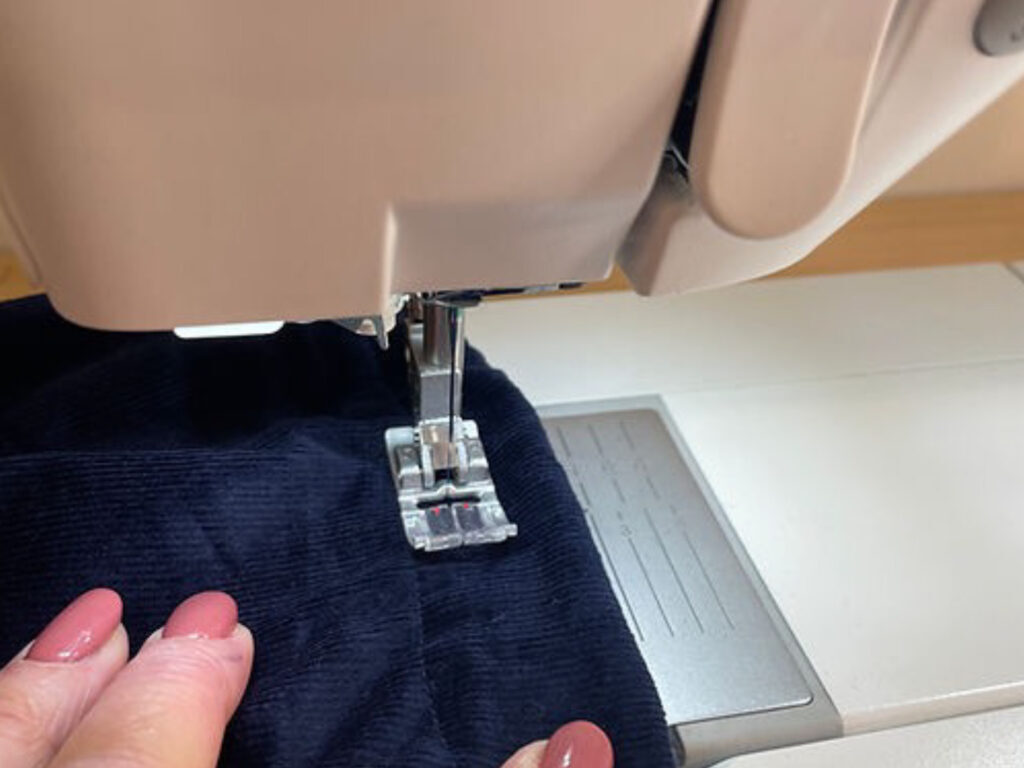
7 – With right sides together, sew your side seams using a 1.5cm seam allowance (overlock if you have one)
8 – Press the hem up 1.5cm, then turn it up another 1.5cm, and press. Stitch hem
9 – Press the waist down 1cm, then turn down another 2.5cm. Stitch, leaving a 3cm opening to thread the elastic through.
10 – Cut your elastic to the desired length, then thread through using a safety pin.
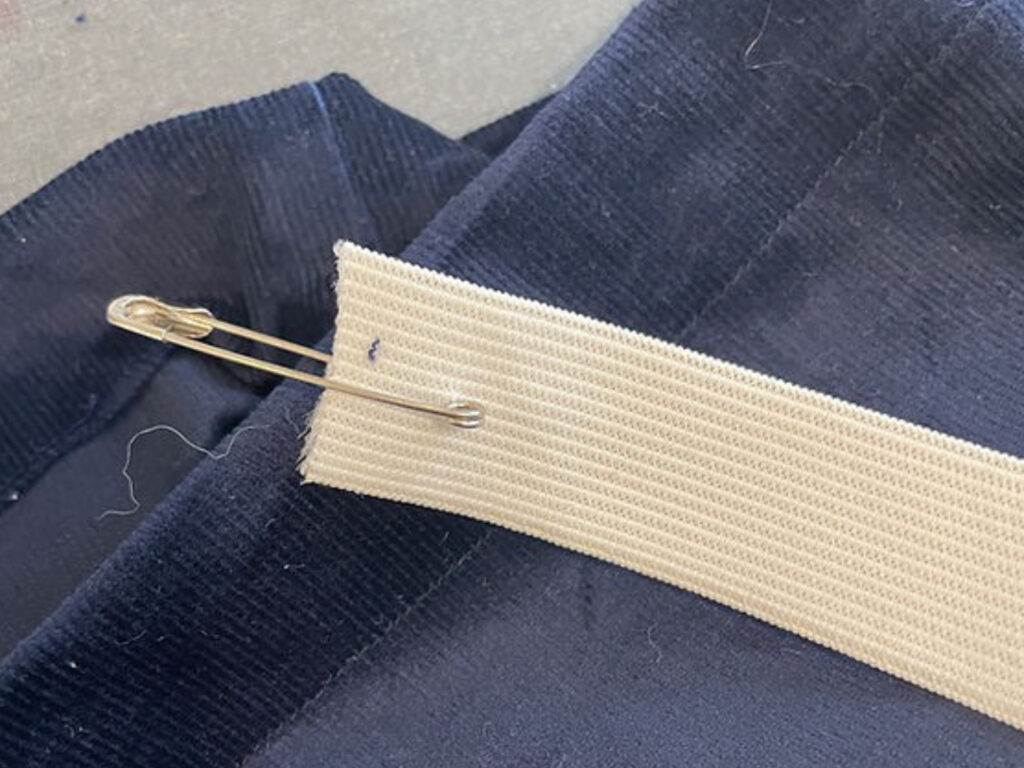
11 – Stitch through elastic to join
12 – Stitch closed the gap you threaded the elastic through.
13 – I chose to sew two extra rows of stitching through the elastic as I used a soft braided elastic, this helps it not to roll or twist.
And your skirt is done!
I’ve made a size 5 here, but you could use the same method for an adult too.
Fabric requirements will depend on the size you’re making and the width of the fabric. I used 50cm of 140cm wide fabric.
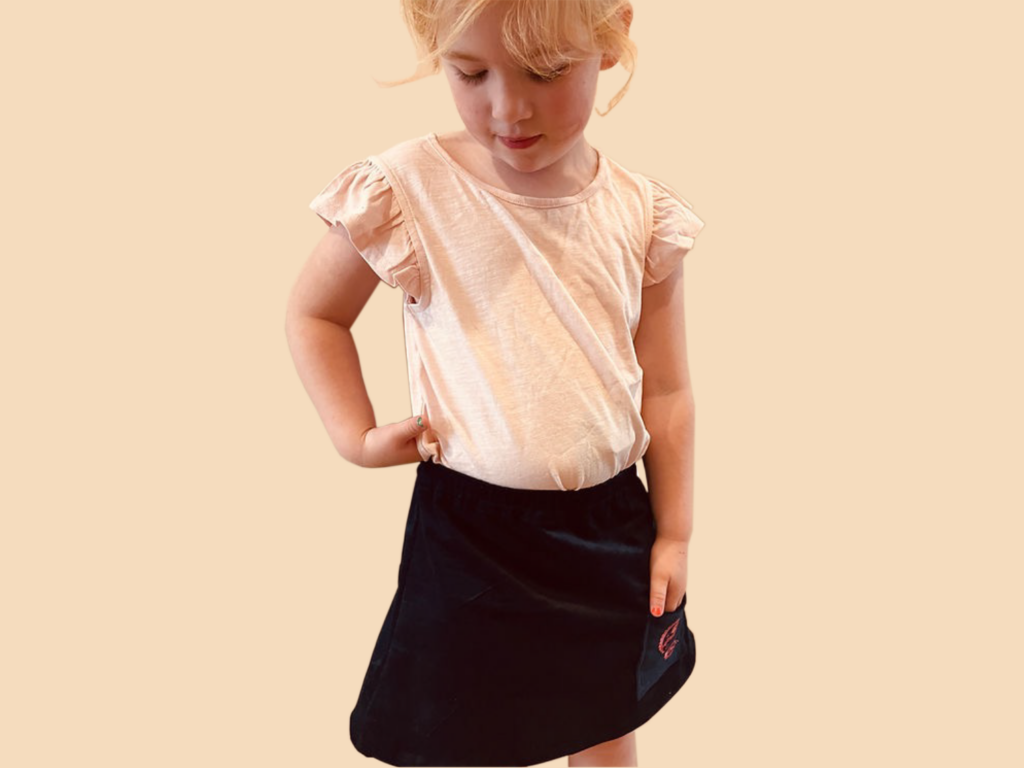
I’ve kept it pretty simple with this make, adding just a touch of embroidery to elevate it. You could go wild with contrasting pockets, adding trims or a gathered frill. The possibilities are endless with this as a basic base.
Until next time, happy sewing
Julia x