

Looking to expand on your sewing skills and possibly looking to try your hand at self-drafting a skirt? Then this project is perfect for you!
It is a basic straight skirt, and the drafted pattern then can be used to create other skirts, e.g. a pencil skirt by tapering in the side seams or creating embellishments such as flounces, etc to add to this shape.
This Taffeta Pencil skirt is easy to sew and is perfect to wear in the office or out to dinner.
Requirements:
Here is what you need to make your own Straight Skirt.
- Drafting paper
- Ruler
- Pencil
- Taffeta Fabric (amount will depend on your own measurements and more will be required for a directional print.)
- Lining Fabric (same amount as your taffeta)
- 12cm invisible zip
- Co-ordinating all-purpose thread
- Fusible interfacing for waistband (for the amount refer to your measurements for the waistband).
- Fabric marker
- Iron
- PFAFF Invisible Zipper Foot
- PFAFF Sewing Machine (we used the creative 4.5 sewing and embroidery machine)
- Hook and bar closure
Drafting:
1 – Measure at your natural waistline and at the widest part of the body. This may be your hips, bum, or thighs.
2 – From where your natural waist was taken measure the vertical drop to the widest part of your body.
3 – Now measure how long you want the skirt to be. E.g. from your natural waist to your knee.
4 – Take a piece of large paper and cut it to the following dimensions:
- Your skirt length + 10.5cm
- The width of your widest measurement is divided by 2 + 10.5cm.
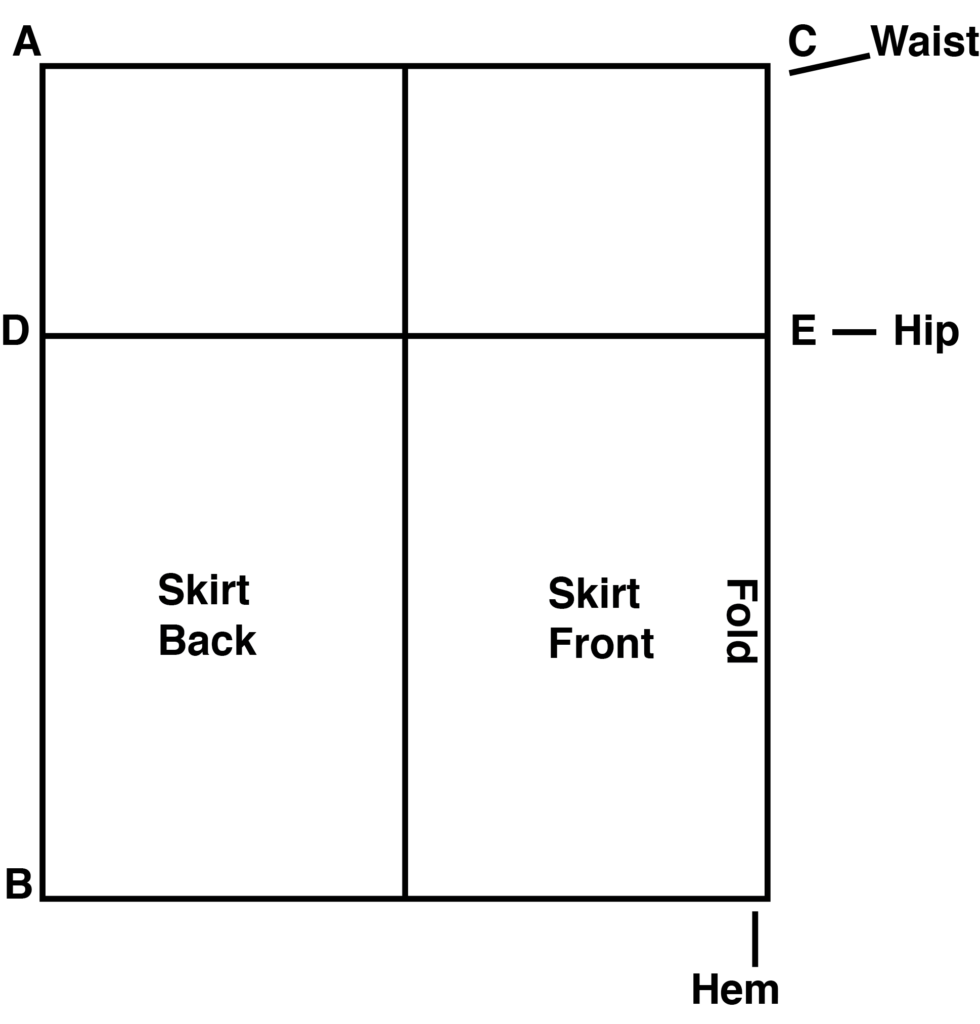
5 – Draw a rectangle in the middle of your paper which is:
- The length of your hem measurement from waist to hem
- ½ the width of your widest measurement + 1.5cm to 2cm for ease. The amount of ease will depend on your own body. The ease is important, so you can sit in your skirt!
6 – Length A to B = the length of your skirt from waist to hemline excluding the width of the waistband.
7 – Length A to C = your hip measurement divided by 2 plus your ease.
8 – Locate the center at the top and bottom of the rectangle and draw a vertical line down the center. This will create 2 pattern pieces. Note on the right side: Skirt Front cut on fold and note on the left side skirt back.
9 – Add the hip line (D to E) Across the width of the rectangle and down from the top by your waist to hip measurement.
10 – Mark across on each side for a quarter of the waist + 4.25cm for the 2 darts on the back, and a quarter waist plus 2.25cm for the dart on the front. Make these points F and G.
11 – Measure up 1.5cm from points F and G and make these points H and I. Draw lines from H to A and from I to C. Slightly curve these lines.
12 – Starting with the front of the skirt. Your dart should be 10.5cm from the fold, so measure in 10.5cm and make a mark on the waistline. This will be the center of the dart, mark these measurements. Now measure out 1cm on each side of your mark and this becomes the outside of our dart. The length of your front dart should be 10cm and it should run parallel to the skirt front. Draw the dart by joining the marks you made.
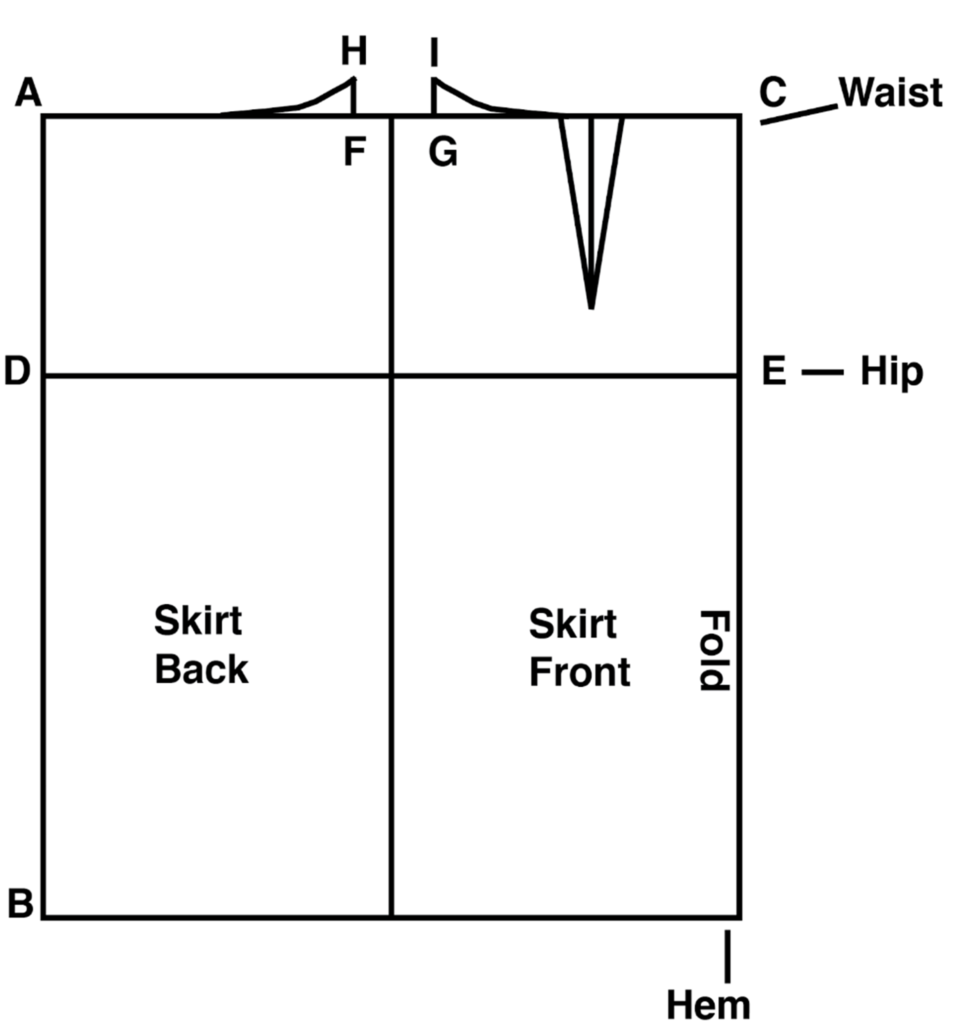
13 – Divide your quarter waist measurement by 3 for the spacing. Mark your 2 dart placements on the waistline. The left dart length is 14cm and the right is 12.5cm. The width of each dart is 2cm and should run parallel to the side. Mark these darts in the same method as step 12.
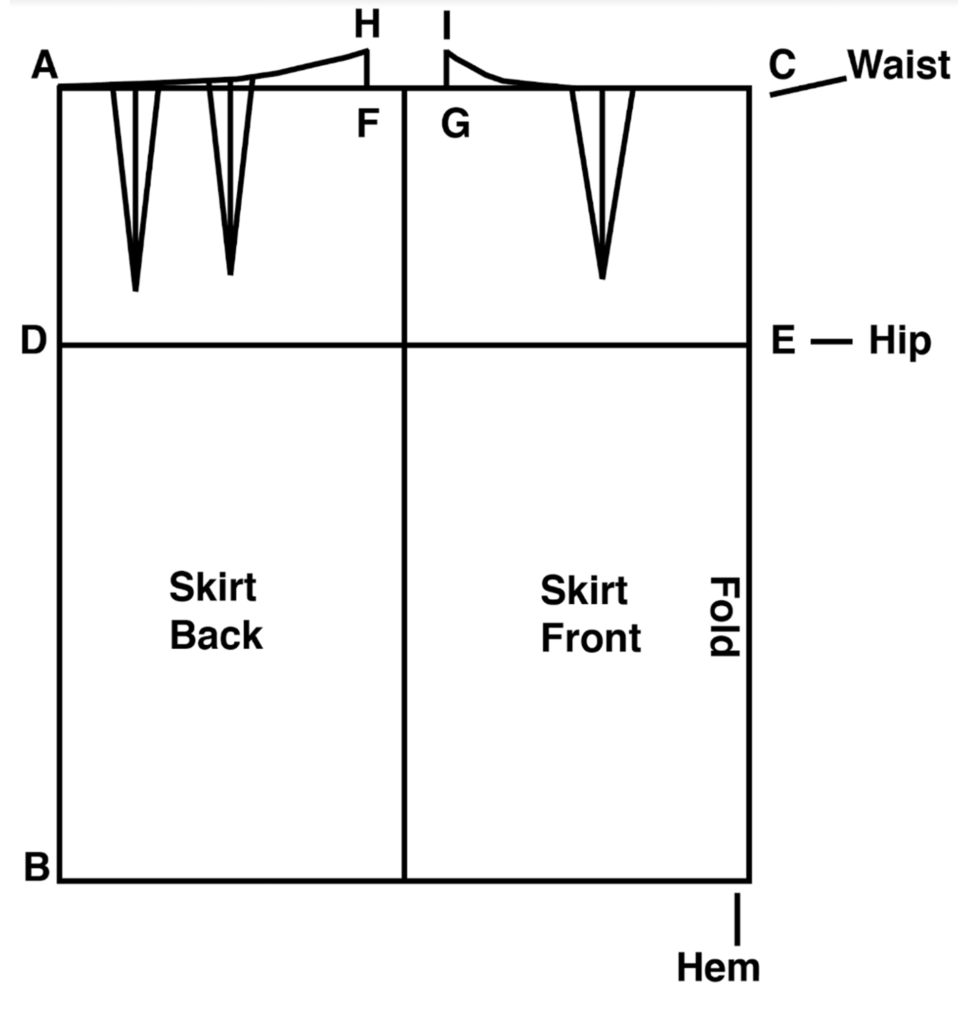
14 – Marks F and G need to be smoothed from the waist to the hip line. This will allow for the curve of your body.
15 – Add seam allowance of 1.5cm. To do this, cut out your pattern pieces, and stick them to another piece of paper and add a seam allowance of 1.5cm. Don’t add seam allowance to the center front as it is cut on the fold.
Now you have a basic skirt pattern, that you can make a nice pencil skirt from or use as a base, to make many other skirts!
Tip: Before proceeding to make this out of your fashion fabric, make your skirt in some cheap fabric such as calico to check the fit, and to see if you need to make adjustments.
16 – For the waistband create a rectangle that is your waist measurement + 5m x 10cm.
Cutting:
1 – Cut your front pattern piece on the fold. 1 out of Taffeta and one out of lining.
2 – Cut 2x your back panel out of the taffeta and lining. Ensure you mirror the pattern so you get one for each side. Transfer dart markings to your fabric using a fabric marker.
3 – Cut 1x rectangle that is your waist measurement + 5 x 10cm in the taffeta
4 – Cut 1x rectangle that is your waist measurement + 5 x 10cm in fusible interfacing.
Construction:
Seam Allowance is 1.5cm unless otherwise specified
1 – Pin and sew all darts. Press towards the center.
2 – Sew side seams
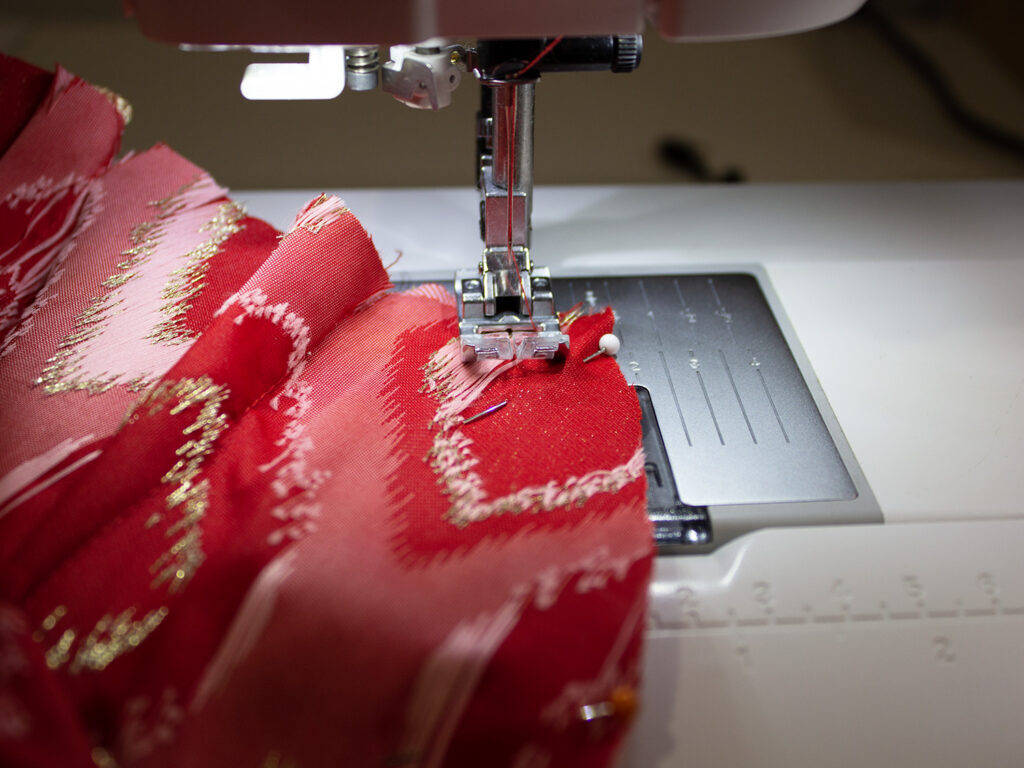
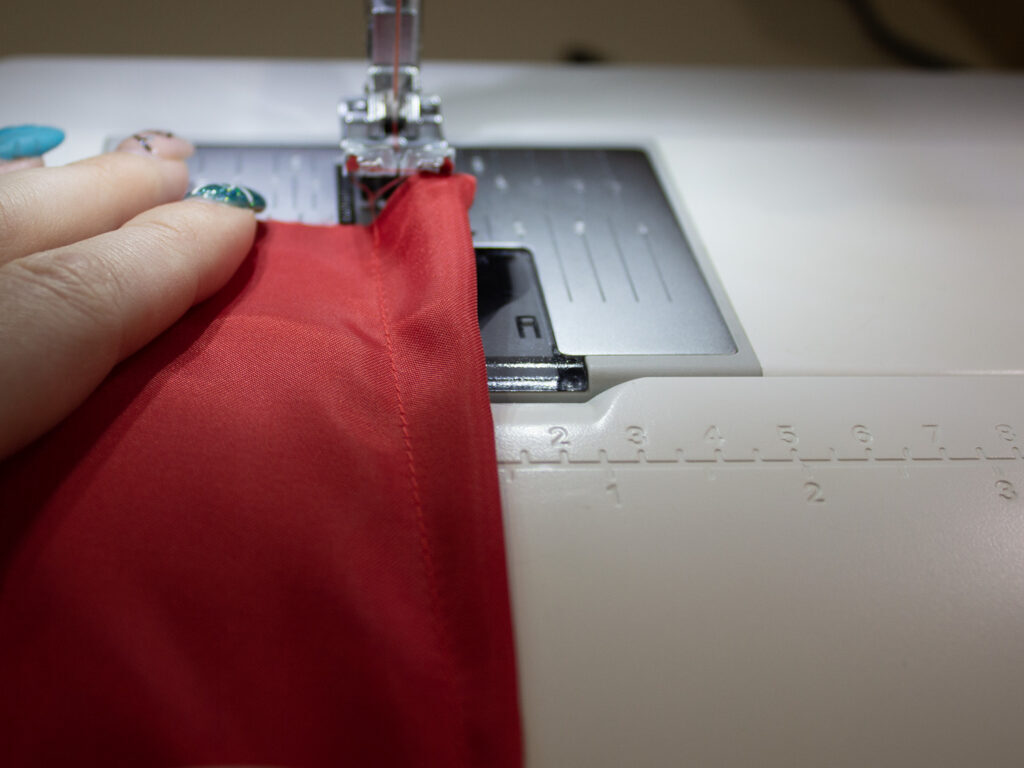
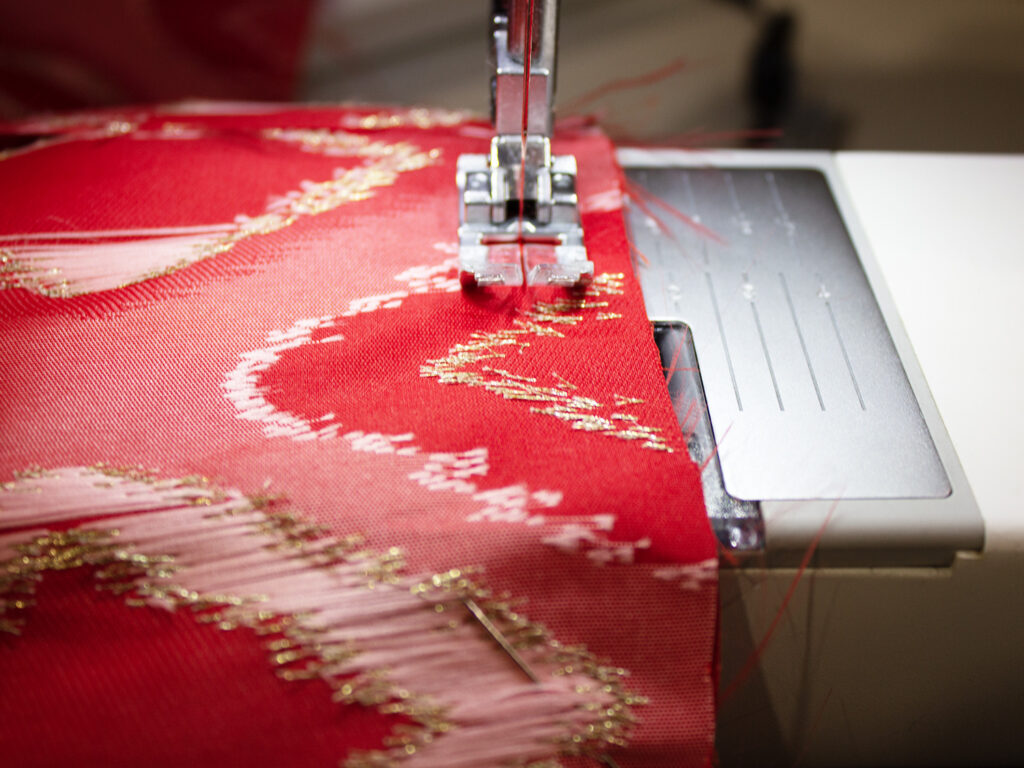
3 – Change your presser foot to the Invisible Zipper Foot.
4 – Pin the zipper coil right side down along the edge of one side of your center back seam.
5 – Starting at the top of the zip, position the zipper teeth under the groove in the invisible zipper foot. Carefully stitch down the zip, stopping when you reach the zip stopper.
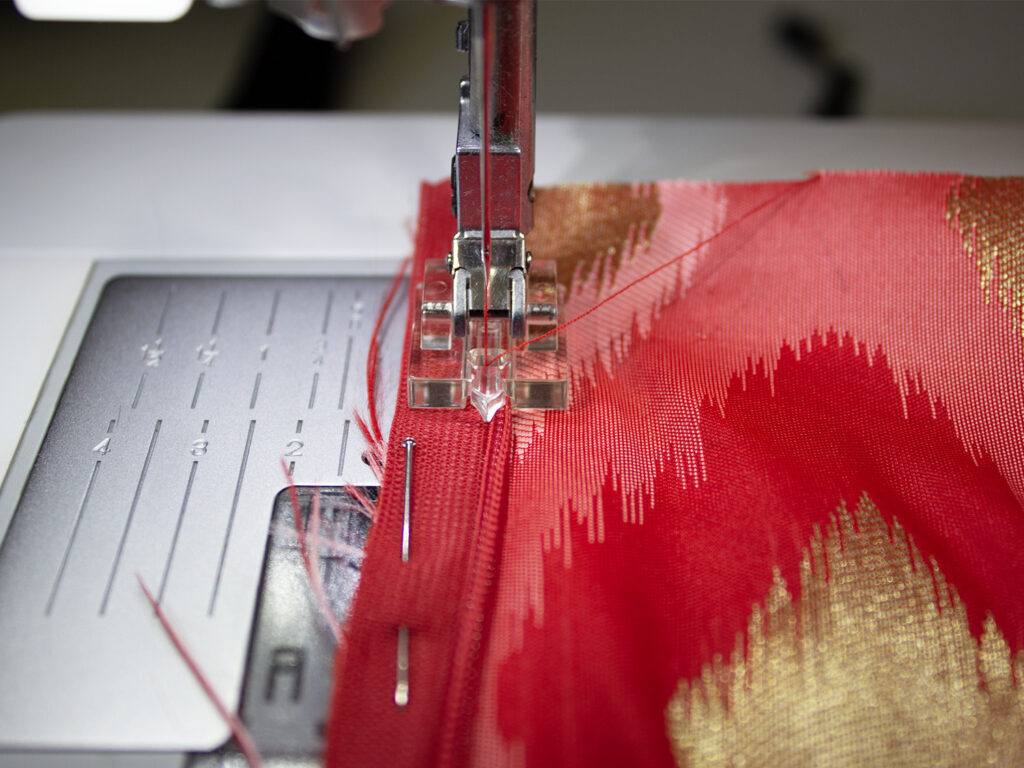
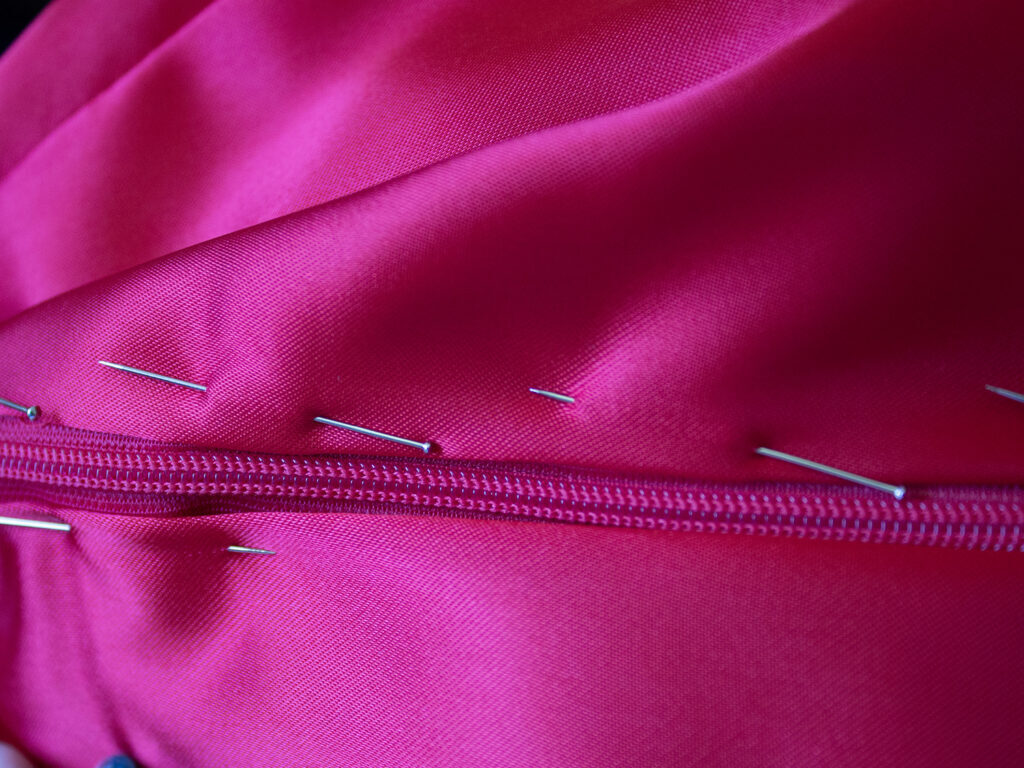
6 – Pin the other side of the zip to the remaining center back seam edge.
7 – Sew in place using the same method as step 5.
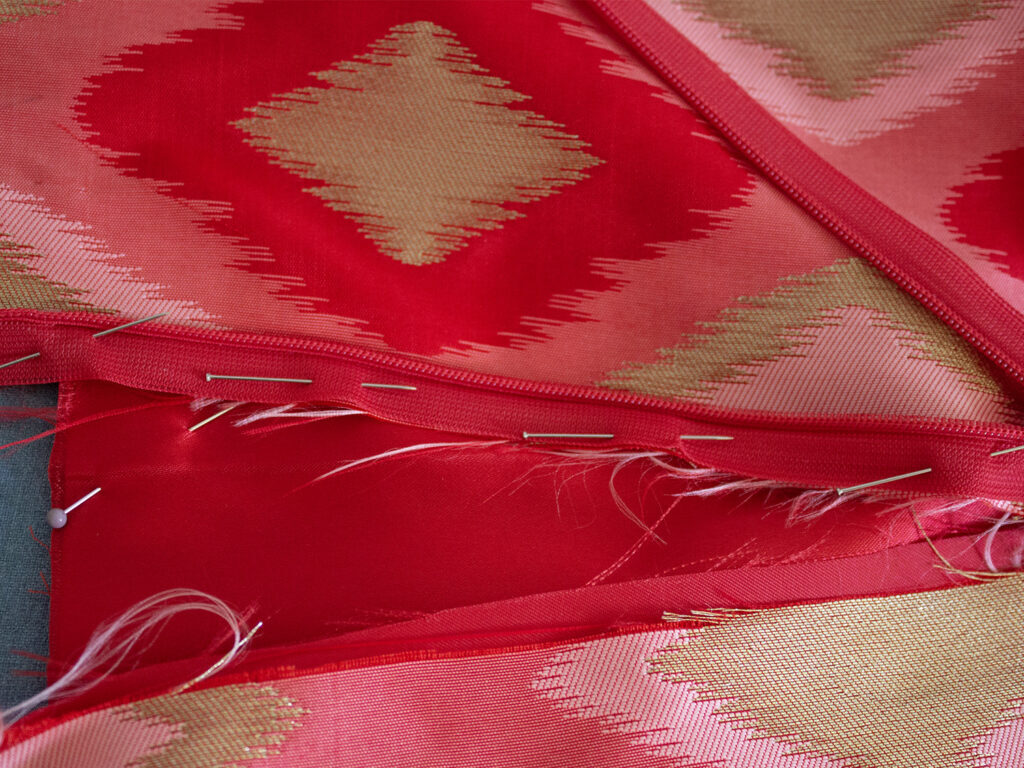
8 – To finish your seam change back to your all-purpose foot. Pin the seam and sew starting from the end of the zip.
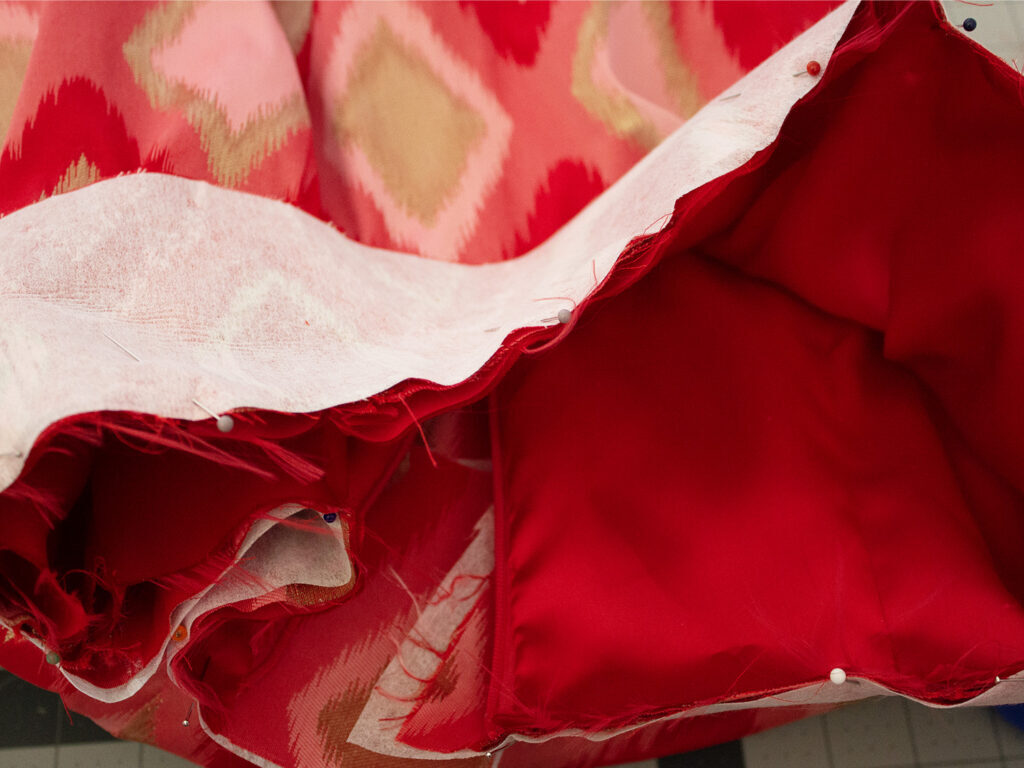
9 – Repeat steps 1 and 3 for lining pieces.
10 – Fold the lining seam allowance in and pin it to the back of the zip. Hand-stitch in place.
11 – With right sides together (outer skirt and lining) pin around the hem of the skirt. Sew.
12 – Turn so the fabric is the right way to push the lining inside the skirt. Baste the lining to the top of the outer skirt.
13 – Fold the lining slightly to the inside of the hem and press.
14 – Pin the waist band to the top of the skirt right sides together. With one side overhanging the skirt top. Sew.
15 – Fold over to the inside of the skirt. Now fold up the raw edge and pin.
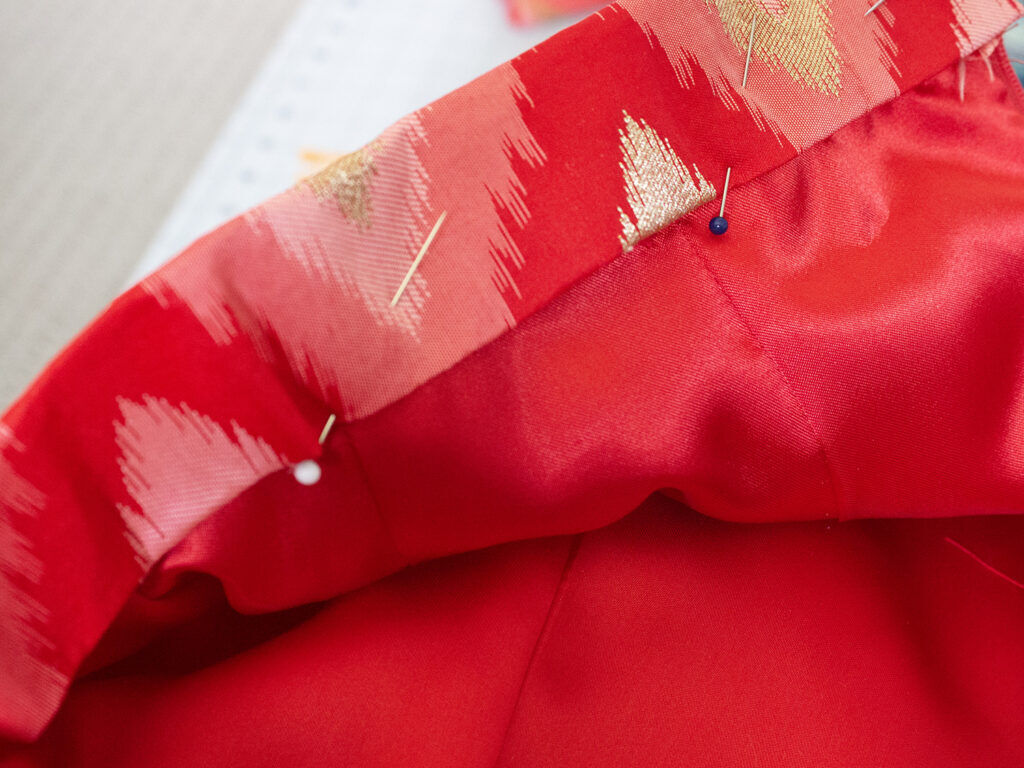
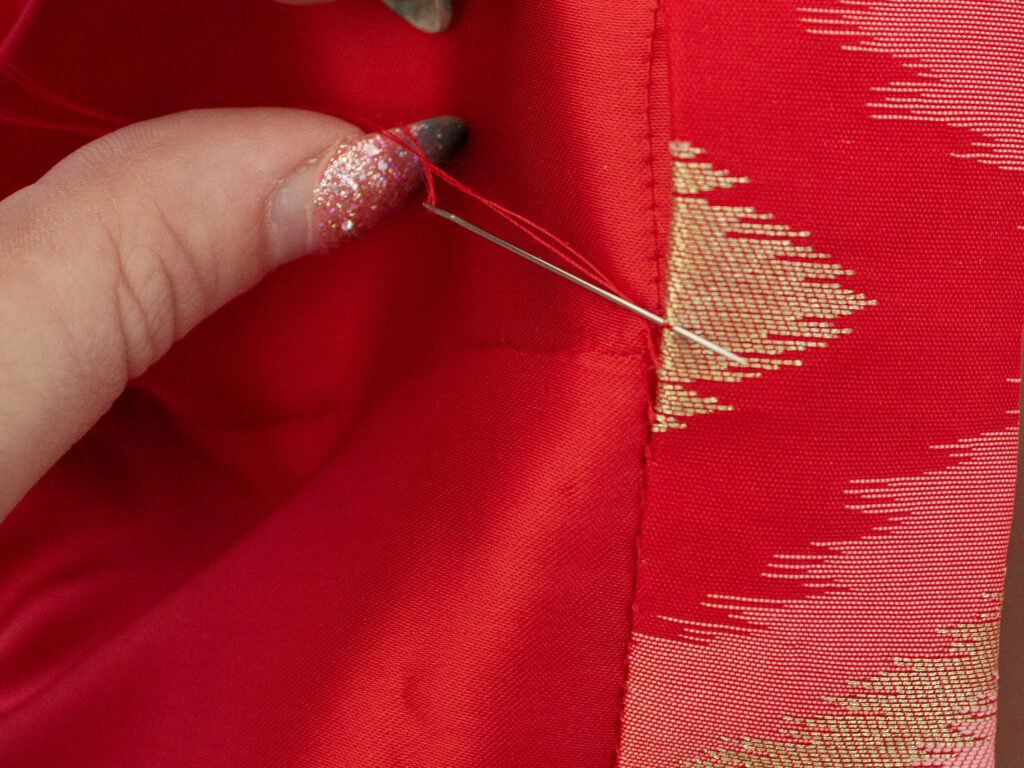
16 – Whip stitch the inside of the waistband in place. By hand-stitching this in place, there is no visible stitching on the outside.
17 – Try the skirt on to determine where to attach the hook and bar. Attach the bar to the side of the waistband that finishes at the end of the skirt and the hook on the side that hangs over.
Conclusion:
Now you have drafted and created your very own Straight Skirt!
Now you have drafted and made this skirt for yourself, why not try making it in different colours, and different lengths and playing with some embellishments to design a skirt that is truly unique to your style!
Be sure to share your results from this Creating Your Own Straight Skirt project with us on social media by tagging @pfaffsewingaus and #pfaffsewingaustralia