

Machine Compatibility
hobby 1042, 1040, 1032, 1030, 1022, 1016
tiptronic 6112, 6110, 2010 select 2.0, 1528, 1526, 1520 expression 2014
select 4.2, 4.0, 3.2, 3.0, 1548, 1546, 1540, 1538, 1536, 1530 stretch & jeans 6091, tiptronic 6270, 6250, 6232, 6152, 6122
tiptronic 2040, 2030, 2020, expression 2036, 2034, 2028, 2026, 2024 quilt expression 2046, 2044, 2042, creative 2124
expression 2038, quilt expression 2048, performance 2058, 2056, 2054, creative 7570, 7562, 7550, 7530, 2170, 2144, 2140, 2134
creative sensation pro 2, creative sensation pro, creative sensation, creative vision, creative performance, creative 4.5, 4.0, 3.0, 2.0, performance 5.0, 5.2, quilt expression 720, 4.2, 4.0, expression 710
expression 3.5, 3.2, 3.0, 2.0, 150
creative expression 750, creative elevate 680, quilt expression 725, expression 715
creative ambition 640, creative 1.5, quilt ambition 635, 630, ambition 620, 610
quilt ambition 2.0, ambition 1.5, 1.0 ambition essential
passport 3.0, 2.0,
SMARTER BY PFAFF 260c, 160s, 140s
creative icon 2, creative icon, performance icon, creative performance 950
Perfect 1/4 Inch Foot with Guide for IDT™ System
Description
The Perfect 1/4 inch Foot is designed to help you achieve a 1/4" (6mm) or scant 1/4" (<6mm) seam with piecing.
$55.00
Description
Description
Machine Compatibility: B, C, D, E, G, J, K, L
Not sure which group your machine belongs to? Check out the Machine Compatibility Chart
Piecing
Piecing
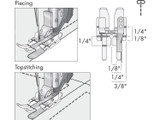
The Perfect 1/4 inch Foot is designed to help you achieve a 1/4″ (6mm) or a scant 1/4″ (<6mm) seam when piecing. The needle hole in the foot is oval shaped allowing you to adjust the needle position.
The distance between the centre needle position and the guide is less than 1/4″ (6mm).
- Snap-on the Perfect 1/4 inch Foot*
- Engage the IDT™
- Select a straight stitch
A. For a 1/4″ (6mm) seam; adjust the needle position one or two steps to the left.
B. For a scant 1/4″ seam; select a centred needle position or one step to the right. - Place the fabric pieces right sides together under the presser foot, aligning the edges of the fabric with the guide on the foot.
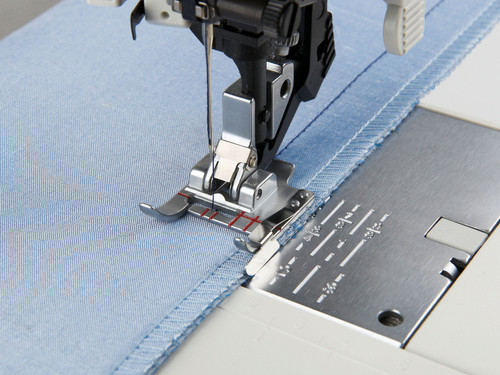
- Sew the fabric pieces together guiding the fabric so that the edges touch the guide
- Press the seam allowance and measure the block
Note: Depending on the weight of your fabric and thread it may be necessary to adjust the needle position to achieve your desires seam allowance. Move the needle to the right to decrease the seam allowance and to the left to increase it. You can safely move the needle three steps in either direction but not more.
* Do not use the straight stitch plate when using the Perfect 1/4″ Foot.
Topstitching
Topstitching
The Perfect 1/4 inch Foot is also wonderful for topstitching. Adjust the needle position and use the guide to place your stitching exactly where you want it on your blocks, garments and home decor projects.
- Snap-on the Perfect 1/4 inch foot
- Engage the IDT™
- Select a straight stitch, triple straight stitch or the mock and hand quilting stitch. Adjust the needle position as desired if needed.
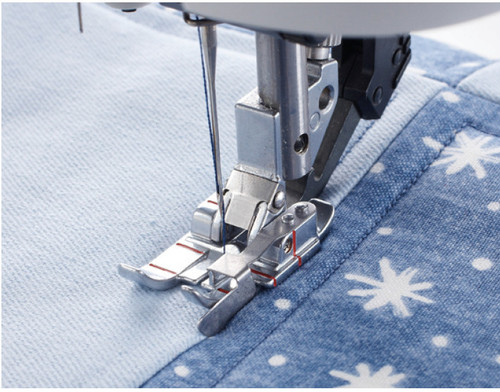
- Place the project under the presser foot so that the guide on the foot runs in the ditch of the seam or along the edge of the fabric. sew.
Note: Red markings on the Perfect 1/4″ Foot help you align the fabric when you start sewing, at corners at the end of your fabric.
For all machines with the manual presser foot lifters: When you are using any of the optional quilt feet with guides and sewing with the needle set to stop in the down position, it is recommended that the presser foot be lifted only as high as necessary for pivoting. Lifting the foot to the extra high position can cause the needle holder to touch the guide on the presser foot. The foot may become dislodged, causing damage to the needle and or the foot.
Additional information
Additional information
| Weight | 0.100 kg |
|---|
Related Products