


Machine Compatibility
tiptronic 6112, 6110, 2010 select 2.0, 1528, 1526, 1520 expression 2014
select 4.2, 4.0, 3.2, 3.0, 1548, 1546, 1540, 1538, 1536, 1530 stretch & jeans 6091, tiptronic 6270, 6250, 6232, 6152, 6122
tiptronic 2040, 2030, 2020, expression 2036, 2034, 2028, 2026, 2024 quilt expression 2046, 2044, 2042, creative 2124
creative 7560
expression 2038, quilt expression 2048, performance 2058, 2056, 2054, creative 7570, 7562, 7550, 7530, 2170, 2144, 2140, 2134
creative sensation pro 2, creative sensation pro, creative sensation, creative vision, creative performance, creative 4.5, 4.0, 3.0, 2.0, performance 5.0, 5.2, quilt expression 720, 4.2, 4.0, expression 710
expression 3.5, 3.2, 3.0, 2.0, 150
creative expression 750, creative elevate 680, quilt expression 725, expression 715
creative ambition 640, creative 1.5, quilt ambition 635, 630, ambition 620, 610
quilt ambition 2.0, ambition 1.5, 1.0 ambition essential
passport 3.0, 2.0,
SMARTER BY PFAFF 260c, 160s, 140s
creative icon 2, creative icon, performance icon, creative performance 950
Sew-on Button Foot
Description
Sewing on buttons can be a tedious job – but not when you use the Sew-on Button Foot!
$63.00
Description
Description
Sewing on buttons can be a tedious job – but not when you use the Sew-on Button Foot!
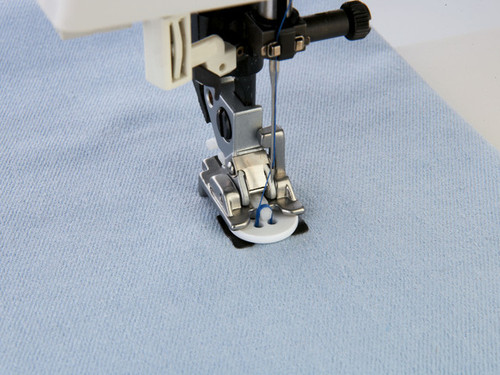
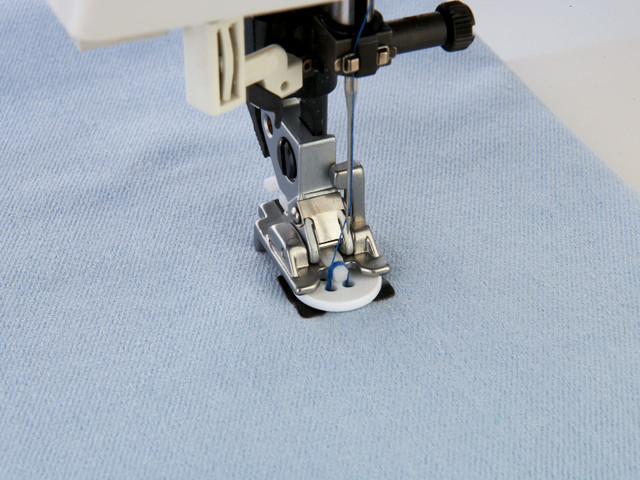
Use it to easily sew 2- or 4-hole buttons of various sizes in place. Just set the stitch width to match the spacing between the holes and your machine does all the work. By including a shaft, you can even sew on buttons with a thread shank, see illustration.
How to use:
How to use:
- Mark on the fabric where you want the button to be placed.
- Snap on the Sew-on Button Foot.
- Lower feed dogs.
- Insert the button between the black metal piece and the presser foot. Make sure that two holes are positioned in the cut-out of the presser foot.
- Place the fabric under the presser foot. Select button sew-on stitch or zigzag stitch. Lower feed dogs.
- Select width to match buttonholes. Manually turn the hand wheel to make sure that the needle enters the left hole.
- Start to sew. The machine will automatically tie off your button if using button sew-on stitch. If using zigzag, sew across button five times.
If you want your button to have a shank, push the plastic piece on the presser foot towards you, placing it between the two holes of the button. When you have finished sewing your button, pull the plastic piece back, remove your button from the presser foot and cut off the threads. Wrap the seam with sewing thread and make a knot.
The automatic needle threader cannot be used on Group L machines.
Additional information
Additional information
| Weight | 0.100 kg |
|---|
Related Products
Sale