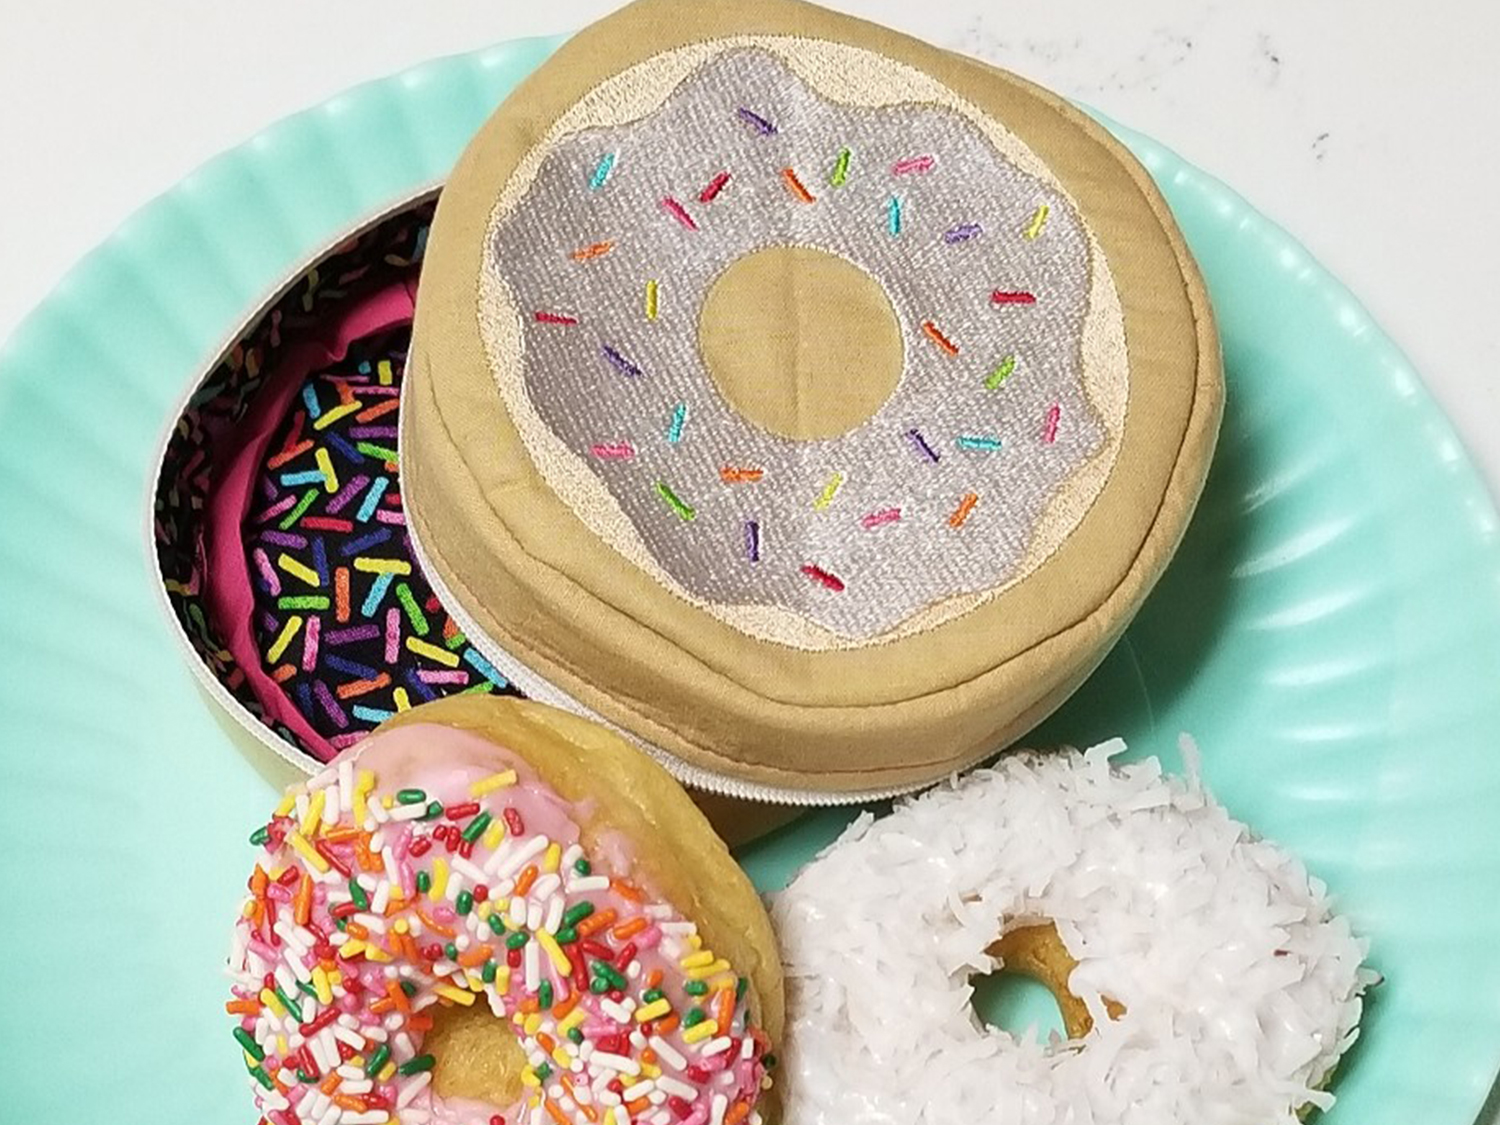
Stitch up one of these super fun donut-sized pouches to hold all your small accessories. Choose from one of two included donut embroidery files, and feel free to change the donut, frosting, and topping thread colours to whatever “flavour” you love.
For a non-embroidered option, use a bold print, or fussy cut a fun design. The zipper unzips almost all the way around, which means the pouch can be opened flat. And luckily, an entire box of these is calorie-free!
Sewing Requirements:
- PFAFF Sewing and Embroidery Machine
- 6D Dynamic Spring Foot or appropriate embroidery foot
- 0A Foot
- Zipper Foot
- B-Level Topstitch Foot for IDT System (P8206760-96)
- INSPIRA Universal needles - Size 80
- Quarter yard fabric for exterior
- Quarter yard fabric for lining
- Quarter yard Pellon Decor-Bond
- 10" piece of 1" twill tape
- 14" zipper
- 1 Packet of 1/2" double-fold bias tape
- Sewing thread to coordinate with the exterior fabric
- Basic sewing tools
- Panel templates (Pages 5 and 6)
Embroidery Requirements:
- creative 120 Square Hoop 120x120mm (P412968202)
- INSPIRA Tear-A-Way stabiliser
- Cotton or Polyester embroidery thread in tan (donut) and frosting/sprinkle colours
- Bobbin fill thread
- Embroidery files
Cutting Instructions:
From Main Fabric and Lining Fabric:
- 2 pieces Main Panel (pattern piece included, 5.” circle) NOTE: If embroidering, wait until after embroidery to cut one of the main panel exteriors.
- 2 pieces 1 5/8"Lx15”W Zipper Gusset
- 1 piece 3 1/4”Lx2 1/4”W Hinge
From Decor-Bond and Fusible Fleece:
- 2 pieces Main Panel Interfacing (pattern piece included, 5” circle)
- 2 pieces 1”x14.” Zipper Gusset
- 1 piece 2 1/2”x1 1/2” Hinge
Preparation:
- Mark centers of long edges of zippers gussets and short edges of hinges. Fold main panels in half twice to mark four even points around the edge.
- Fuse Decor-Bond to the wrong sides of all corresponding exterior pieces. On the main panels and hinge, there should be 3/8" of fabric showing around all sides. On zipper gussets, there should be 1/4" of fabric showing along zipper edge and 3/8" along all other edges. (Note: if embroidering one of the main panels, do not fuse Decor-Bond until after embroidery.)
- Fuse fleece to wrong sides of all corresponding lining pieces. On main panels and hinge, there should be 1/4" of fabric showing zipper edge 3/8" along all other edges.
Embroider:
- Snap-on the 6D Dynamic Spring Foot or appropriate embroidery foot. Load design in the machine. Hoop 9"x9" piece of exterior fabric centered with Tear-A-Way stabiliser in the 120x120mm hoop. Go to Embroidery Stitch Out mode and thread machine with first colour cotton/polyester thread on top and bobbin fill on bobbin.
- Press Start/Stop button. Stitch out design, following prompts for thread colour changes.
- Remove hoop and stabiliser. Find center of paper Main Panel pattern piece by folding in quarters. Stick a pin through center, then stick a pin through center of donut hole to center donut in pattern piece. trace around pattern and cut out with scissors.
- Fuse Decor-Bond to back of donut panel.
Sew the Zipper Gusset:
- Toggle to Sewing Mode, snap-on Zipper Foot and engage IDT system. Thread machine with sewing thread on top on bobbin. Select a straight stitch.
- Find center of zipper between metal stops. Pin one edge of zipper tape to long edge of one zipper gusset, right sides together and aligning centers. Unzip zipper halfway.
- Increase stitch length to 4.0. Baste zipper to exterior gusset close to edge. When you are close to the pull, stop, crank the needle down and zip pull past the foot. Continue sewing.
- Place one lining gusset on top of zipper with right side against wrong side of zipper. Align lining edges with exterior edges. Reduce stitch length to 2.5. With lining fabric on bottom, stitch zipper edge at 1/4" seam allowance, again stopping at pull and zipping it as before.
- Press both fabric pieces away from zipper. Snap-on Bi-level Topstitch Foot. Increase stitch length to 3.5 and move needle position all the way left. Topstitch fabric along edge of zipper with zipper to left of the foot.
- Repeat steps 1-5 with other gusset exterior and lining.
- Snap-on 0A foot. Pin raw edges of linings and exteriors together, wrong sides together. Stitch around edges of each side at 1/4" to secure.
Construct Bag:
- Fold gusset in half, aligning center marks in gusset and hinge. Mark these new folds so that you have four total marks around gusset ring.
- Turn gusset lining side out. Snip one edge of gusset 1/4" every 2" around entire circle.
- Place bottom panel inside gusset ring. Align and pin four marks on gusset and panel, exterior sided together. Pin the rest of the edge, spreading gusset edge to fit circle of panel.
- Reduce stitch length to 2.5. Sew all the way around seam at 3/8". It will be easiest to sew with gusset side up.
- Wrap bias tape around raw edge of seam. Stitch through all layers to secure, positioning and slightly stretching the bias tape as you sew. When you get to where you started, cut off bias tape with some overlap and fold under raw edge before stitching down.
- Repeat steps 1-5 with other panel and gusset side.
- Turn both sides right side out.

